

Introduction: Tinkercad Codeblocks: Resizing Nametag


Tinkercad is a free web app for 3D design, electronics, and coding. The Tinkercad Codeblocks editor uses familiar Scratch block-based coding to generate 3d models. We will use the power of code and some handy tricks within Codeblocks to build a one-size-fits-all nametag. Enter any name, any size and it will automatically fit the text, with a rounded edge and hole cut out to be able to tie it to something like a backpack.
Supplies
- Computer, with preferably the Chrome, Edge or Safari browser.
- Internet connection
- An account at tinkercad.com
Step 1: Create a Codeblocks Design and Add Text

- Log into or create an account Tinkercad.com.
- Click "Create", then "Codeblocks" to open the Codeblocks editor in a new design.
- (OPTIONAL) Click on the title (the crazy auto-generated name) and rename it something like "Resizing Nametag".
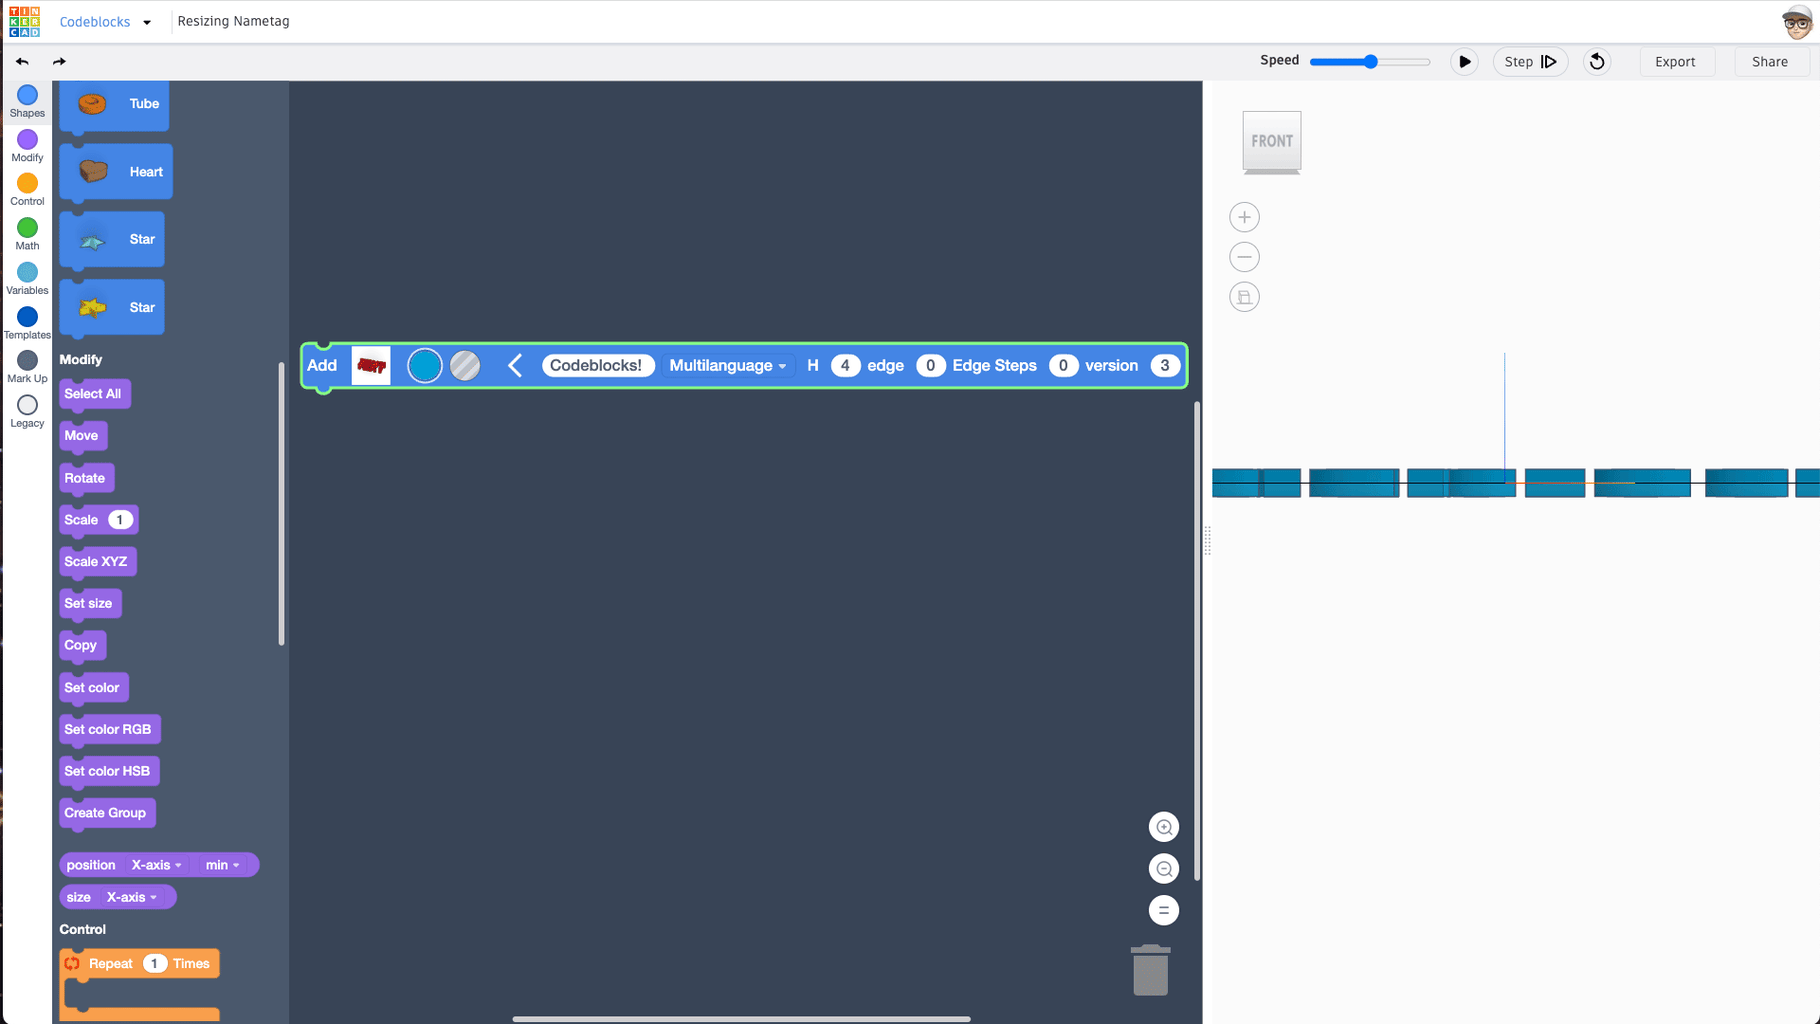
- Drag a Text block from the Blocks library onto the Blocks editor.
- Expand the Text block and type in any text you want in your nametag. Hey, how about your name?
- Finally, set the height (H) to be "4" (The units are in mm).
- Click the Play button to see your text.
Step 2: Move the Text Up on Top of the Workplane

All shapes are added with their center at position (0,0,0). So this text is half above the workplane and half below. We'll raise this text up onto the workplane. Since our text is 4mm tall, we'll move it up 2mm in the Z axis.
- Drag a Move block from the Blocks library to just underneath the Text block in the Blocks editor.
- Enter "2".
- Click the Play button to see your text end up on top of the workplane..
Hint: Looking from the side in orthographic viewing mode will show you that the text sits perfectly on the workplane.
Step 3: Scale Down the Text

If we were to print this nametag, it may need to be scaled down to fit onto your printer's print bed.
- Add a Scale block and enter ".5" to scale it down by half its current size.
- Click the Play button to see the scaled down version of the text.
Step 4: Add a Box to Serve As a Backplate

- Drag out a Box block and add it under the Scale block.
- Click the Play button to see the default Box shape added in the middle of your Text shape.
Step 5: Use the "Size" Block to Fit the Box to the Text
We'll make use of the handy "Size block" to make sure our backplate always fits the text entered into the Text block. The size block always looks at the previous created shape (the Text shape in this case) and matches the size dimension in either x, y, or z.
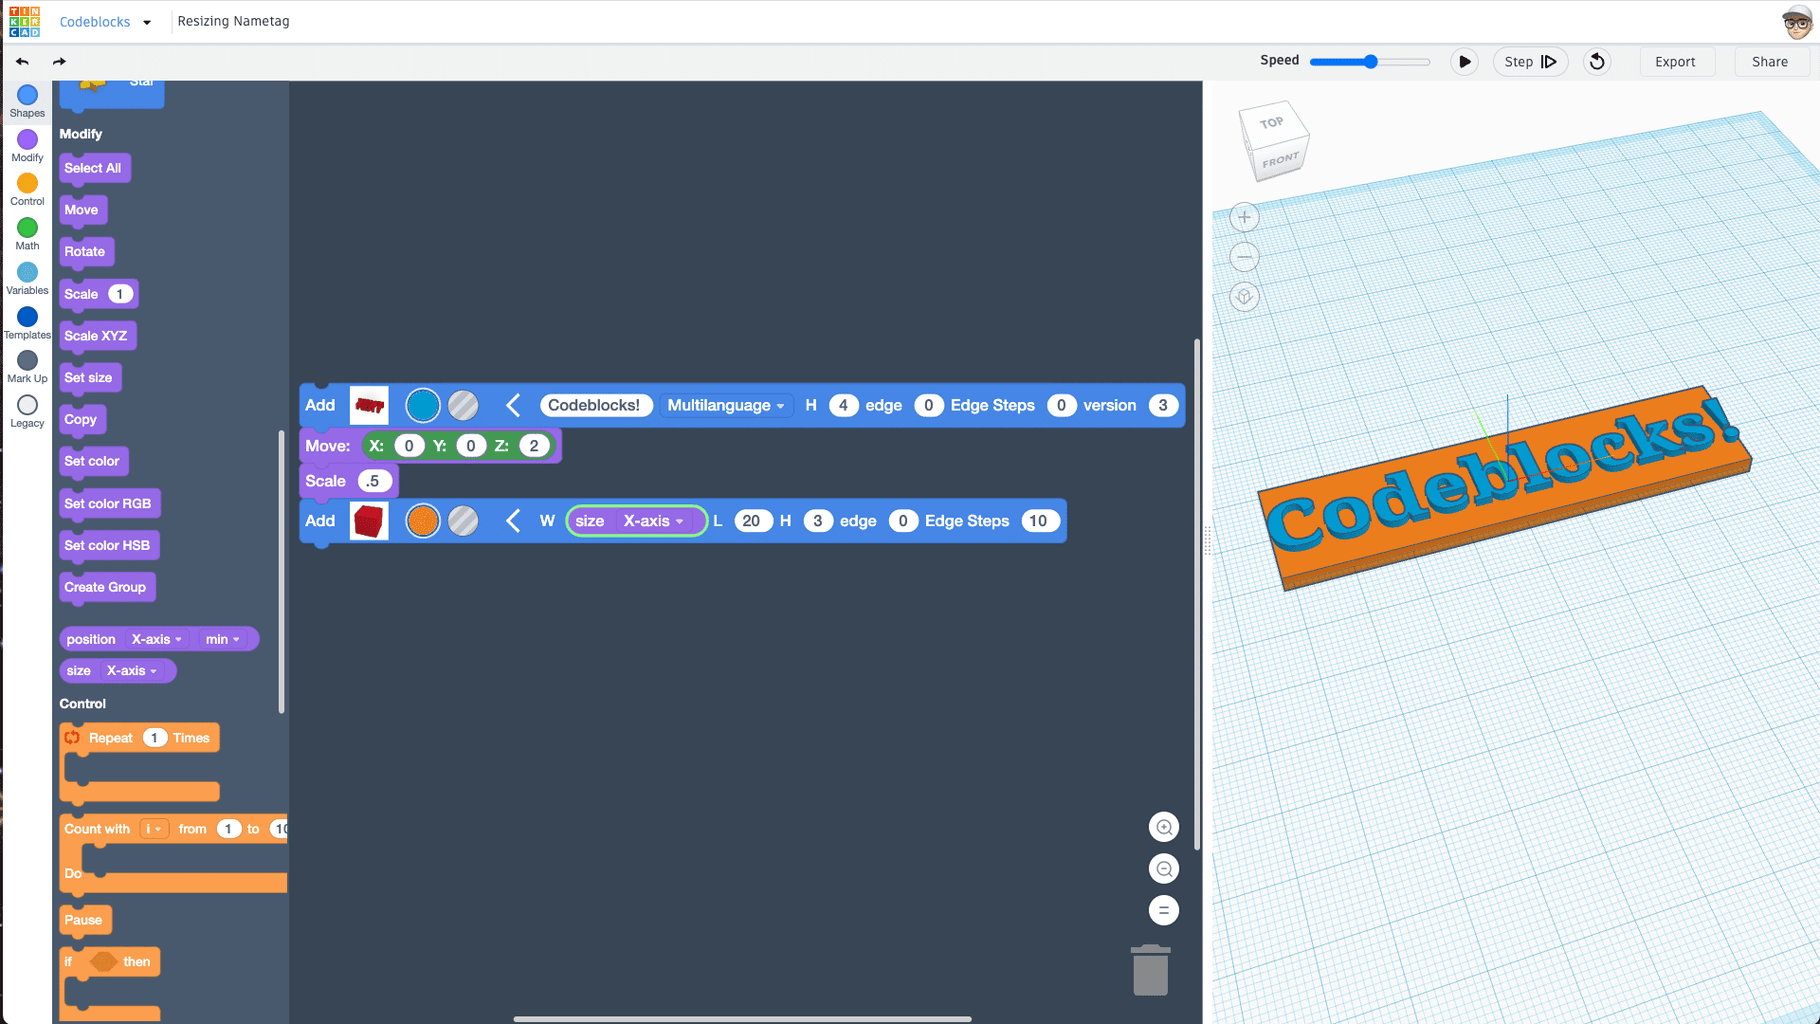
- Find and drag the purple size block into the Box's width parameter.
- Make sure the size block dropdown shows that the "X-axis" is selected. This will make sure the box is always as wide as the text that gets created just before it.
- Press "Play" to see the box match the width of the text. You can change the text and it will always match the size.
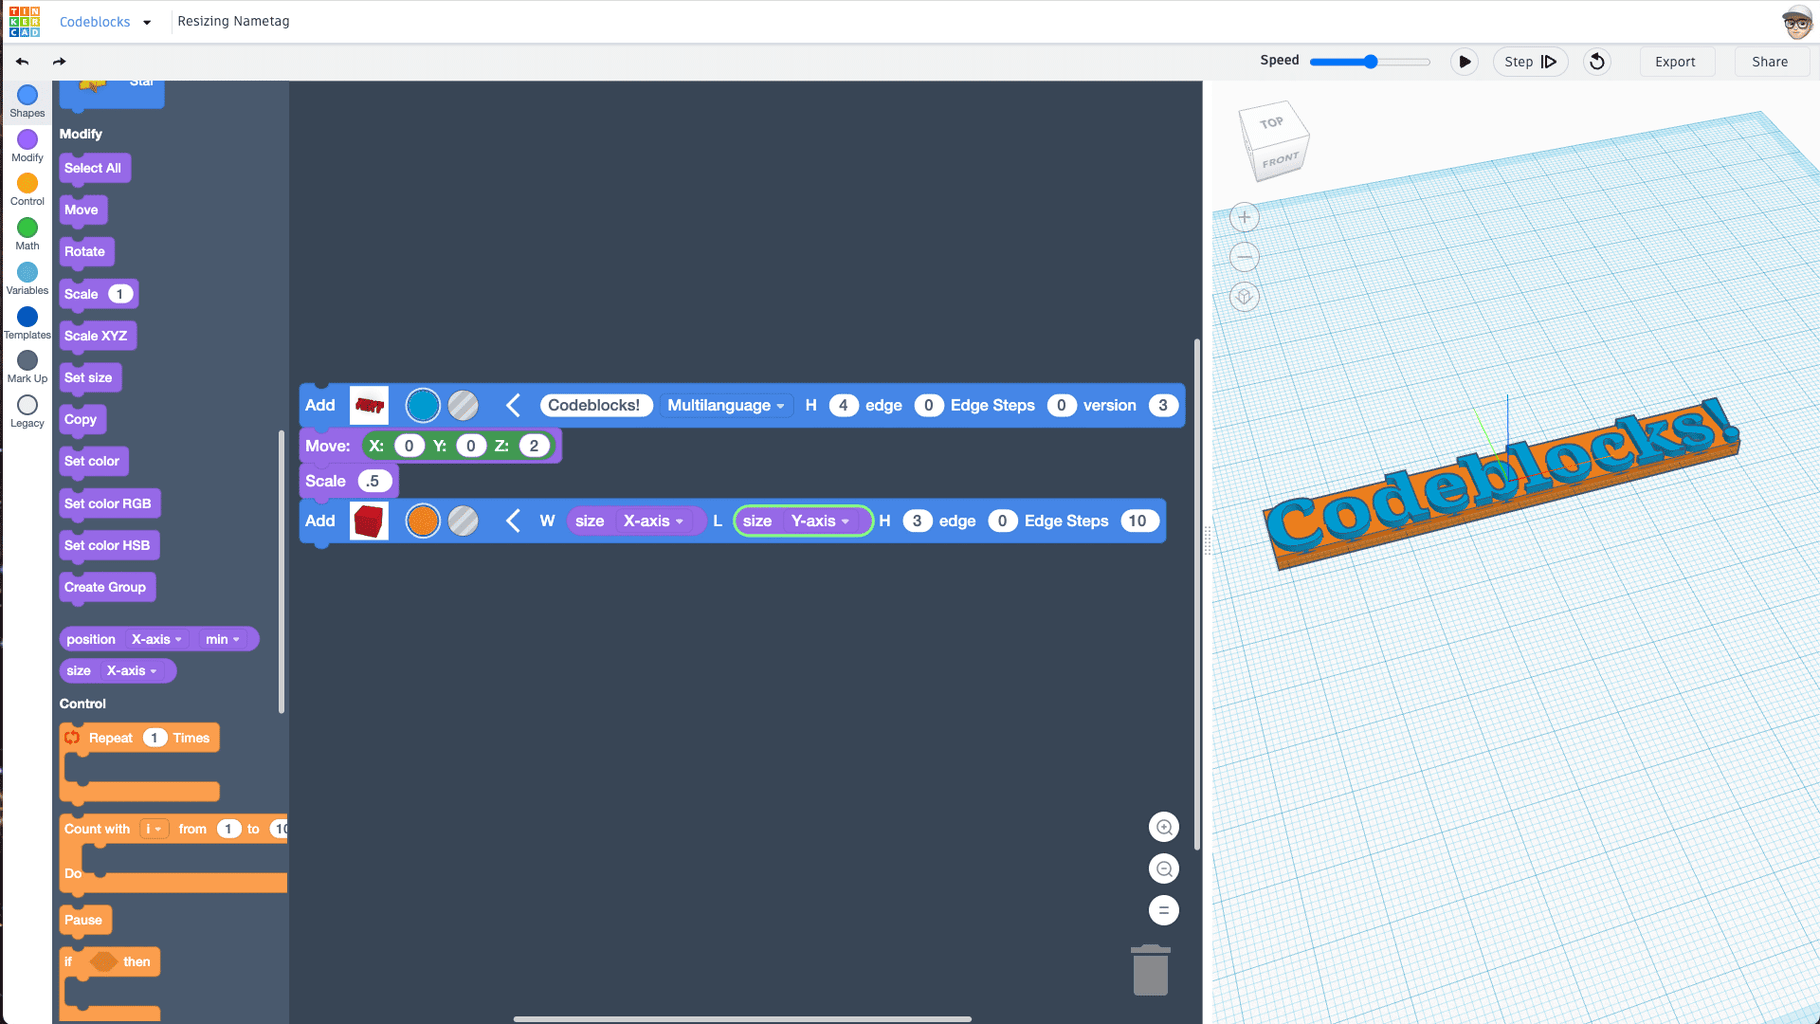
- In similar fashion, drag another size block into the Box's length parameter.
- For this second size block, click to choose that it is getting the "Y-axis". This will make sure the box is always matching the length of the text (bottom to top).
- Press "Play" to see the box match the width and length of the text. Sweeeeet!
Note that I've also changed the color of the box shape by clicking on the red swatch and changing it to orange.
Step 6: Give the Box Edges Some Space Around the Text

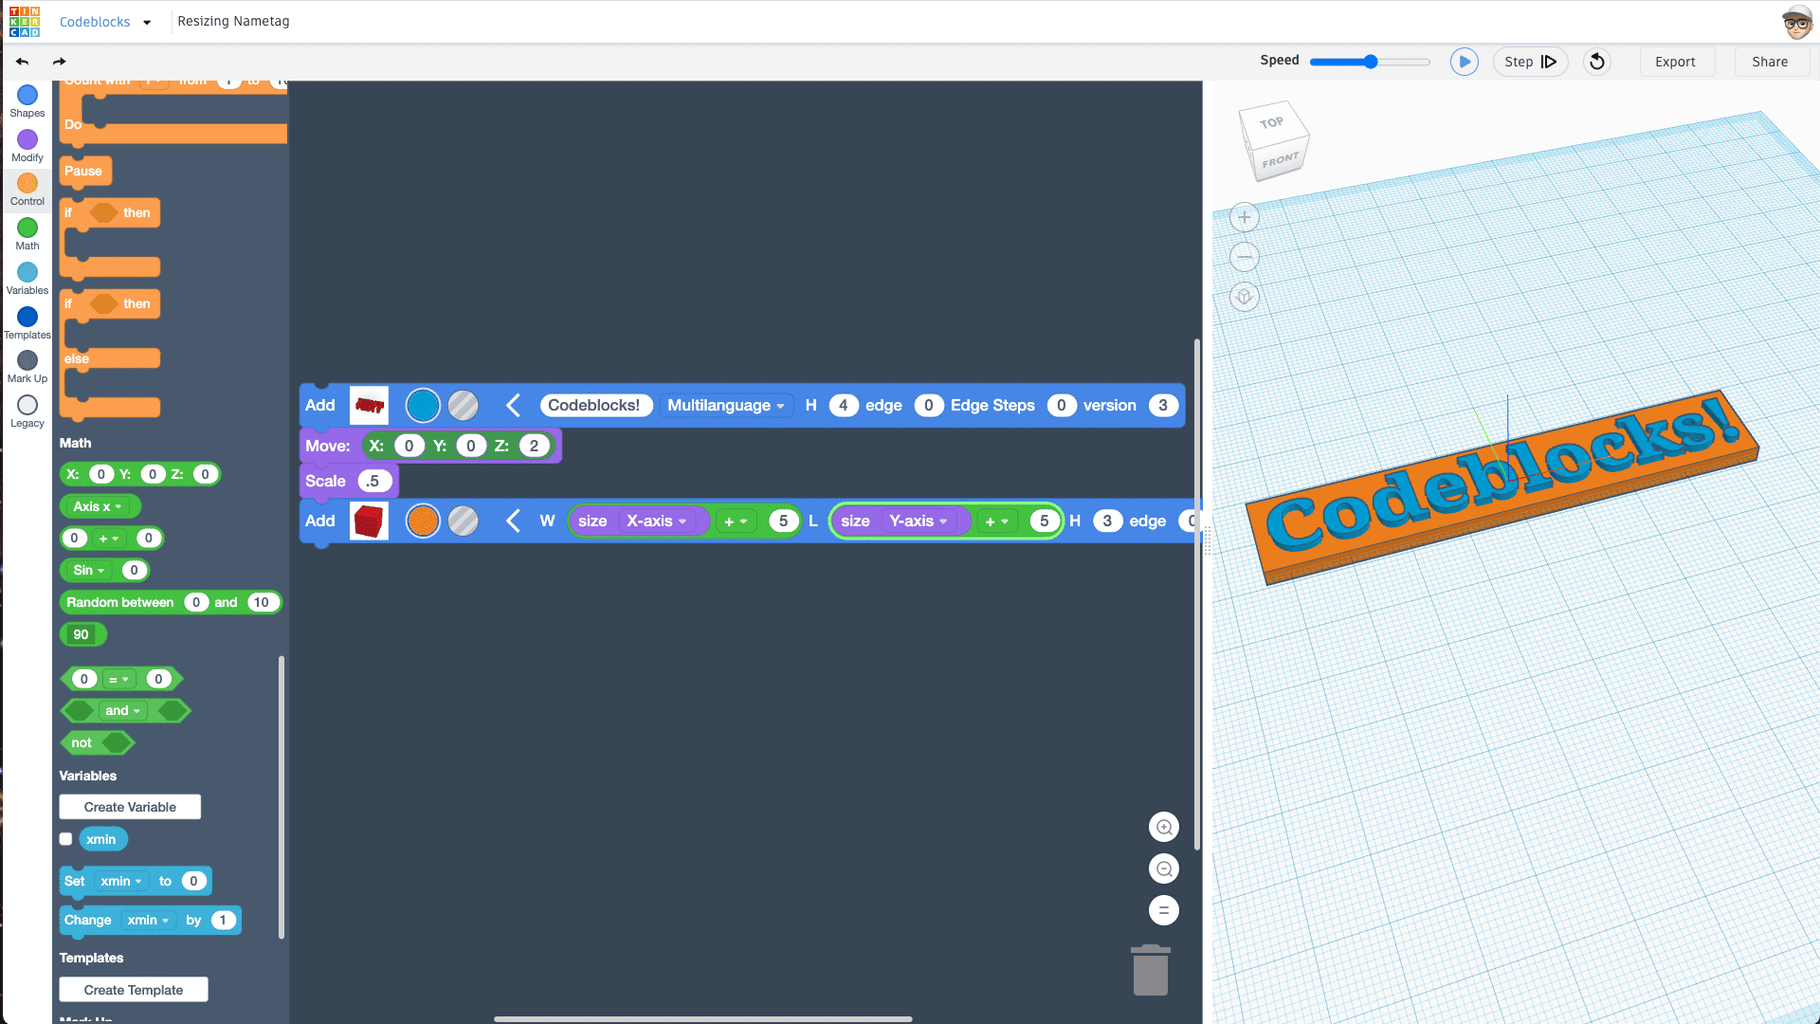
The green math blocks are handy to add some extra padding to the tight fit of the backplate. We will use these to contain the size block made in the previous step, then use the "+" (addition) operation to add 5mm more space from the edge of the text in both the Box blocks "W" and "L".
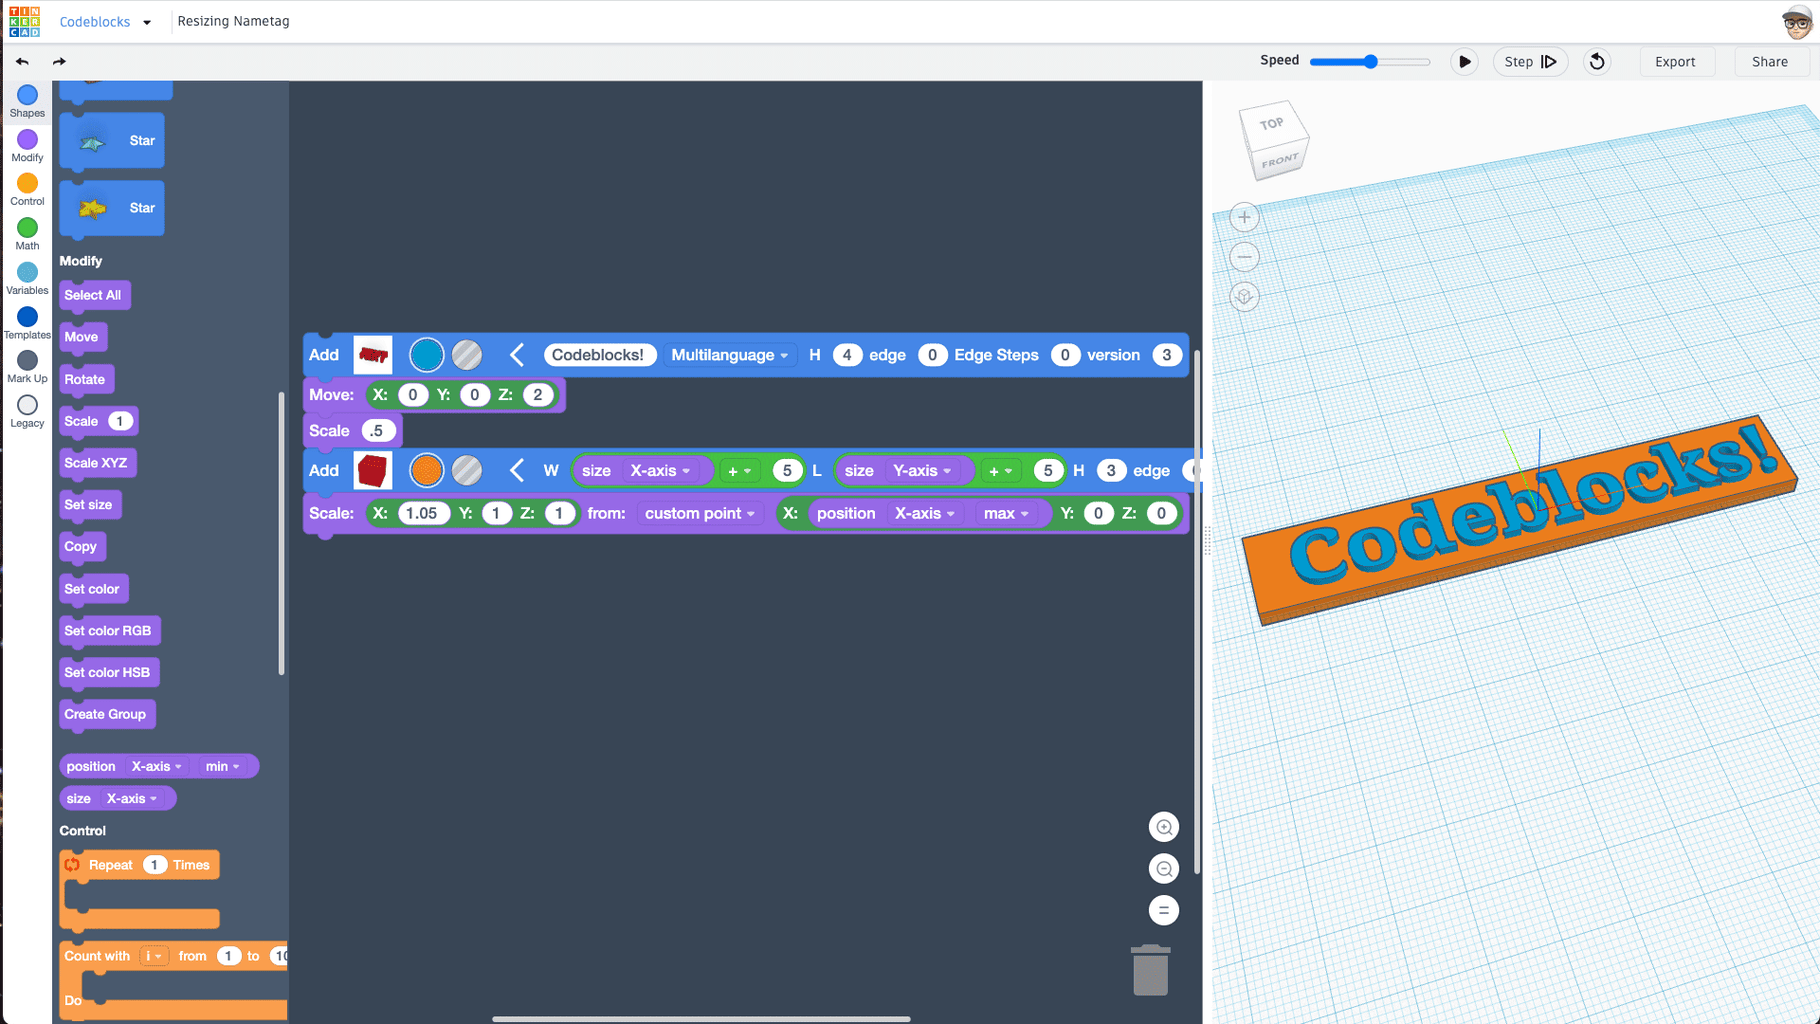
- Find and drag out a green oval shaped math block that have two fields on each side with a "+" in the middle. (See first image for reference)
- Drag the size block we added to the Box block's "W" parameter in the previous step into the first field on the green math block.
- Make sure the green block's dropdown shows a "+". It should by default.
- Enter "5" in the right hand field of the same green math block.
- Place the green math block into the Box blocks "W" parameter oval.
- Press "Play" to see the extra space we've added to width of the backplate (box).
- Repeat steps 1-6 for the Box blocks "L" parameter oval. This will give 5mm spacing between the top and bottom of the text (See second image for finished step).
Step 7: Add Some Additional Space to the Left of the Text
It step 3, we used a Scale block to scale the text down uniformly by a factor of .5 (half). That Scale block scaled in each X, Y, and Z at the same time. This is called uniform scale.
There is also a Scale XYZ block that allows you to scale in either X, Y, or Z only. This is called a non-uniform scale. This block also allows you to make that scale about a custom point. We can use this to make the backplate a bit larger on the left side by scaling it with the Scale XYZ block in the X direction from the right hand side of the backplate. We just need to make the scale factor a little larger than 1 in the X oval to see the effect.
- Drag a Scale XYZblock under the Box block.
- Enter "1.05" in the X number oval.
- Choose "custom point" from the dropdown.
- Drag a position block into the custom point X oval.
- Make sure the position block shows "X-axis" and "max". This means we'll scale from the max extent in X of the Box shape (that edge will stay put).
- Press "Play" to see the effect of the Scale XYZ block on the backplate.
Notice that this creates a little bit more space to the left of the Text shape than we created in the last step.
Step 8: Add a Cylinder for the Rounded Left Edge


For the rounded edge on the left side of the nametag, we'll use a cylinder. Create a cylinder and use the size block to make its diameter the same width as the backplate.
- Drag a cylinder block under the Scale XYZ block.
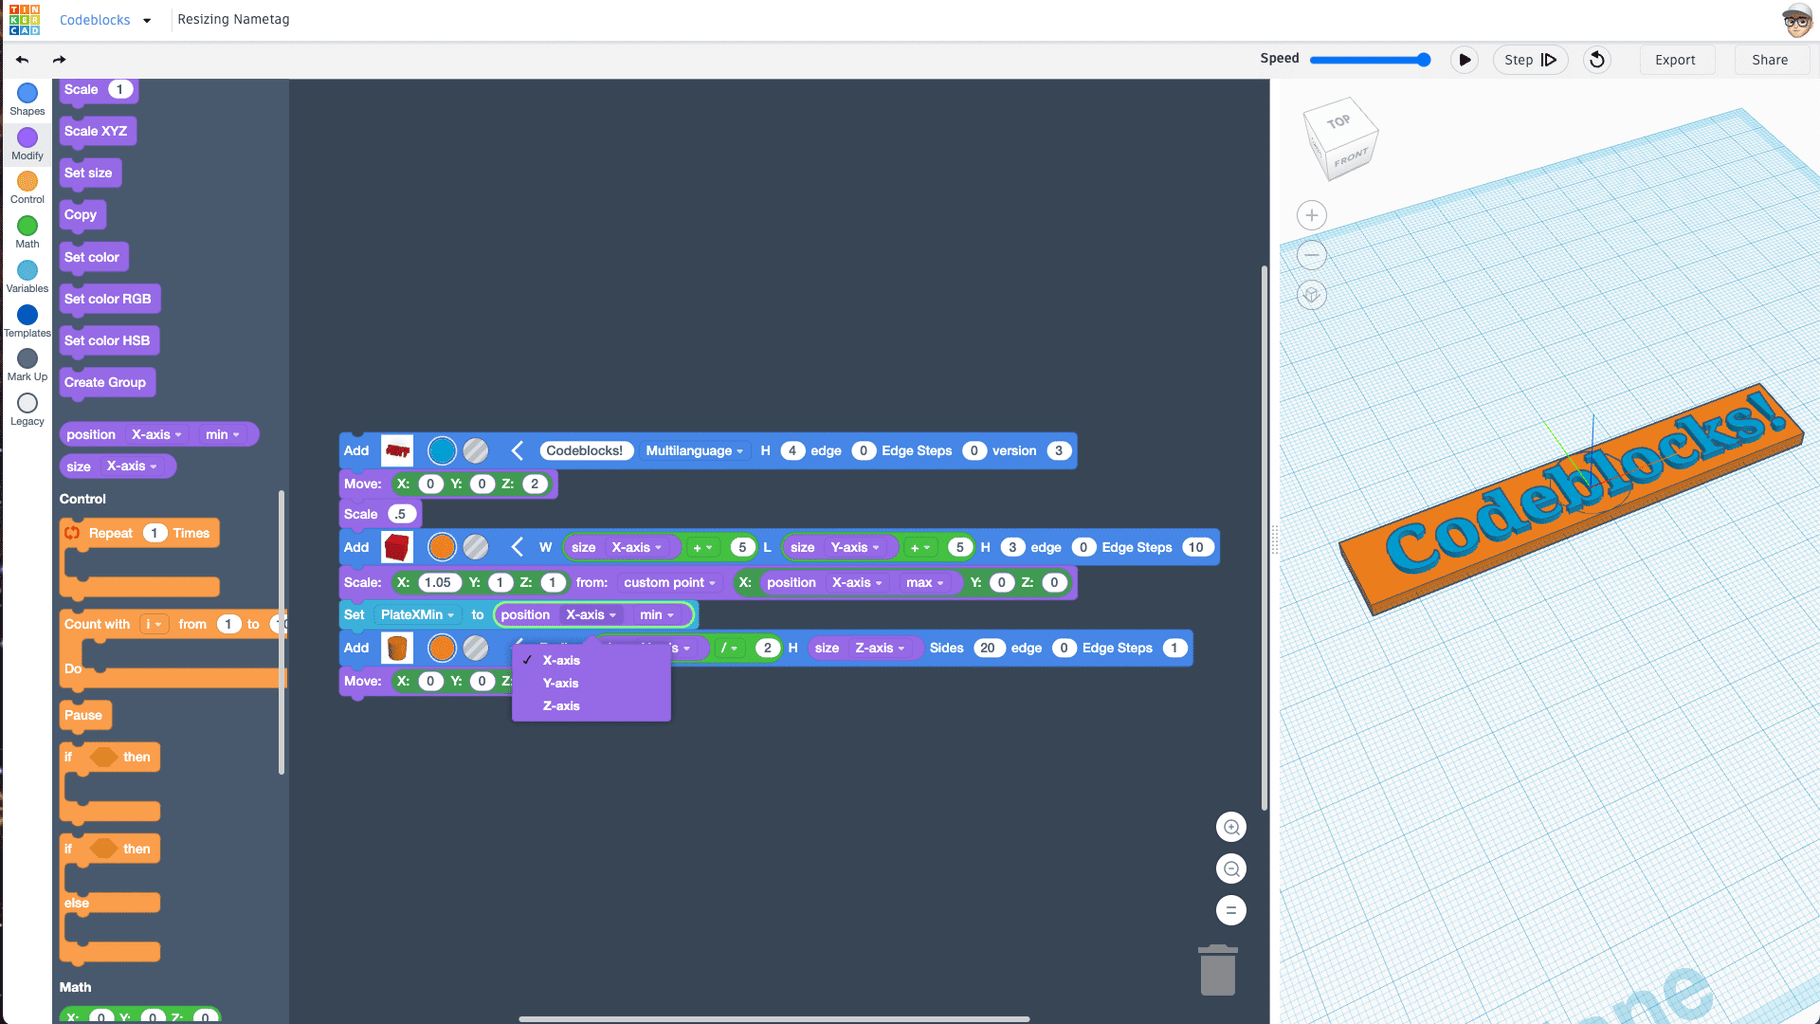
- Since the cylinder block has a "radius" parameter, we'll need to set it to half the total size of the nameplate length. Drag another green math block from the blocks panel into the cylinder's Radius oval.
- Drag a "size" block into the first oval of that green math block, and change the dropdown option to "Y-axis".
- The math block will calculate the size of the name plate and divide it by 2. Change the math block dropdown to be division. It will look like this "/".
- Enter "2" in the math block's right oval to make the math equation read "Size Y-axis divided by 2" (See screenshot).
- Press "Play to see the cylinder fit the length of the backplate length. Note it is still too tall.
- Drag a "size" block into the cylinder's Height oval. Make sure it is referring to and setting the "Z-axis" from the above Box shape.
- Press "Play to see the cylinder fit the length and height of the backplate length.
It may be hard to spot the cylinder hidden in the middle of the backplate, but you should see the outline of it. (See second screenshot).
Step 9: Store and Set Position in a Variable


So far, we've used the "size" and "position" blocks to get the dimension from the last created shape (text), and set that dimension where the block gets used (nameplate).
When you want to use a size or position of a shape that doesn't get created just before the usage of that block, you can store that dimension within a variable. Just set the variable dimension value after the reference objects gets created, then use it anywhere downstream in the stack of blocks!
- Add a "Move" block. We'll need to use the position we store in the variable to set the position to move the cylinder in X.
Create a variable for the position of the left hand side of the nameplate, and set it just before the Cylinder gets created:
- Click "Create Variable" within the Blocks panel.
- Name it "PlateXMin".
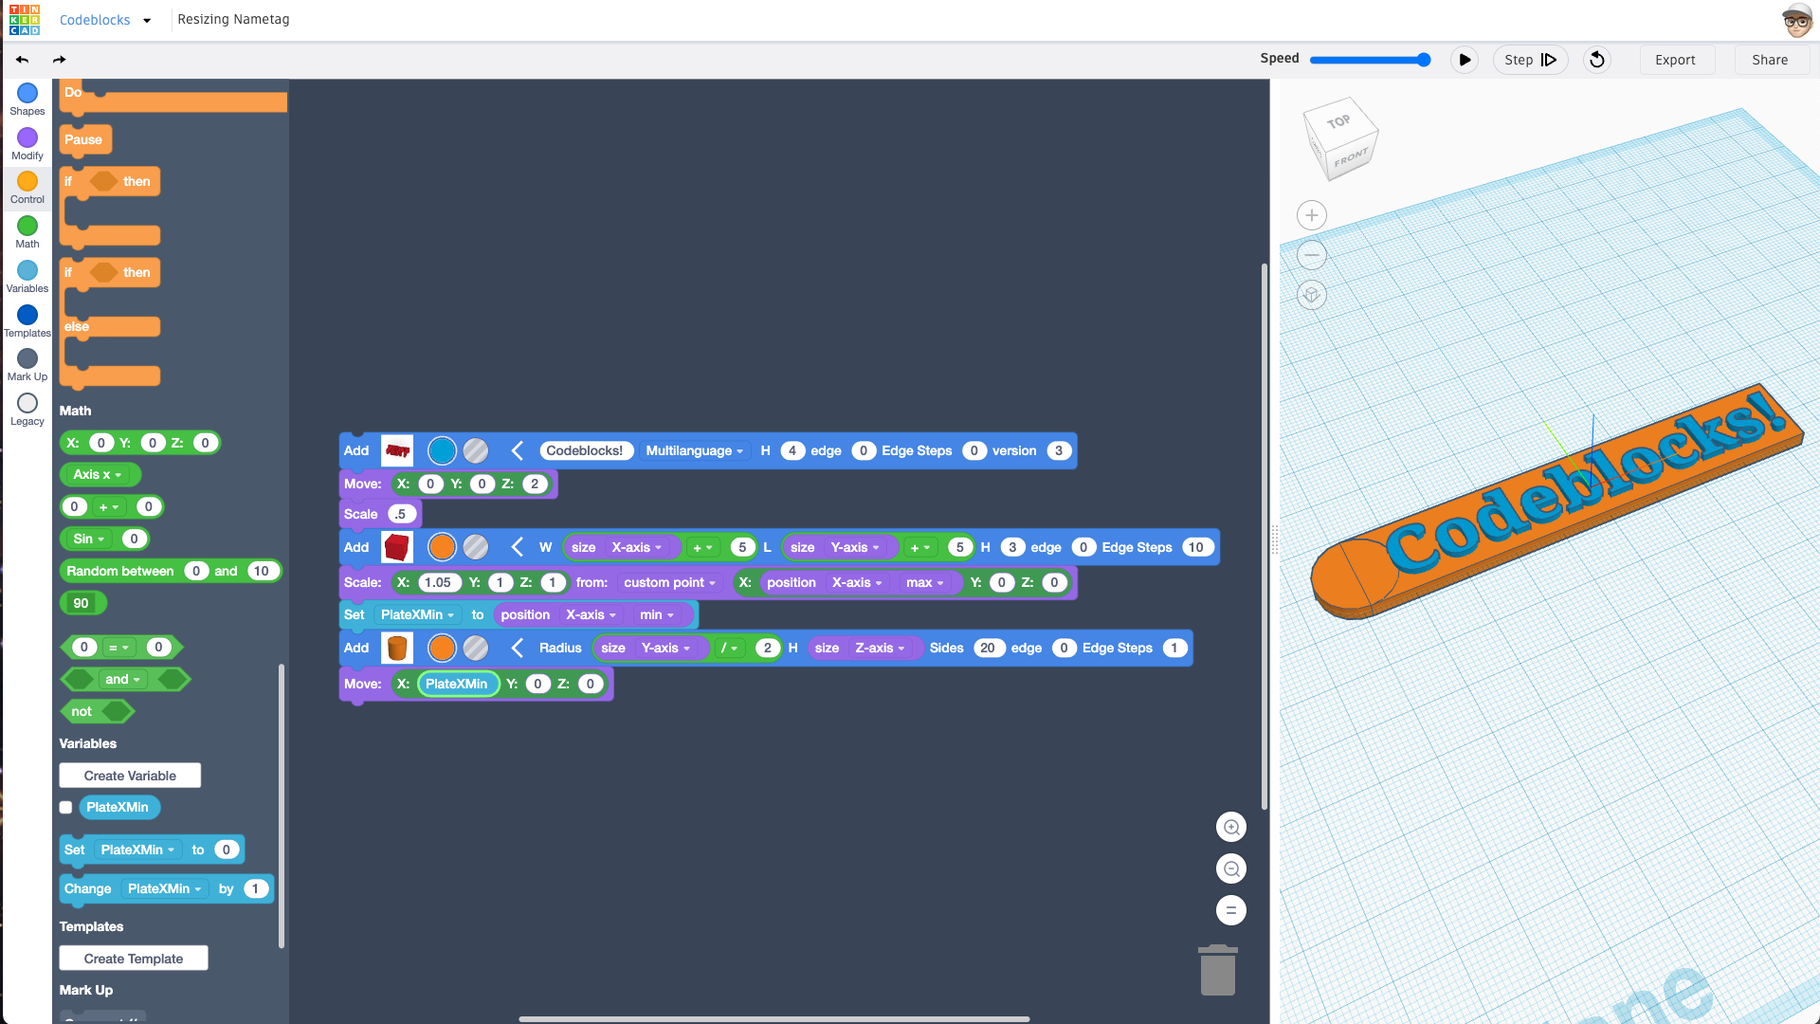
- Drag the newly created "Set PlateXMin" block between the Scale XYZ block and the cylinder block.
- Drag a "position" block into the Set plateXMin block oval and set it to get the X-axis min, which gets the leftmost position of the nameplate.
- Add the PlateXmin variable into the X oval of the Move block created above.
- Press Play to see the cylinder move to the left of the nameplate such that half of it is to the left and half is within the nameplate.
The last screenshot in this step shows you what it all should look like.
Step 10: Cut a Hole in the Nametag


We'll reuse the previous cylinder/move blocks to create and cut a hole centered on that cylnder.
- Right-click on the previously added cylinder block and choose "Duplicate".
- The cylinder block and move block are duplicated and follow your mouse cursor. Drop the duplicated blocks at the bottom of the stack.
- Change the new cylinder block to be a "hole" by clicking the grey circle next to the orange color that is currently selected. This will make it a hole.
- Remove the math block and contained size block from the new cylinder's Radius oval, and throw it in the trash can.
- Enter 4 instead for the new cylinder's radius.
- Find a "Group" block in the Blocks panel and add it at the end of the stack.
- Press Play to see the final result of the nametag.
Step 11: Test Out Your Resizing Creation

Enter different names in the first text block and play the stack to see that the nametag will always fit the text you enter. The power of code! Well done.
Here's a link to the finished resizing nametag design in Codeblocks: https://www.tinkercad.com/codeblocks/kTUjYPpHnur-autosizing-nametag


Comments