

Introduction: A "Do Nothing" Dominoes Box.


"A 'Do Nothing' Dominoes Box" is a "do nothing" style box using dominoes as the switch. When the dominoes are toppled by finger action, the mechanism turns itself on, returns the dominoes to the standing position, then turns itself off awaiting the next topple. The model uses no power while awaiting the dominoes to be toppled so battery life should be quite long.
The family plays with it for hours on end. I leave the model sitting on the table and when anyone walks by they can't resist toppling the dominoes and watching them being restored by the mechanism.
As usual, I probably forgot a file or two or who knows what else, so if you have any questions, please do not hesitate to ask as I do make plenty of mistakes.
Designed using Autodesk Fusion 360, sliced using Ultimaker Cura 4.12.1, and 3D printed in PLA and TPU on Ultimaker S5s and an Ultimaker 3e.
Supplies
Soldering Iron and Solder.
Thick cyanoacrylate glue.
Thin double sided tape.
AWG28 stranded wire.
Step 1: Parts.
I acquired the following parts:
- One N20 100RPM gear motor.
- One twin AAA switched battery pack.
- Four 8mm ID, 16mm OD, 5mm thick flanged ball bearings.
- One 3mm diameter by 1mm thick neodymium magnet.
- One lever switch (CYT1073).
- One reed switch (EK1621, 14mm by 2mm tube).
- Two M2 by 20 cap screws and nuts.
I 3D printed the following parts at .1 mm layer height, 15% infill with no supports in PLA unless noted otherwise:
- Two “Axle Sprocket.stl”.
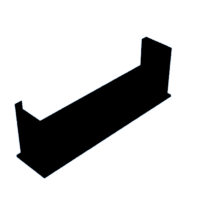
- One “Base.stl”.
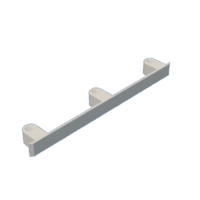
- One “Belt Support.stl”.
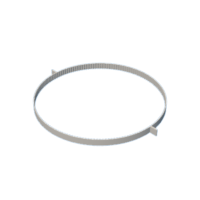
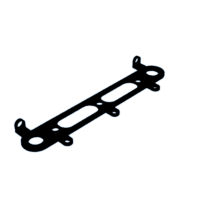
- One “Belt.stl”, TPU.
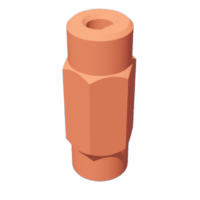
- Eighteen “Bolt (M8 by 1.25 by 8).stl”.
- One “Bolt (M8 by 1.25 by 14).stl”.
- One “Cover.stl”.
- Seven “Domino Mount Axle.stl”.
- Seven “Domino Mount.stl”.
- Seven “Domino.stl”.
- One “Front.stl”.
- One “Motor Mount.stl”.
- One “Rear.stl”.
- One “Reed Switch Mount.stl”.
- Two “Sprocket Cap.stl”.
- Two “Sprocket.stl”.
- One “Top.stl”.
This is a high precision large format 3D print and assembly model using at times very small precision 3D printed parts in very tight spaces. Prior to assembly, test fit and trim, file, sand, polish, etc. all parts as necessary for smooth movement of moving surfaces, and tight fit for non moving surfaces. Depending on you printer, your printer settings and the colors you chose, more or less trimming, filing, sanding and/or polishing may be required. Carefully file all edges that contacted the build plate to make absolutely certain that all build plate "ooze" is removed and that all edges are smooth. I used small jewelers files and plenty of patience to perform this step.
The model also uses threaded assembly thus an M8 by 1.25 tap and die will assist with thread cleaning if necessary.
Attachments


Step 2: Assemble the Belt Track.


To assemble the belt track, I performed the following steps:
- Pressed one flange bearing into each end of "Front.stl" and "Rear.stl" as shown.
- Pressed one "Axle Sprocket.stl" into one of the flange bearings in the rear assembly as shown.
- Pressed one "Sprocket.stl" onto the axle sprocket.
- Pressed one "Sprocket Cap.stl" onto the axle sprocket.
- Repeated the previous three steps for the remaining end of the rear assembly.
- Attached "Belt Support.stl" to the rear assembly using three "Bolt (M8 by 1.25 by 8).stl".
- Attached the rear assembly to the front assembly using three "Bolt (M8 by 1.25 by 8).stl".
- Positioned "Belt.stl" over both sprockets.
Step 3: Assemble the Top.


To assemble the top, I performed the following steps:
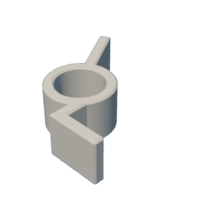
- Positioned one "Domino Mount.stl" into "Top.stl" and secured in place with one "Domino Mount Axle.stl" making certain the domino mount rotated with ease.
- Glued one "Domino.stl" to the domino mount mounting pin making certain the domino stood perpendicular to the top surface and carefully noting the orientation of the domino on the pin as shown in the wireframe view.
- Repeated the previous two steps for the remaining domino mount, domino axles and dominoes.
- Glued one 3mm by 1mm diameter neodymium magnet to the last domino mount lever arm.
- Secured the top assembly to the belt track assembly using four "Bolt (M8 by 1.25 by 8).stl".
- Attached "Base.stl" to the assembly using six "Bolt (M8 by 1.25 by 8).stl".
Step 4: Final Assembly.


For final assembly, I performed the following steps:
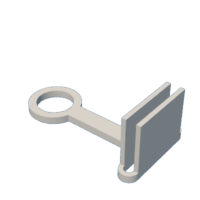
- Carefully inserted the reed switch into "Read Switch Mount.stl" with the reed switch tube flush with the mount, soldered an 80mm length of wire to each reed switch terminal, then glued the wires to the read switch mount for strain relief.
- After removing two of the 8mm bolts from the rear of the assembly, I attached "Motor Mount.stl" and the read switch assembly to the belt track assembly using one "Bolt (M8 by 1.25 by 14).stl", positioning the reed switch mount as shown.
- Pressed the gear motor into the motor mount assembly and into the axle sprocket.
- Attached the lever switch to the base using the two M2 by 20 cap screws and nuts.
- Using the schematic, I wired the motor, battery pack, reed switch and lever switch as shown.
- Inserted two AAA batteries into the battery pack and turned the battery pack switch off.
- Attached the battery back to the belt track assembly using double sided tape.
At this point, I turned on the battery back and made adjustments to both the reed switch position (such that the motor would start when the last domino fell) and the lever switch position (such that the motor would stop when a belt tab pressed the switch lever).
With adjustments complete and the mechanism operating properly, I slid "Cover.stl" over the assembly and attached with four "Bolt (M8 by 1.25 by 14).stl".
And that is how I 3D printed and assembled "A 'Do Nothing' Dominoes Box".
I hope you enjoyed it!


10 Comments
Question 3 months ago
Hello Greg. Thanks for another fantastic model. I have finished printing all the parts and have begun assembly. I am at the point of wiring the elctronics and I noticed that in the descriptive video "A "Do Nothing" Dominoes Box, How It Works" (time stamp 0:35),that there seems to be something that looks like a diode connected to the N20 100rpm motor but is not listed in the parts aquired list. Is this something that I will need? IF I am mistaken or have missed something in your always excellent instructions, then I apoligize in advance. My electronics skills and knowledge are failry limited so I am seeking your sage advice on this one :-). Any assistance or further information that you are willing to provide, would be so greatly appreciated. Love your work more and more. Thanks again.
Answer 3 months ago
Hi rizzocow,
Your observational skills are second to none!
Yes, in this prototype I added a 1n4004 diode in series with the motor negative terminal and the battery positive terminal to slow the motor down slightly. The slower motor speed eliminated domino bouncing during return to vertical. In subsequent builds I found this was not necessary as the bouncing effect primarily depended on the actual motor RPM, which I've found differs enough to cause the dominoes to bounce and fall back down with some of the motors I used. Secondarily it depends on the infill pattern and accuracy of the slicer as variances in the weight of the domino will increase / decrease the bouncing.
In the third step I included an X-ray side view of the model illustrating first, the orientation of the dominoes on their mounts, and second, that the dominoes are over center on the domino axles in their vertical positions which helps the dominoes remain vertical after rotation.
I hope this helps and best wishes on your success with this model!
Greg
Reply 3 months ago
Wow! Thanks Greg for the speedy response and the detailed (as always) explanaition. It makes perfect sense and I also appreciate the newly added knowledge to my ever growing (albeit slowly) electronics learining aresnal. Very helpful and much appreciated. Have a great day and keep up the great work!
3 months ago
Nice project and very smart solution to power it off.
Reply 3 months ago
Thanks Wim3d, I'm glad you enjoyed it!
Greg
3 months ago
Where did you get the belt?
Reply 3 months ago
Hi Ghouldini,
I designed it in Autodesk Fusion 360, and 3D printed in in TPU on an Ultimaker S5.
Greg
Question 3 months ago
Love this project and can't wait to try and make one. However, I don't see where I can down load the stl files. Please advise. Thanks.
Answer 3 months ago
Hi Gyrojeff,
Well that is indeed embarrassing!
I'm out of town at the moment, but fortunately by using Autodesk Fusion 360 I was able to export the missing files and upload them. They should be there now.
I'm truly sorry!
Greg
Reply 3 months ago
Thanks. No worries, things happen. I'll post it when it's done. Just ordered a few parts and some TPU filament which I've never used before. Going to be fun