

Introduction: Life-size Moving Weeping Angel


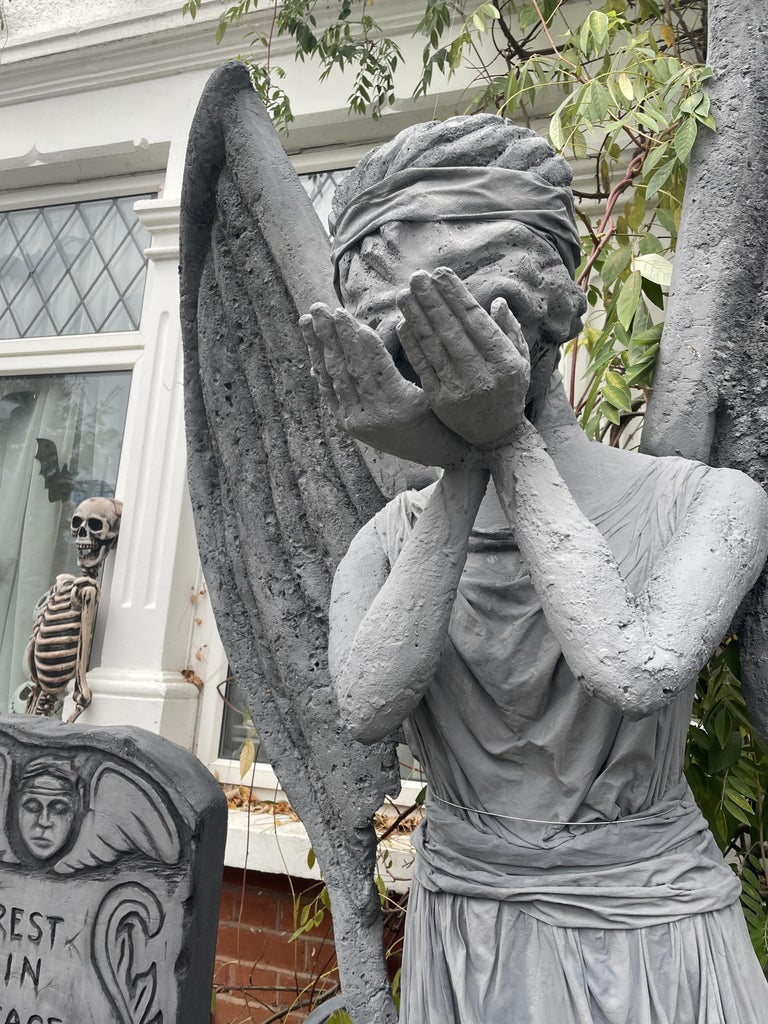
When we picked a haunted cemetery theme for this year’s display, I knew I wanted a life-size angel statue to make the atmosphere creepier. Once I started building it, though, I realized that I didn’t want just any old creepy angel — I wanted a Weeping Angel, possibly the most unsettling of all monsters from Doctor Who. And while I was building her I realized that while the stony version with her hands over her face was delightfully creepy, she’d be much more fun if she moved and showed her scary hidden face.
This was a quick build and would have been relatively straightforward if I’d had a better plan in the first place! Learn from my indecision and experimentation and read on if you want your very own Weeping Angel!
Supplies
foam mannequin torso (a full mannequin might be even better)
broom handle
scrap wood for base
chicken wire
4 pieces of meter-long narrow pipe insulation
2 scrap pieces of foam board (narrow strips of wood would also work)
duct tape
staples
spray foam (approx. 8 large cans)
monster mud (plaster jointing compound plus outdoor latex paint)
small length of scrap wood
small hinge and screws
eye hook
small length of plastic tubing
wire
2 old sheets
stick pins
clay
plaster
vaseline
plastic wrap
acrylic paint
fishing line
Step 1: Build Body
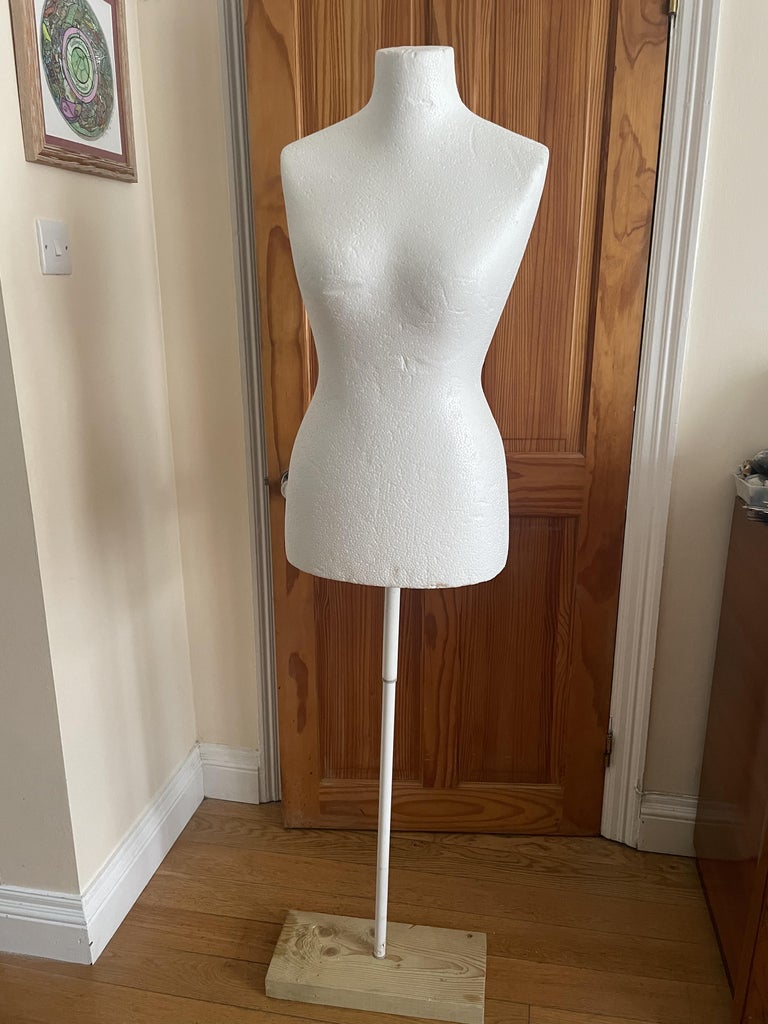
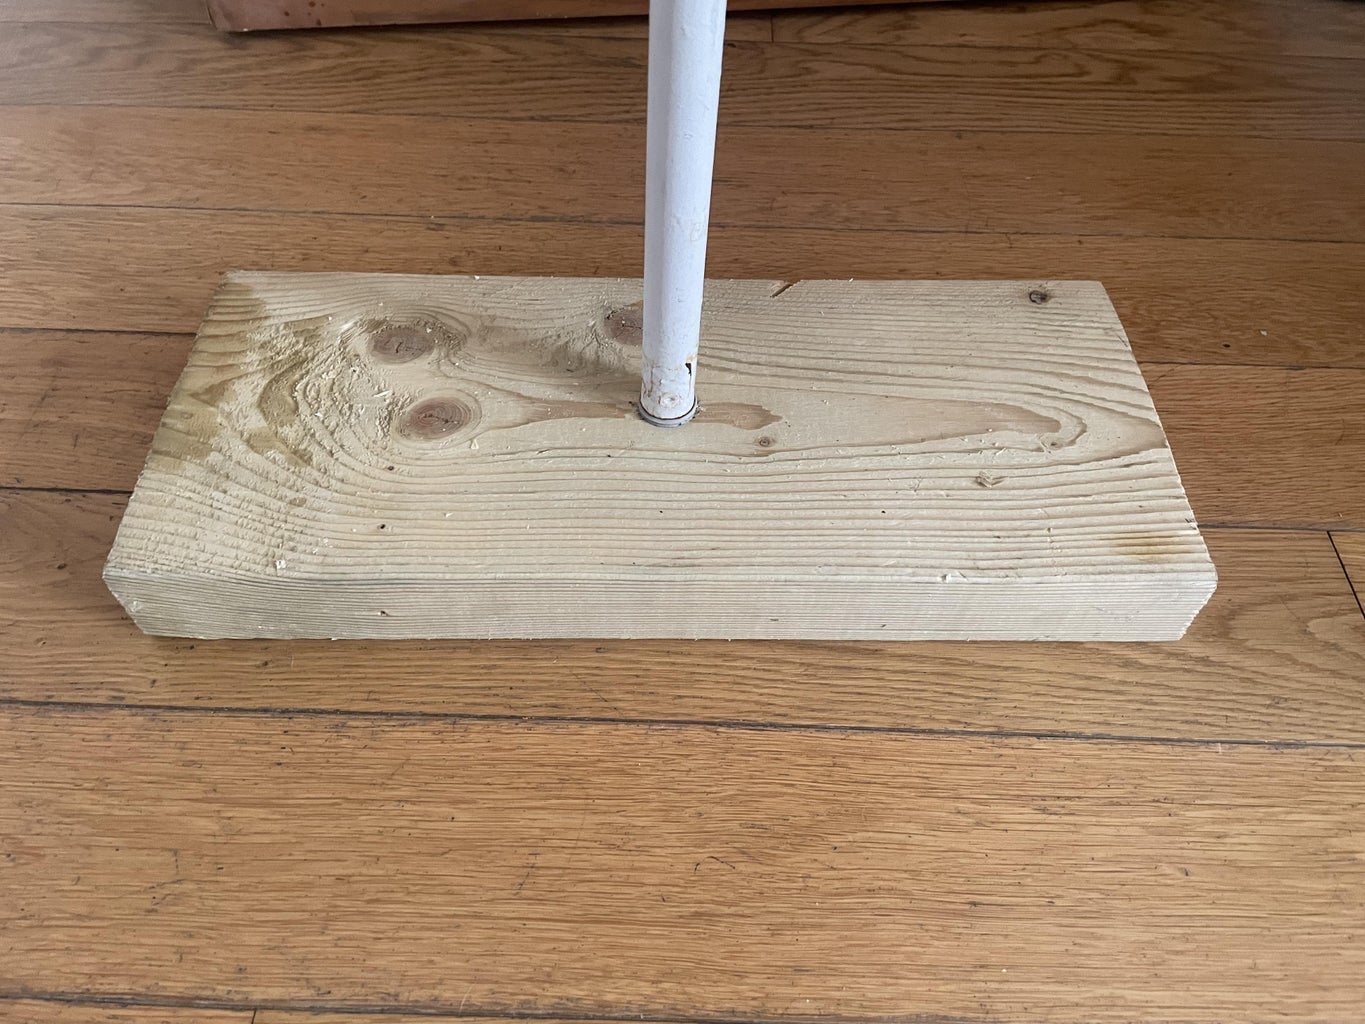
I build as much as I can with scrap and recycled junk and I was lucky enough to snag a foam mannequin torso from a local freecycle group. For a stand I found an old broomstick and drilled a hole in a chunk of scrap wood, then fitted it into the base of the mannequin, adjusting her height so her shoulders were a little higher than my own.
You could certainly use a full mannequin instead, or form a torso with wire and foam or paper mache if you've got sculpting skills.
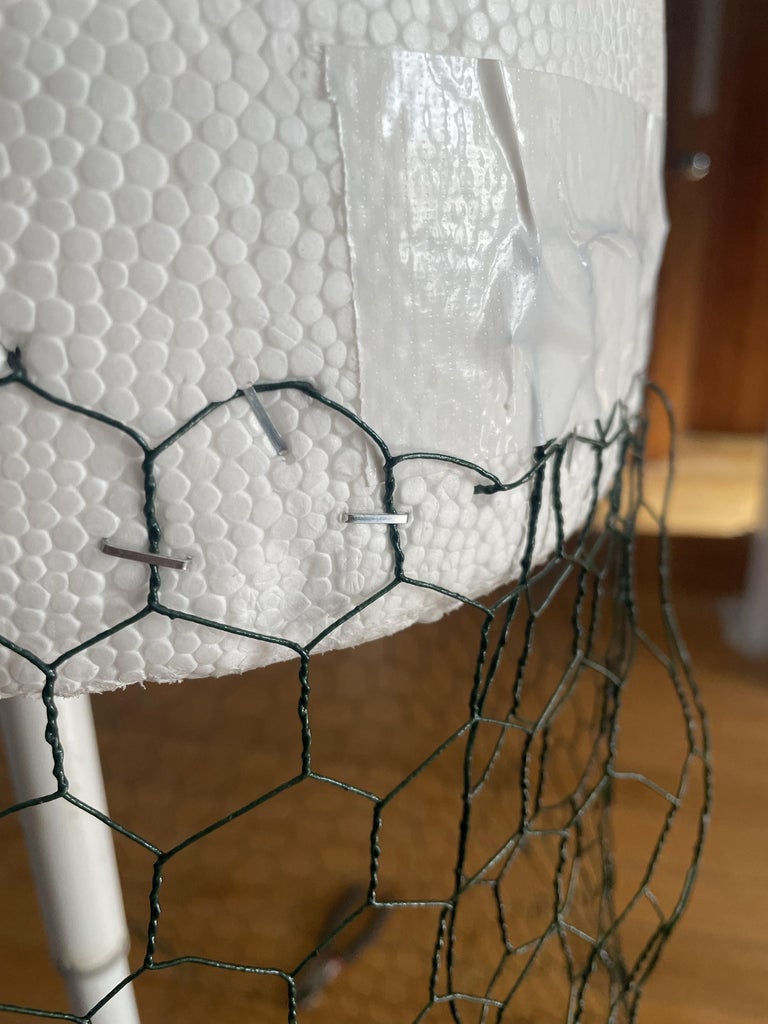
Next I cut pieces of chicken wire to fill the space between her hips and the floor, joining the pieces to each other and stapling and taping them into the foam body (which was only partly successful -- the staples pulled out easily -- but held her together well enough to get to the next steps). I formed it into a vague skirt shape, with one section jutting out in front where her knee would be (you can see this more in the next step).
NOTE: If you haven't worked with chicken wire before it's actually really easy to sculpt -- but wear heavy work gloves if you don't want to end up with lots of small puncture wounds on your hands!
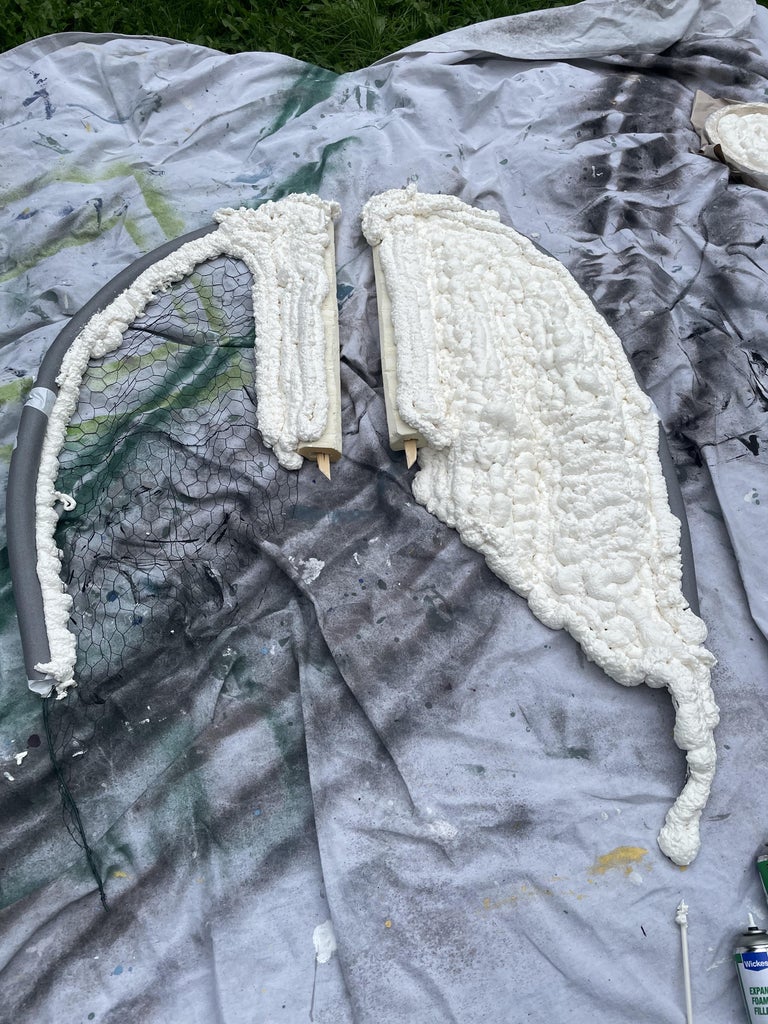
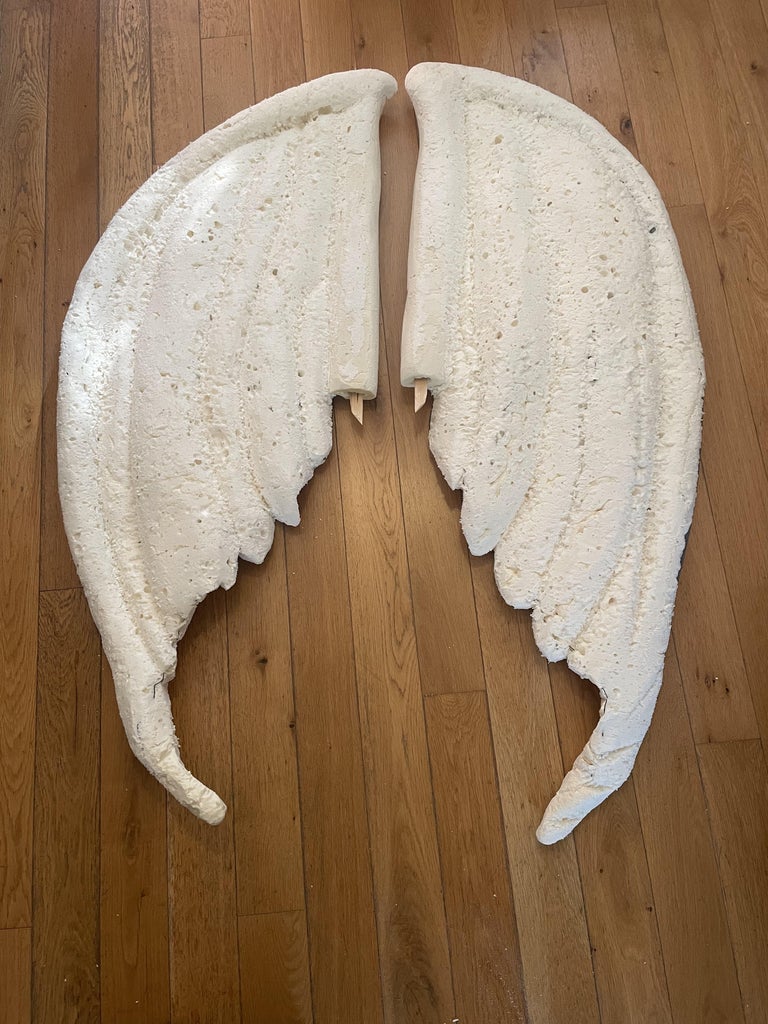
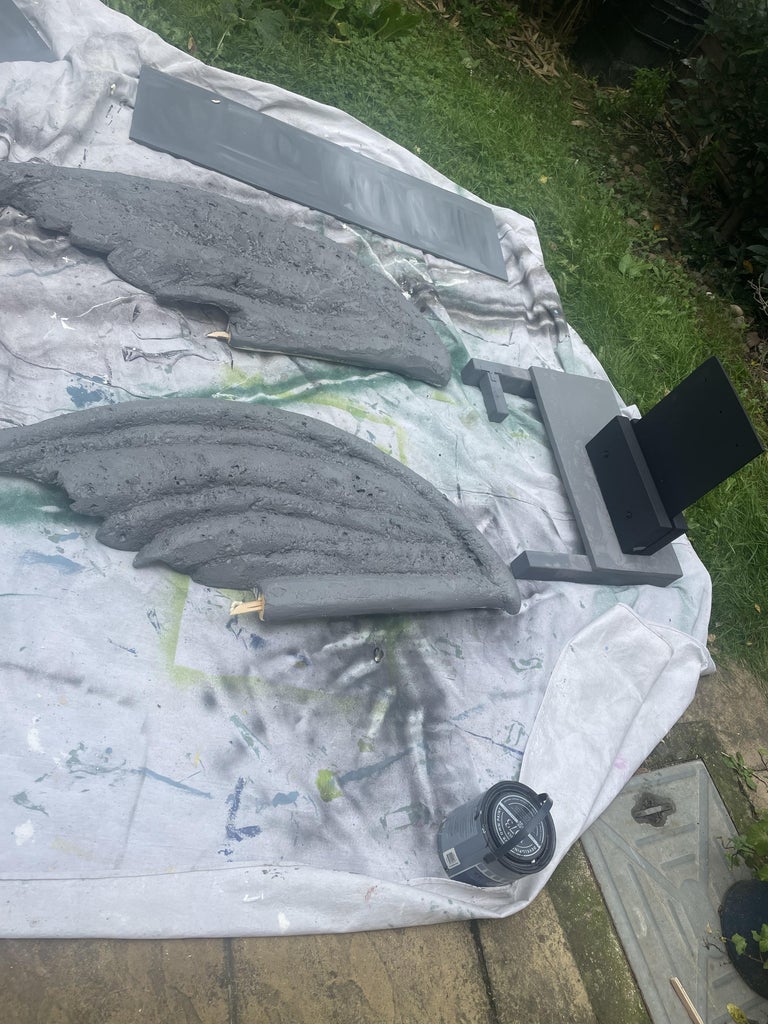
Step 2: Add Wings

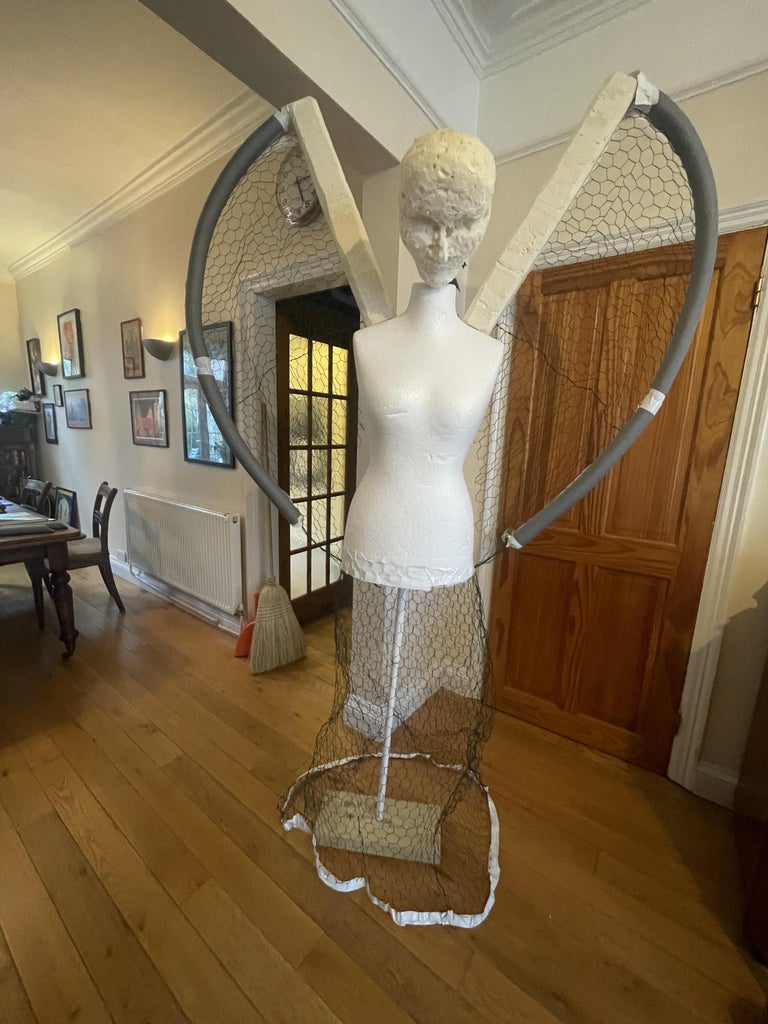
I had some scraps of thick foam board hanging around, so I decided to make them the supports for her wings -- but thin pieces of wood would work just as well. I inserted small sharpened pieces of wood into the hard foam wing supports and made corresponding holes in the mannequin's shoulders so the wings could be build separately. They're removable on the finished angel to make storage a little easier.
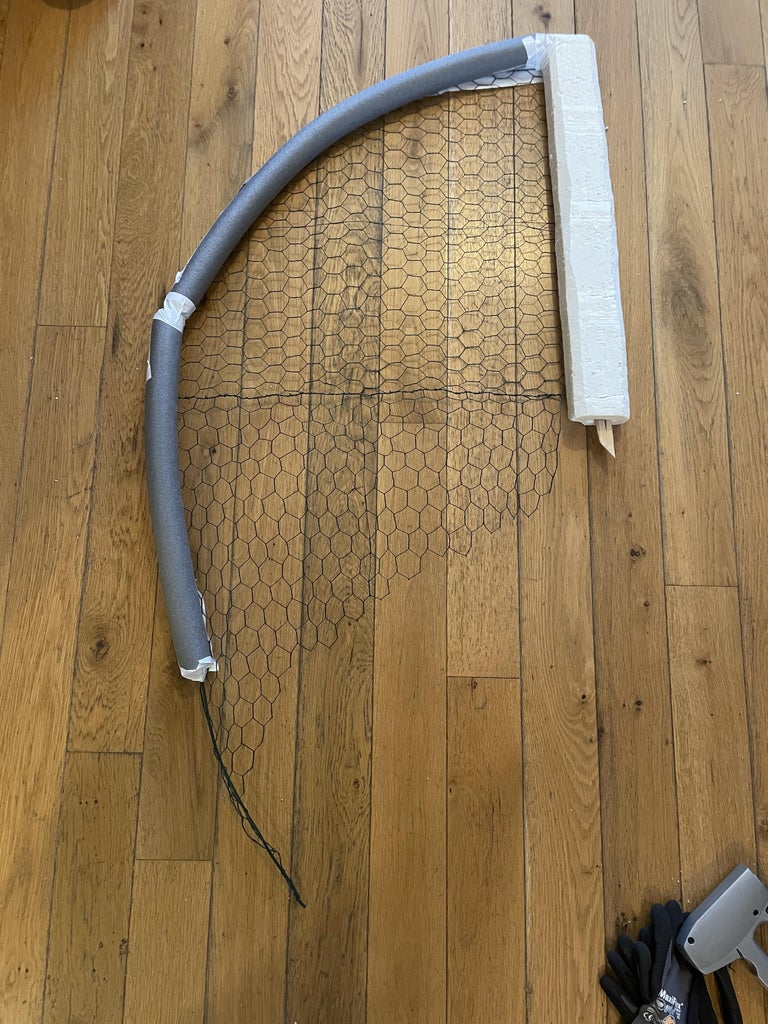
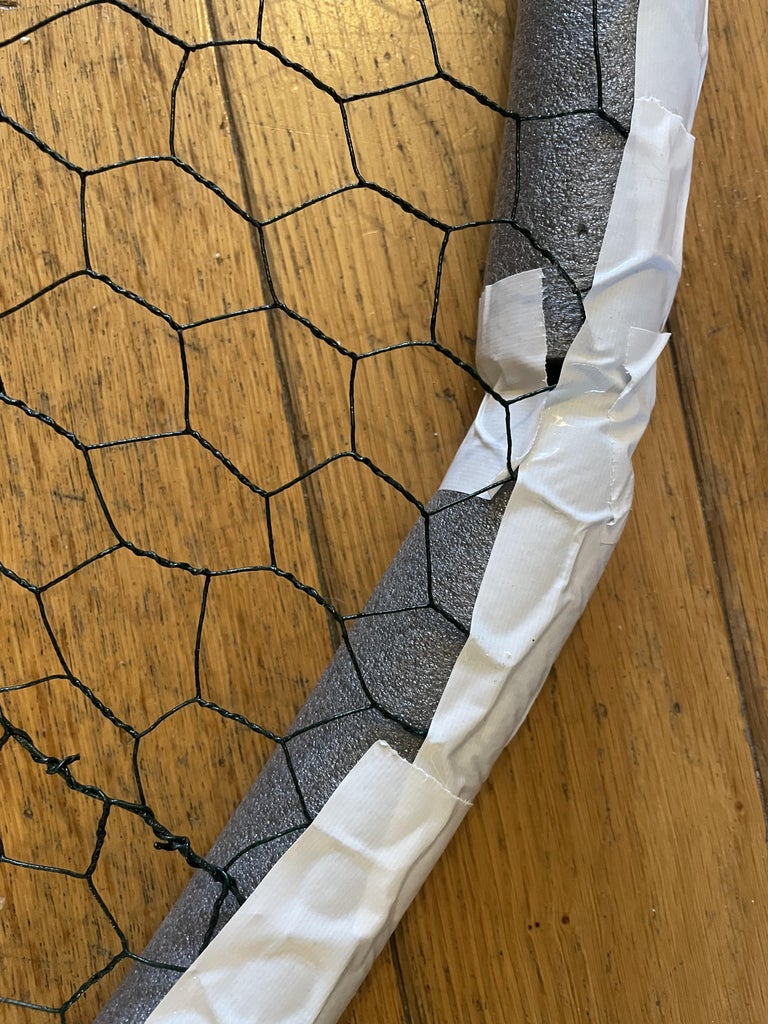
Next I put lengths of stiff wire through two meter-long pieces of pipe insulation (like pool noodles but hollow inside and about 1.5 inches in diameter) and bent them into curved shapes for the outsides of the wings. I stuck one end of the wire into the top of the foam wing support.
I cut chunks of chicken wire to fit the space between the outer wing and the support, stabbing the cut ends into the foam on each side and covering it with tape. (As you can see in the images, I used totally pointless staples again but don't bother copying that step.)
The chicken wire can be formed into whatever wing shapes you like. At this point in the build I was just thinking of her as a generic cemetery angel, so I copied the folded wings of some random angel images online. If I were starting from scratch on a Weeping Angel I'd try to copy the look of the wings a bit better.
Step 3: Arming the Angel
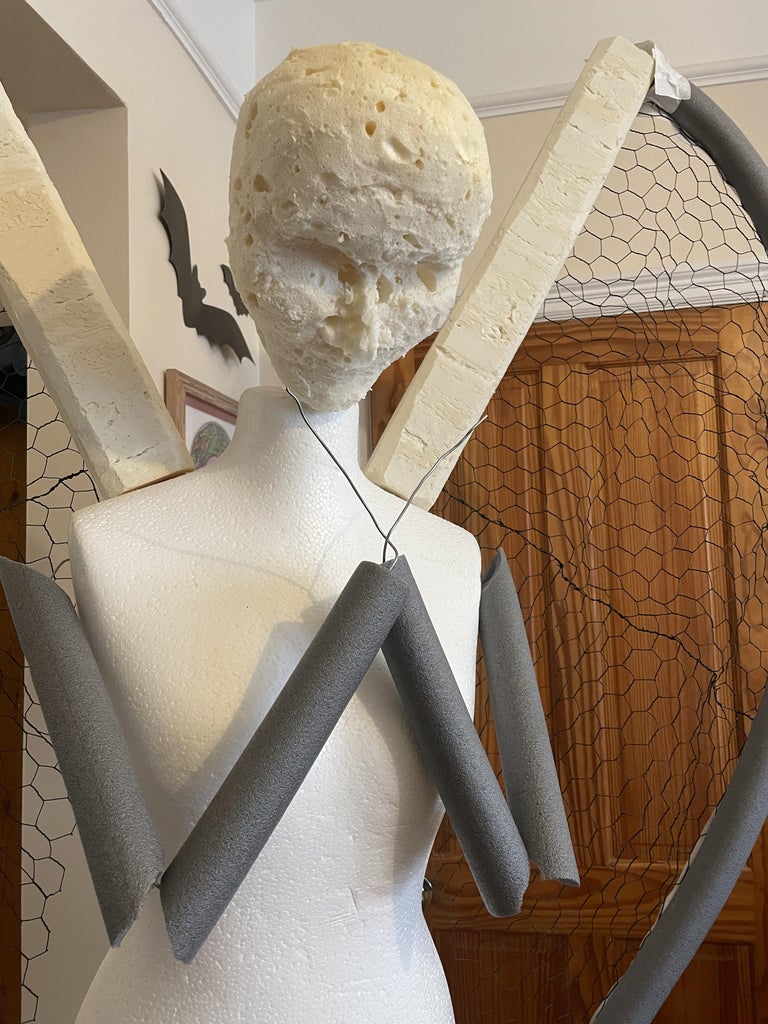

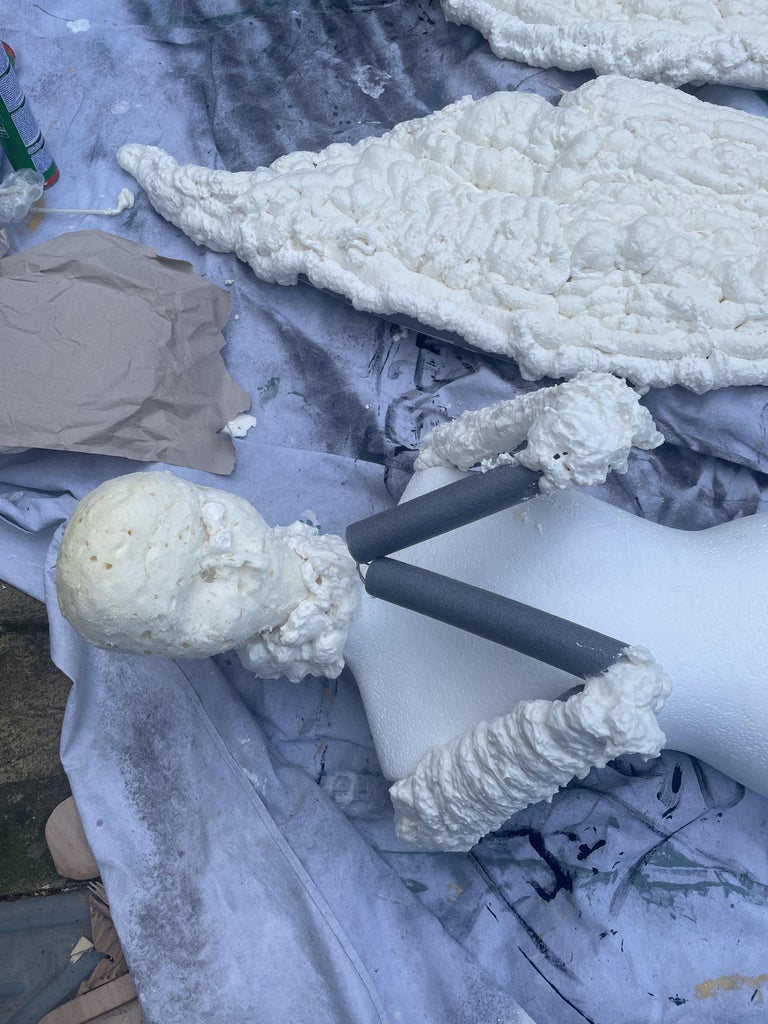
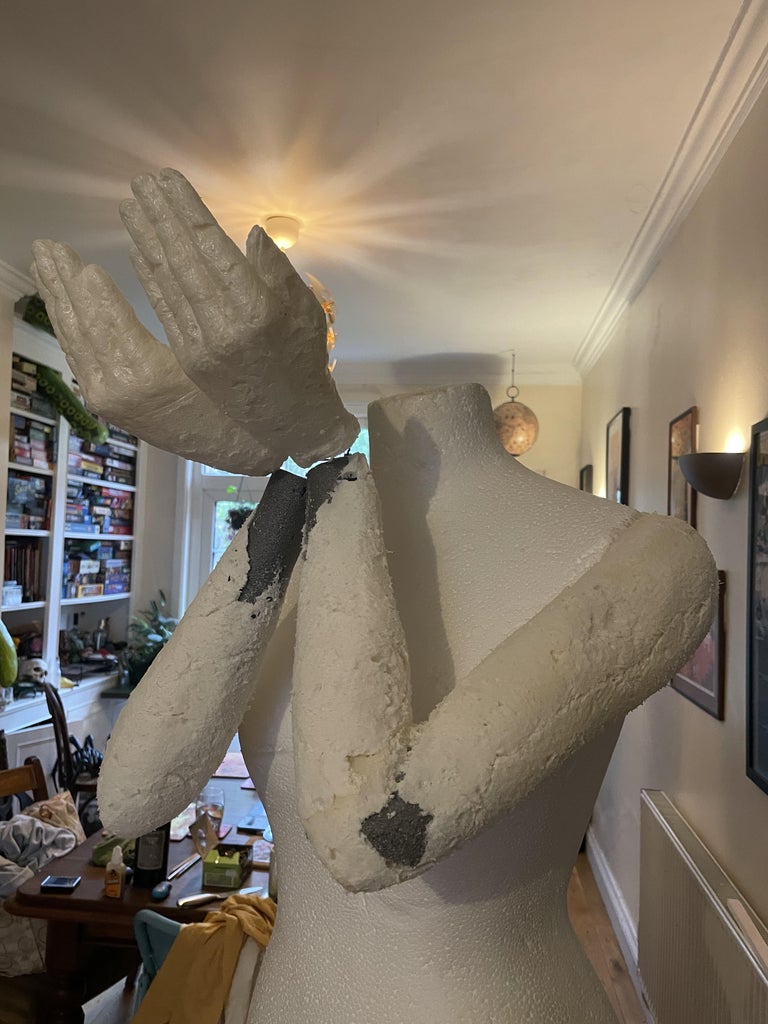
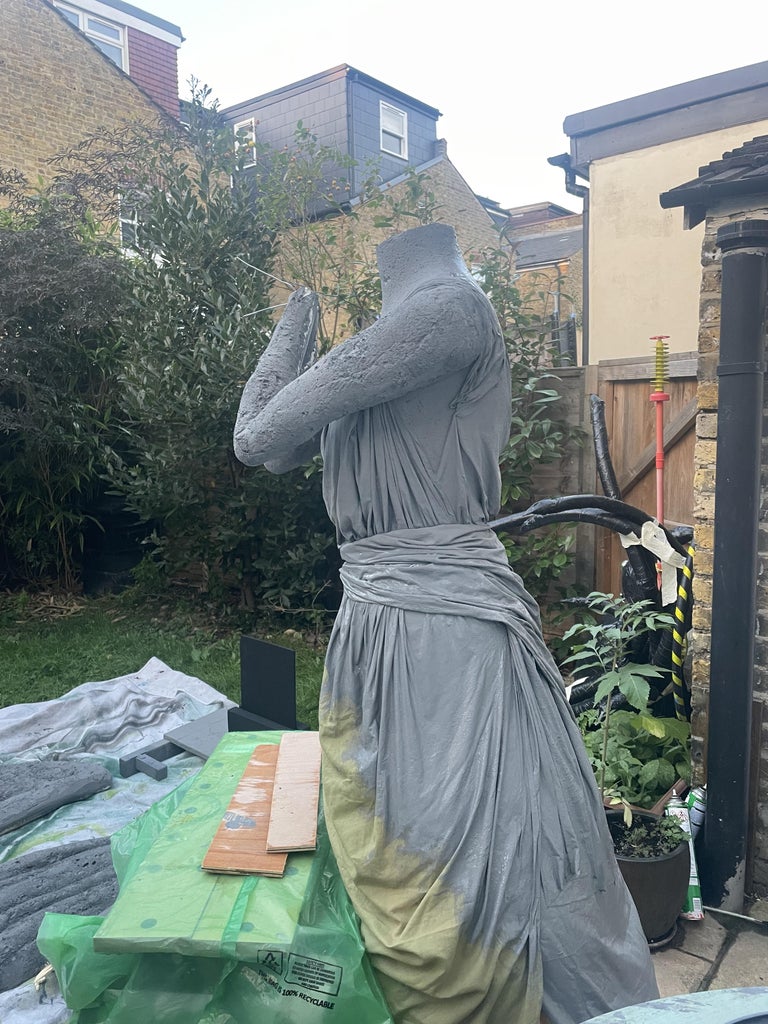
Her arms are two more pieces of pipe insulation -- one per arm -- with heavy gauge wire inside. Cut the insulation (with a box cutter or scissors) on angles for the elbows. Stab one end into the mannequin's shoulder and bend the other so the foam tube doesn't fall off before she has hands. Don't worry about the gaps: They'll be filled with foam in the next step.
Bend her arms so her wrists are together in front of her chest/neck, so her face will be covered when her head is down. I've added a BBC picture of a Weeping Angel for reference here.
And speaking of heads, as you can see in these images I've added a foam head (recycled from one of last year's props and carved into a rough shape), but it gets replaced once I realize she's a Weeping Angel.
Step 4: Foam Time!
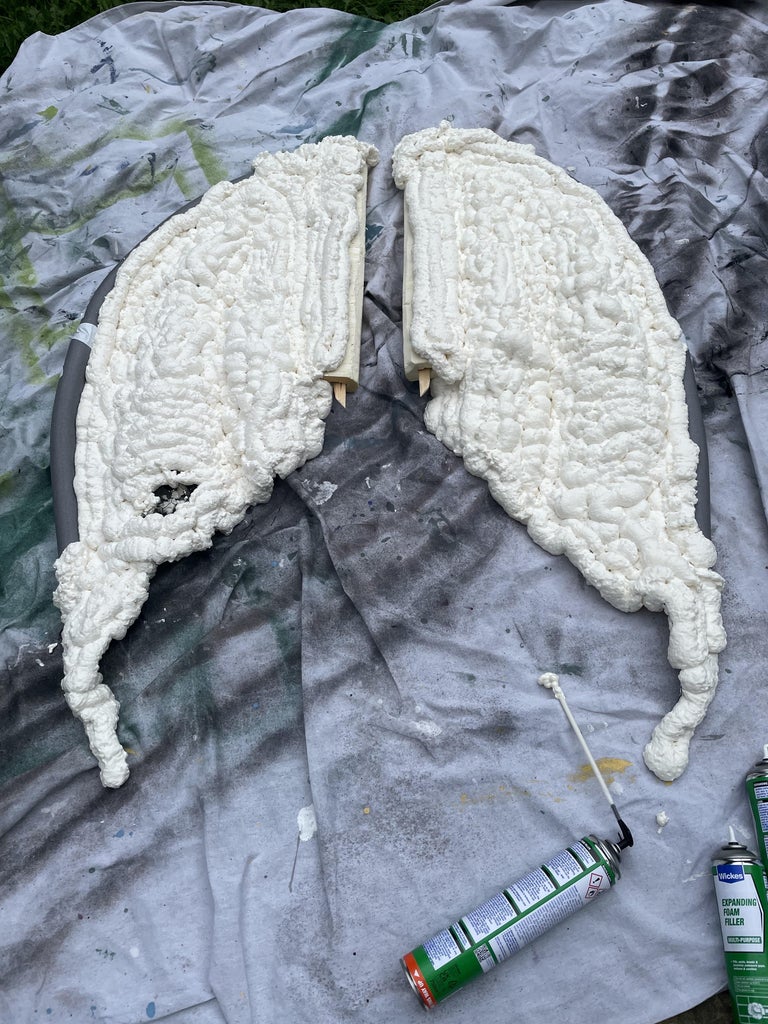
I might love expanding foam too much. I get the cheap stuff in big cans from Wickes so it's not too expensive and it works well for my purposes. If you haven't used expanding foam before a couple words of warning: First, wear the disposable gloves that come with the can. You don't want this stuff on your skin because it's a pain to remove. Also, if you need to make it stick to a surface (like chicken wire or pipe insulation), mist the surface with water before spraying the foam. It helps it stick better.
Cover the front surface of the wings with a thin layer of foam. Be careful not to shoot it straight through the wire. If you take your time you can apply it to the surface only, but as it expands it'll push through the wire and cover most of the back side as well.
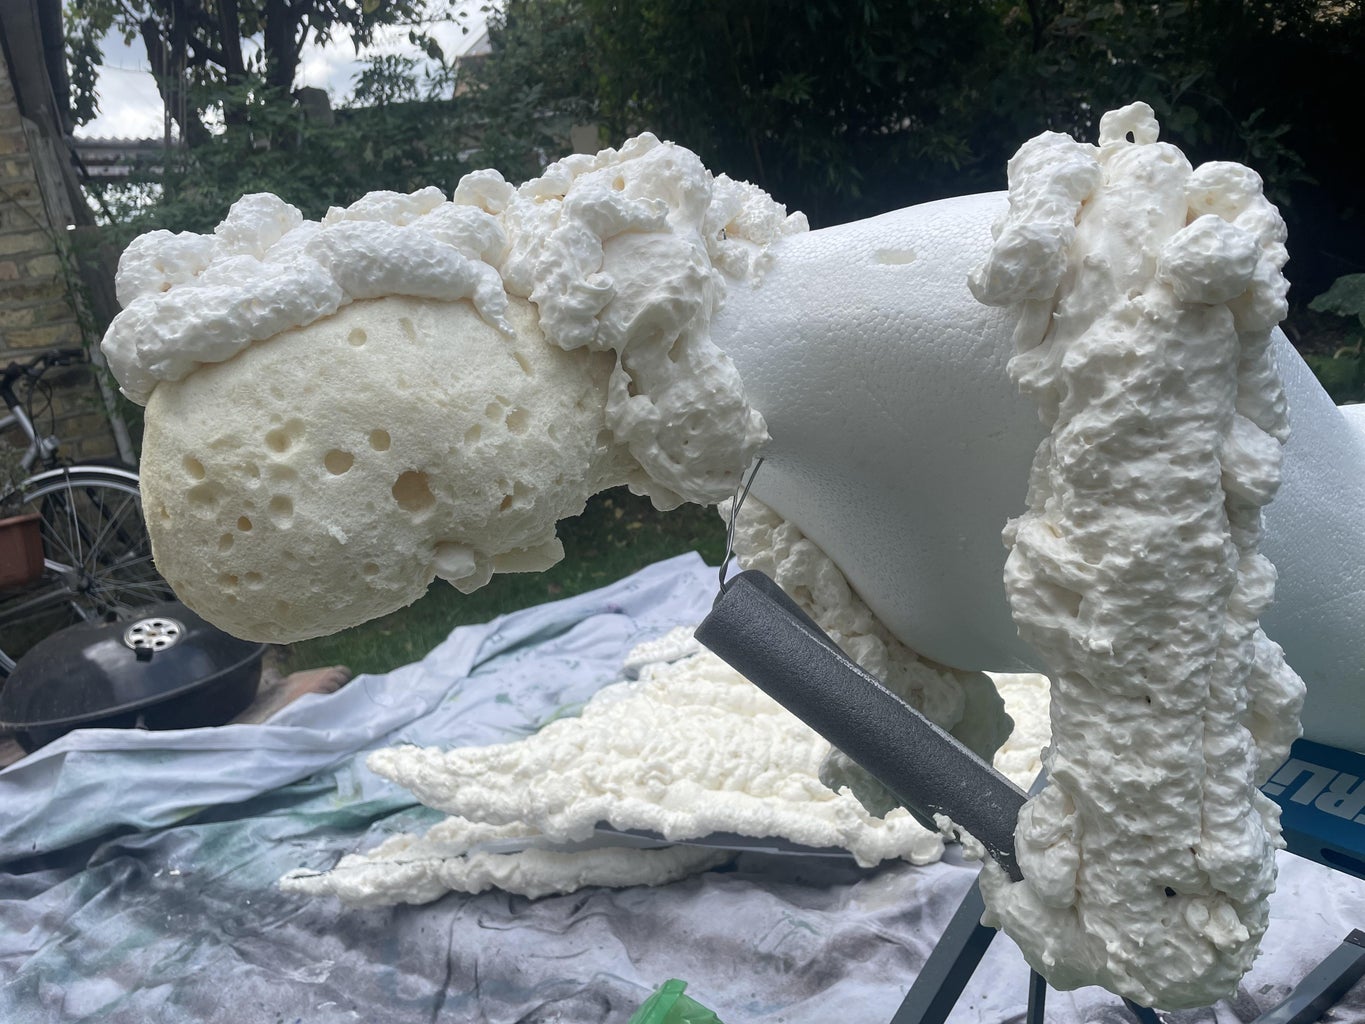
Add foam around the tops of the arms -- that will help hold her arms in place too -- and all the way down to the elbows. I add some more to her forearms to bulk her up a little. It's okay to go overboard here because you'll be carving away the excess.
Don't worry about the neck and head -- those will come later. I ended up tearing this head off a little later in the process (and recycling it into a flying ghost, so it hasn't gone to waste!).
I also covered quite a bit of the skirt with foam but this isn't strictly necessary. I wanted to make sure that the hips and knee would be smooth under the fabric and the chicken wire wouldn't show through, but I honestly don't know how much it would have anyway. It's definitely not necessary on the back or any places where the fabric will hang straight down, like from the knee to the ground. If you're not sure what I'm talking about, the pictures in Step 7 may help explain.
Step 5: Hands
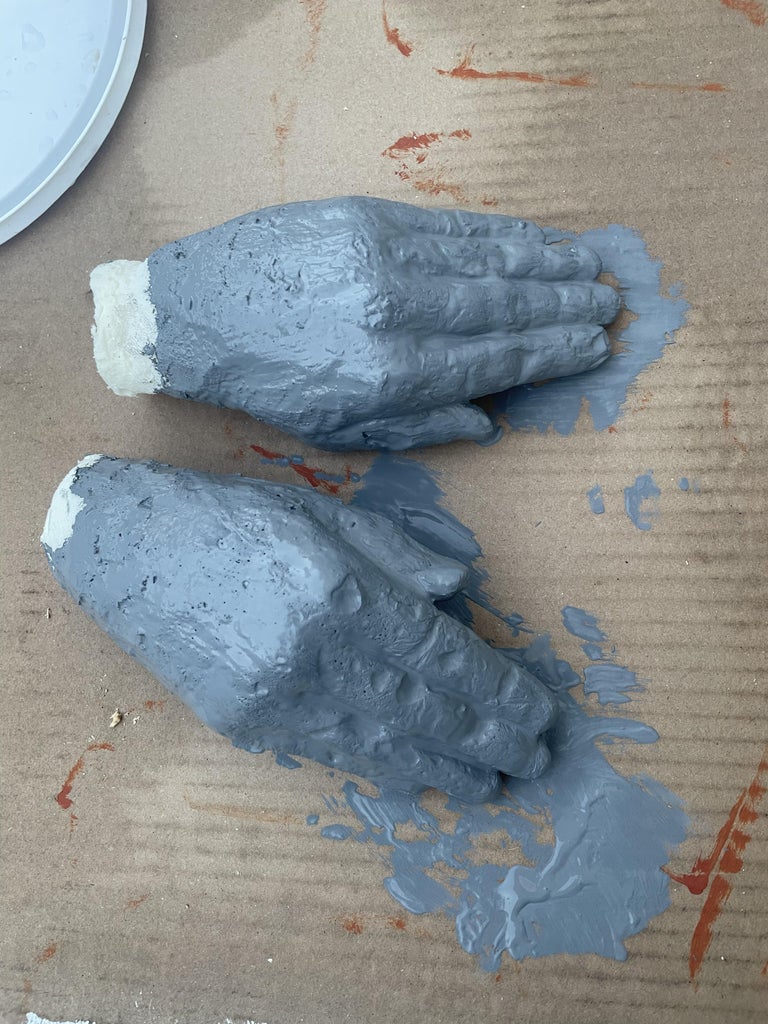
Her hands are definitely a focal point and I wanted them to look as realistic as possible. I've tried building hands for previous projects and they've always been frustrating to make and ultimately disappointing looking. But this year I've started making paper mache carnival masks, which involves sculpting them in clay, making a plaster mold and then casting paper mache inside the mold. I figured I could cast expanding foam into plaster molds too... and I had plaster sitting around the house anyway, so why not?
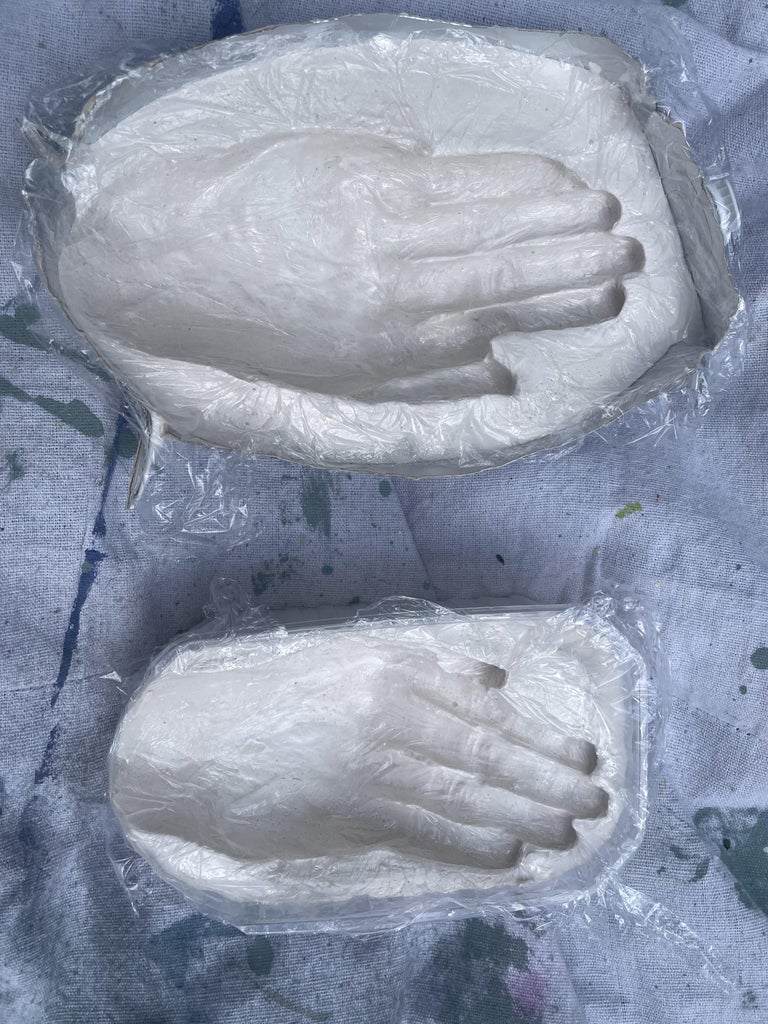
I made plaster casts of the backs of my hands (pro tip: don't try to do both of them at once! Nothing went horribly wrong but I definitely made things more awkward for myself). You could use one of those alginate-and-plaster hand-casting kits, or you could just mix up a batch of plaster, pour it into some hand-sized containers you fished out of the recycling, slather your hands in vaseline and hold them in place until the plaster sets up.
A few tips if you're DIYing some plaster hands:
- Have a bowl of water and paper towels nearby so you can get your hands functional ASAP without accidentally putting plaster down your sink.
- Only cast the back half of your hands -- the palms won't be visible anyway, and it makes it a lot simpler.
- Don't put your hands into the wet plaster until it's the texture of thick yogurt. If you put them in too soon your hands will be cramping before it even starts to set.
- Let your mold dry overnight before you cast your expanding foam in it.
Once you have molds ready, apply a coat of vaseline or cooking spray to the inside of the mold, then press a piece of plastic film inside. Make sure you get into all the crevices and details. The vaseline/oil will help the cling film stick. Expanding foam is insanely sticky and might not come back out of the mold otherwise, but you want to get as much detail as possible.
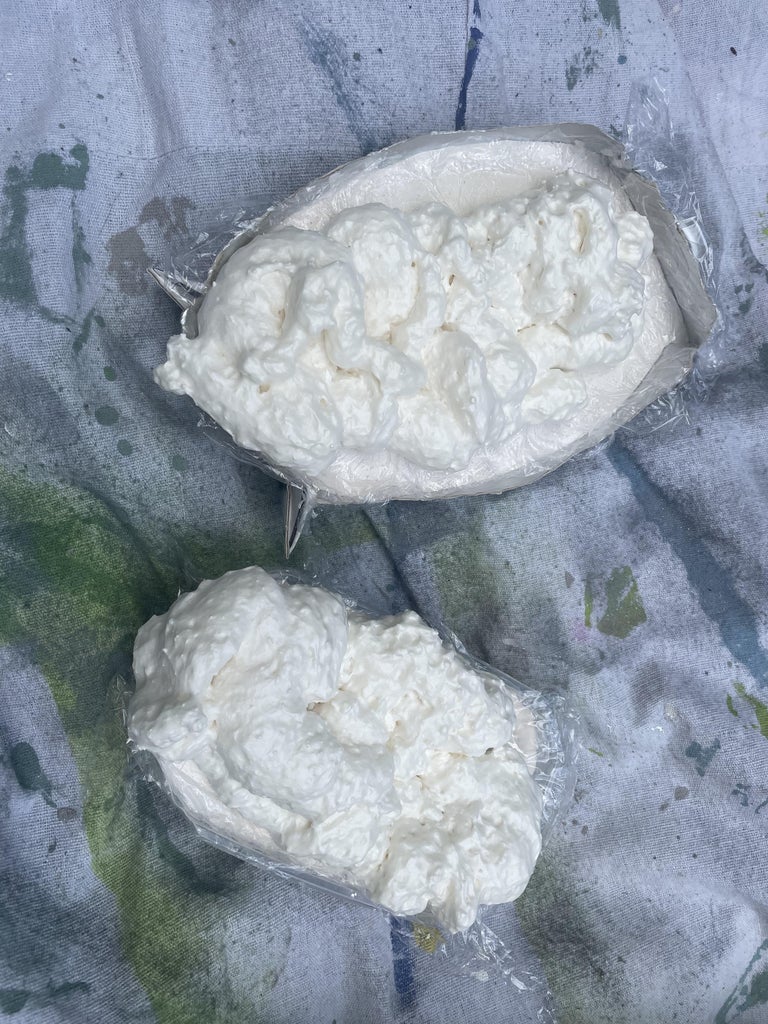
Spray your foam into the mold, making sure to fill all the fingertips and knuckles, but leaving the whole thing about halfway to the top edge of the mold.
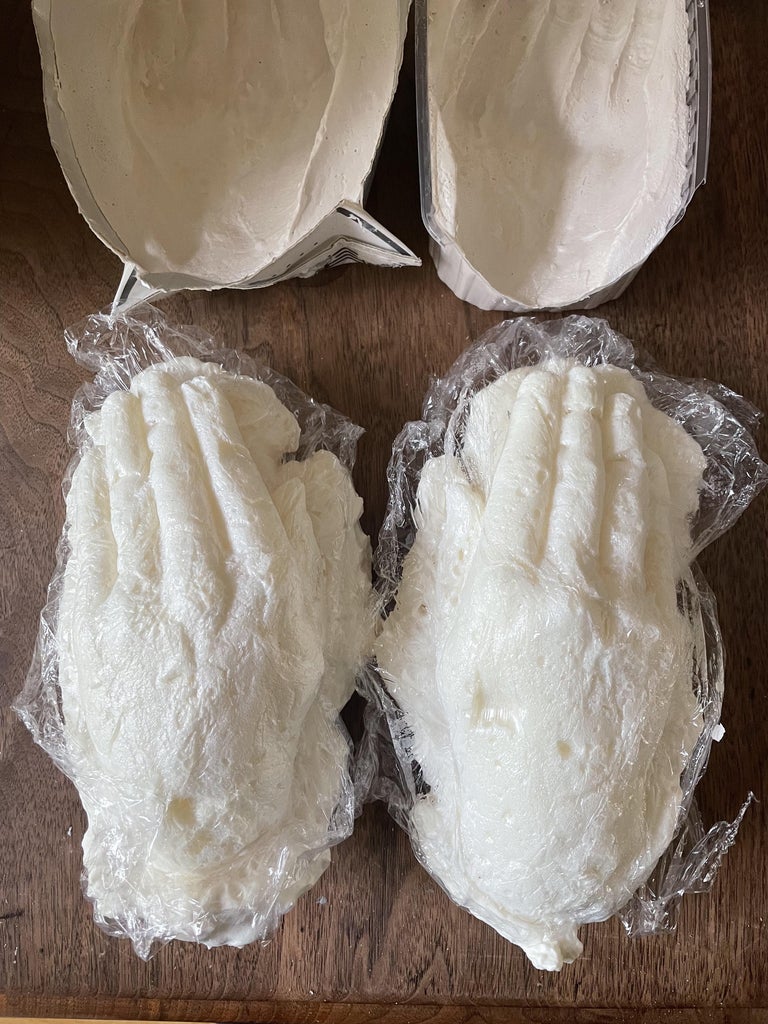
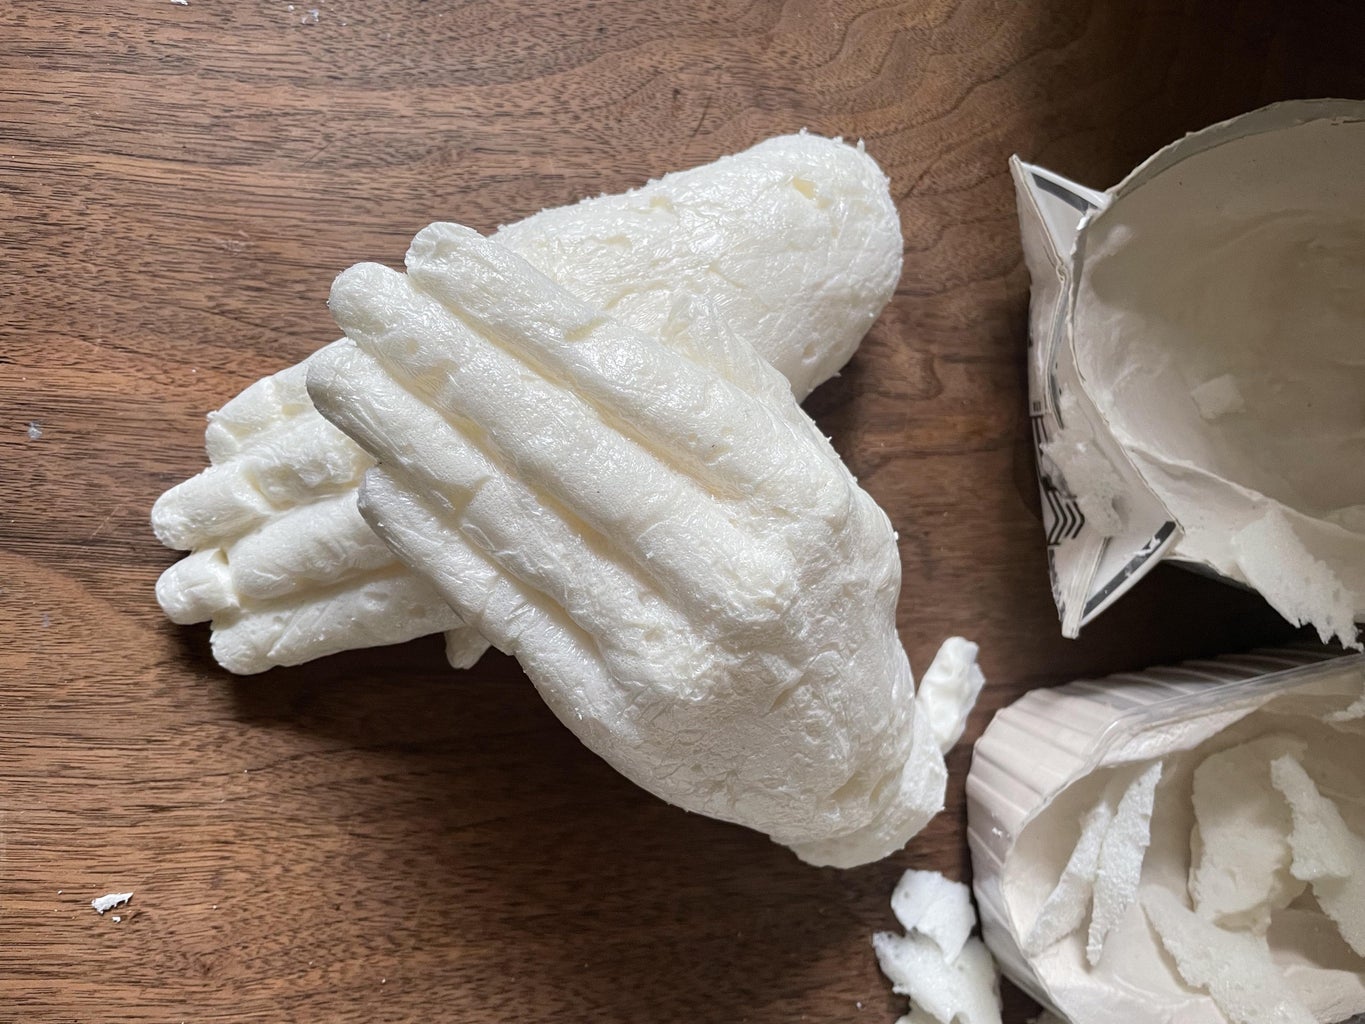
Let it dry overnight, then lift the foam hand out by the cling film. If you're lucky you won't have any serious bubbles -- minor ones just look like weathered stone -- but you can always try again. I had to recast one hand due to a large bubble, but now I have a spare "stone" hand for my graveyard!
Step 6: Carving and Shaping

Okay, this step is pretty straightforward! I used a sharp paring knife to cut away lumps of foam to shape the wings, shoulders, elbows and skirt. I didn't worry too much about the backs of the wings, since they wouldn't be visible when she's on display, but I did shape them a little, especially where the chicken wire pattern was visible.
Once everything was basically the right shape I used a small rasp plane (a woodworking tool that looks like a grater) to smooth the surface a little more.
This is super messy! I usually wear a mask and I have to vacuum up the tiny bits of foam debris when I'm done.
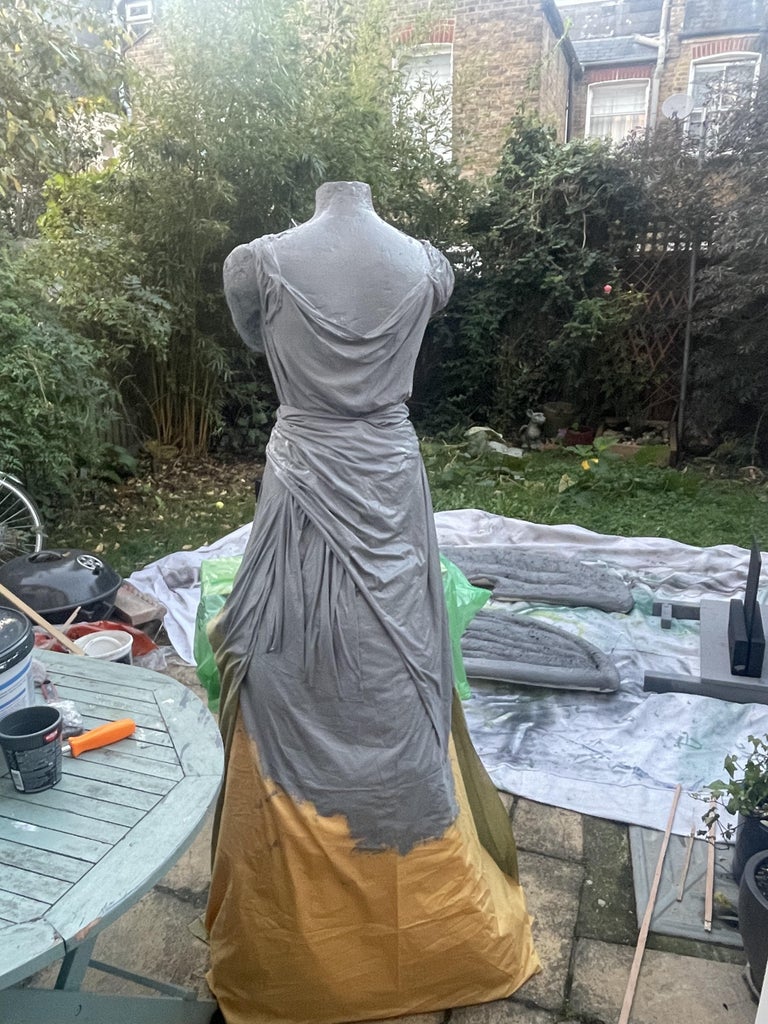
Step 7: Time to Get Dressed
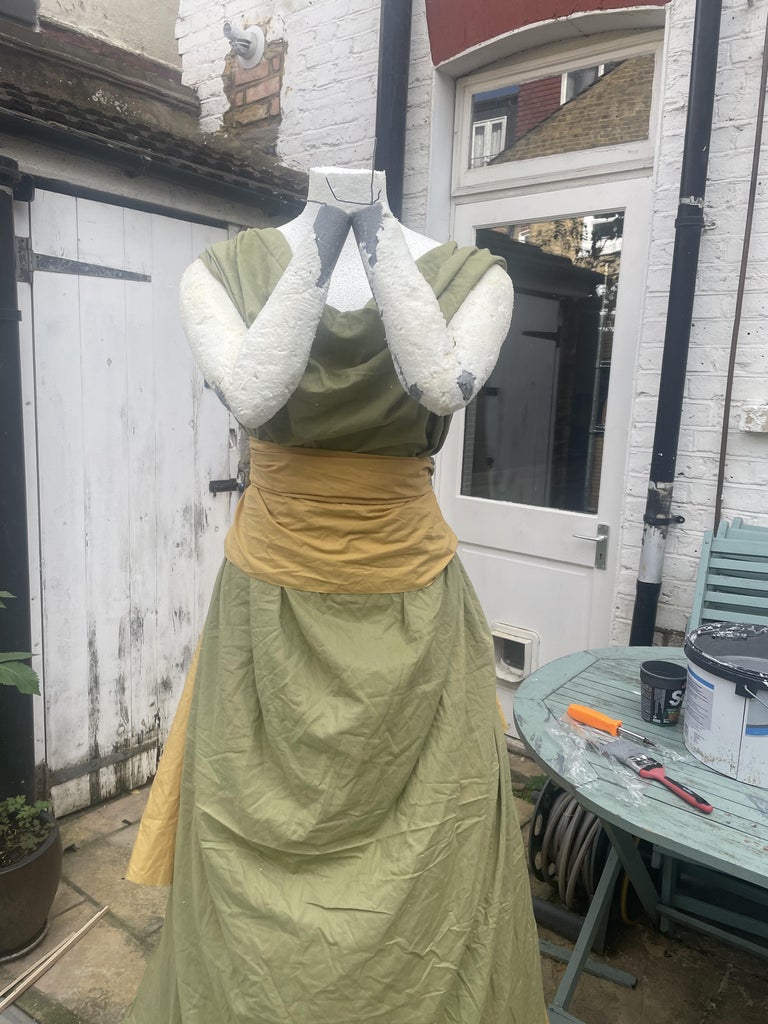
I have lots of scrap fabric, so I found a few big pieces of lightweight cotton to make her dress, but old bed sheets would work even better. I draped one piece around her front, pinned it in place at her shoulders by stabbing stick pins with flat heads through the fabric and into the foam mannequin. Then just arranged it so it would drape naturally over her body. Because I was using scraps the front and back were different pieces, but I overlapped them at the sides and the seams aren't too obvious.
I bunched up a smaller strip of fabric and wrapped it around her waist, pinning it in place behind her back.
Step 8: Monster Mud
Monster mud is the best. It's easy to use, inexpensive, and makes homemade props sturdy and weatherproof. Bonus points if you want them to look like stone!
There are lots of recipes online that give specific ratios of the two ingredients -- latex paint and drywall joint compound (aka plasterboard jointing compound here in the UK) -- but while I've been more careful with measuring things in the past, this time I was a little more relaxed. I used a big 10 kg tub of premixed Wickes jointing compound and added... probably about a 2/3 gallon of paint, half white and half black. It made a ton: plenty for the angel and three foam tombstones, plus base coats on some wooden supports for another build -- and there's quite a lot left over. I'm hoping it'll last for next year.
I painted the monster mud all over the angel's body and dress. Some people soak fabric in monster mud to saturate it, but that looked awkward and messy, and since the foam/chicken wire underneath the fabric is also weatherproof, I wasn't too worried about getting the fabric totally saturated. It dried nice and solid so I think I got away with it.
I also painted the hands and both sides of the wings. The foam absorbs quite a bit of monster mud and took a few days to dry completely, but the fabric was dry the next day.
Step 9: Let's Complicate Things!

By now I'd decided she wasn't an ordinary cemetery angel but a Weeping Angel... and it would be a shame if she didn't have the classic scary face (as seen in the first image, from Doctor Who). That meant two new challenges: First, I needed to make a face detailed enough to be recognizable... and more importantly, it would be SO much cooler if it moved.
I considered making her drop or rotate her hands, but I couldn't think of a way to move them (consider my extremely limited technical skills) that wouldn't be immediately obvious to anyone looking at her. At this point it was the 12th of October, so there wasn't time to do something animatronic -- and it was way too late to build some sort of internal mechanism in her arms. Instead, her head would have to move.
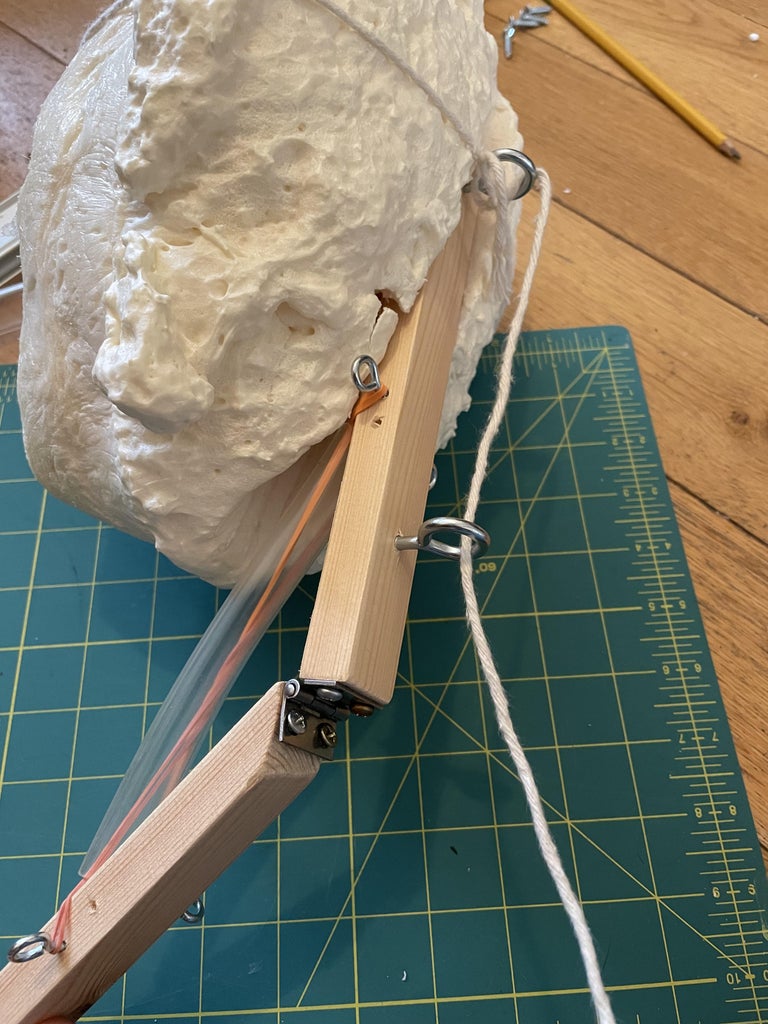
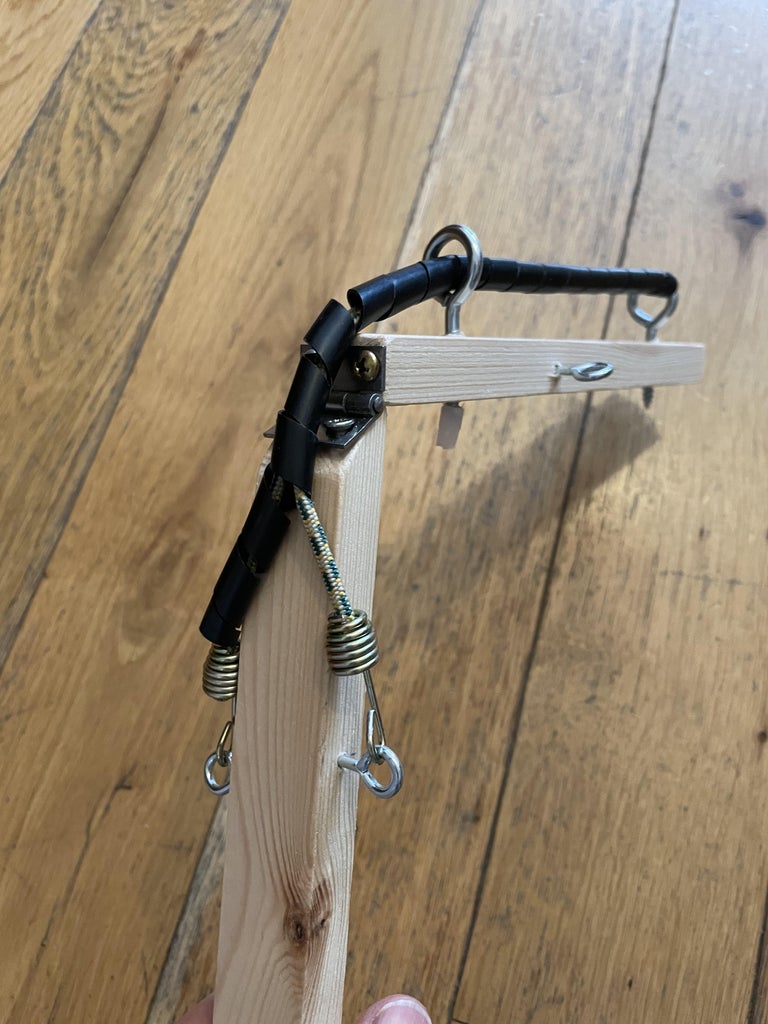
I wanted it to be down nearly all the time, but hinged so it could be pulled up to look at passersby or terrify older trick-or-treaters. It needed to only stay up while being pulled, though, so it would drop back down easily. I tried a bunch of different methods involving rubber bands and bungee cords to keep it in place. I built a support with loads of eye hooks and tubing to run elastic and/or wires through, so they wouldn't get caught on anything or cut through foam. And after an embarrassing number of attempts I realized that a simple hinge and gravity were all I needed.
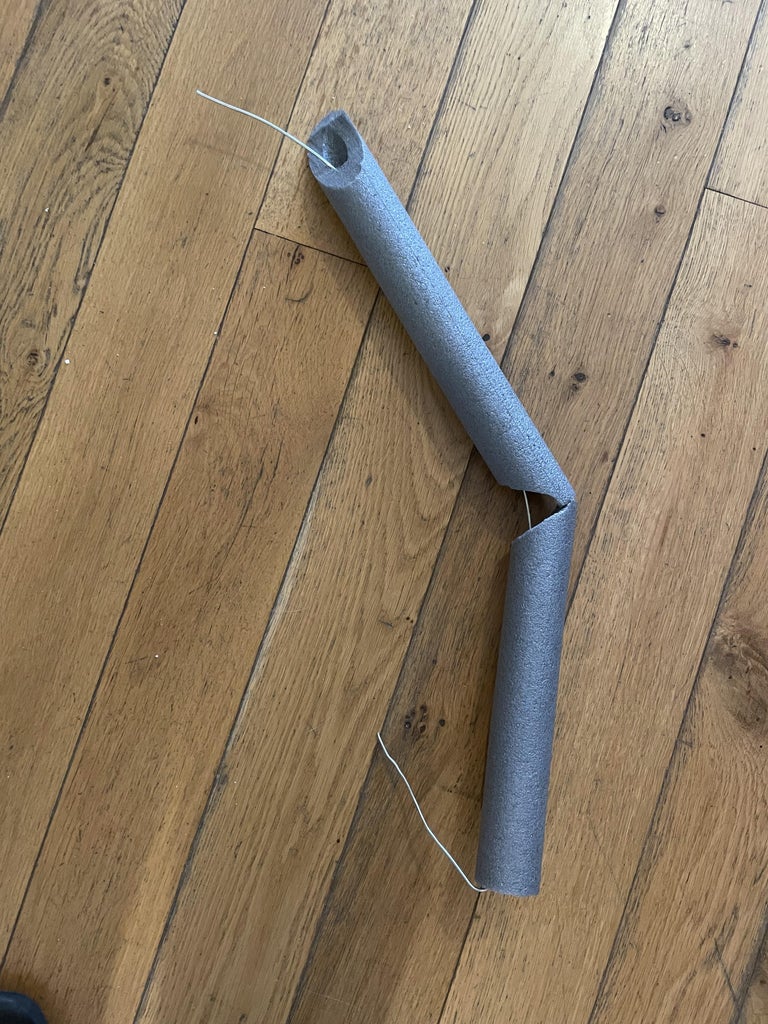
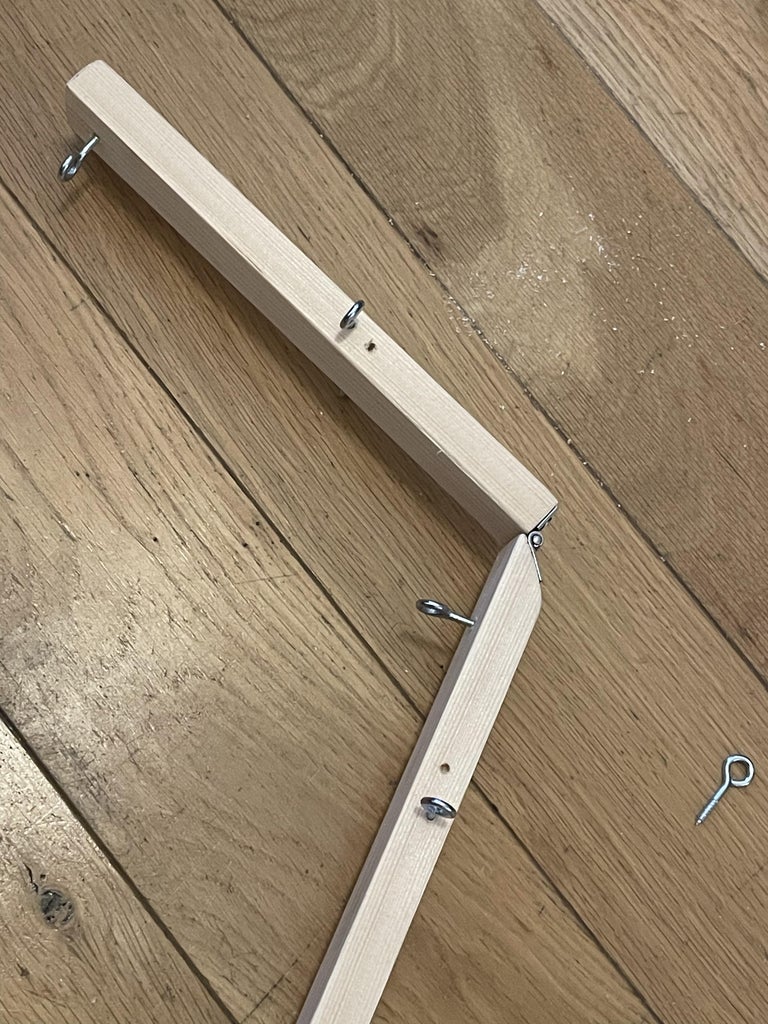
The neck mechanism is a small length of wood, about a foot long. I cut it in half, cut one end on a slight angle, and attached them with a small hinge. The angle allows it to move just beyond straight up and down (otherwise if the two pieces of wood were flat 90 degrees the hinge itself and the screws holding it in place would stop its motion too soon).
One end of the wood is pushed down into the mannequin's neck hole. The other will be embedded in the middle of the foam head, which I'm about to create...
Step 10: Getting Ahead of Myself
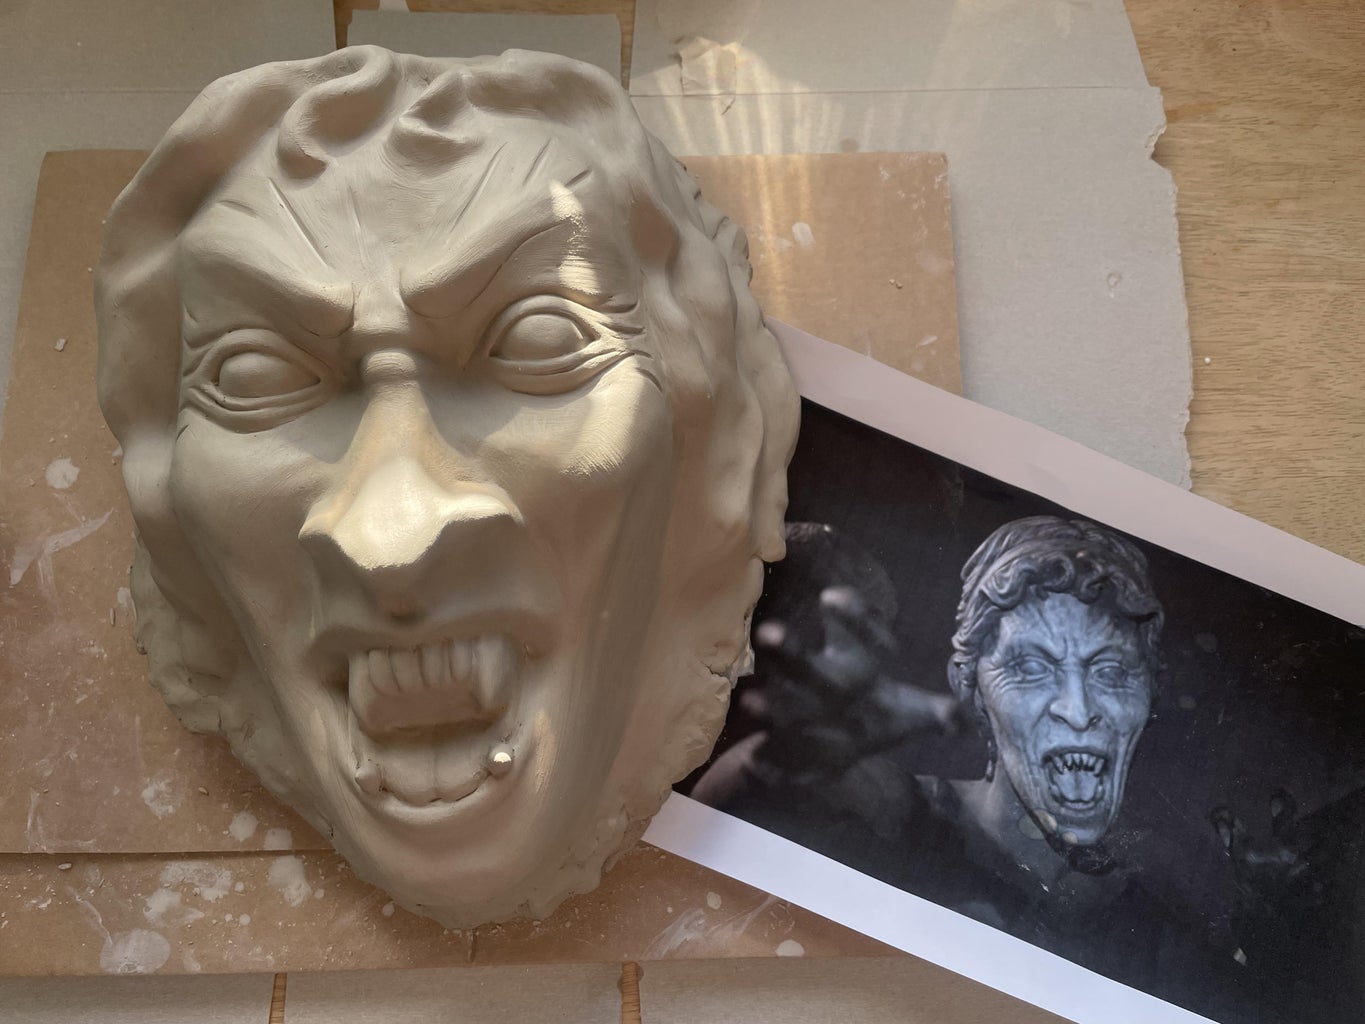
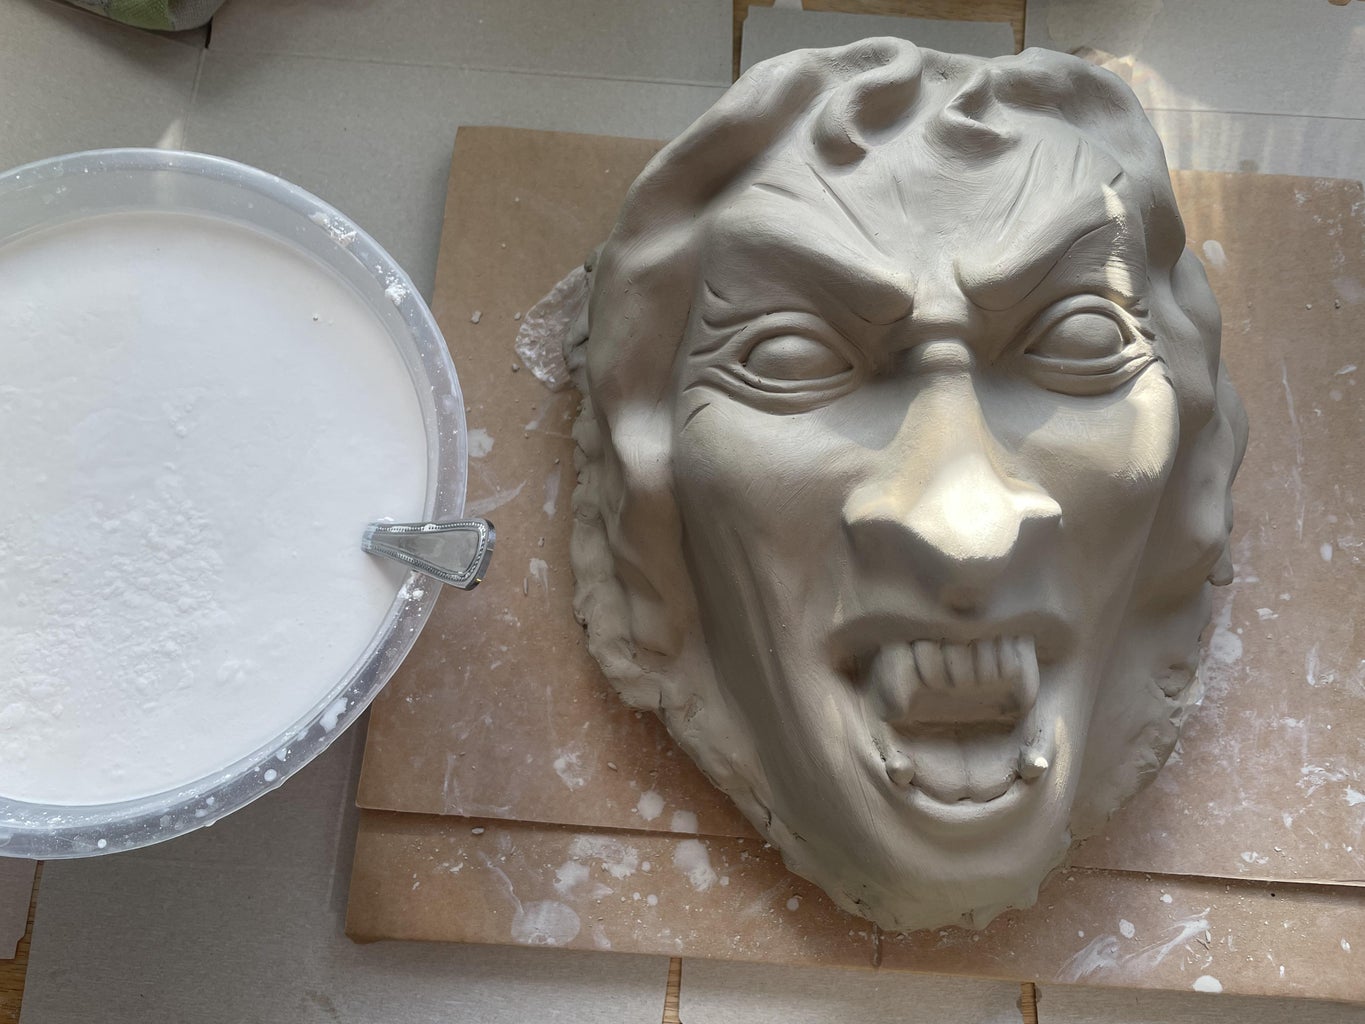
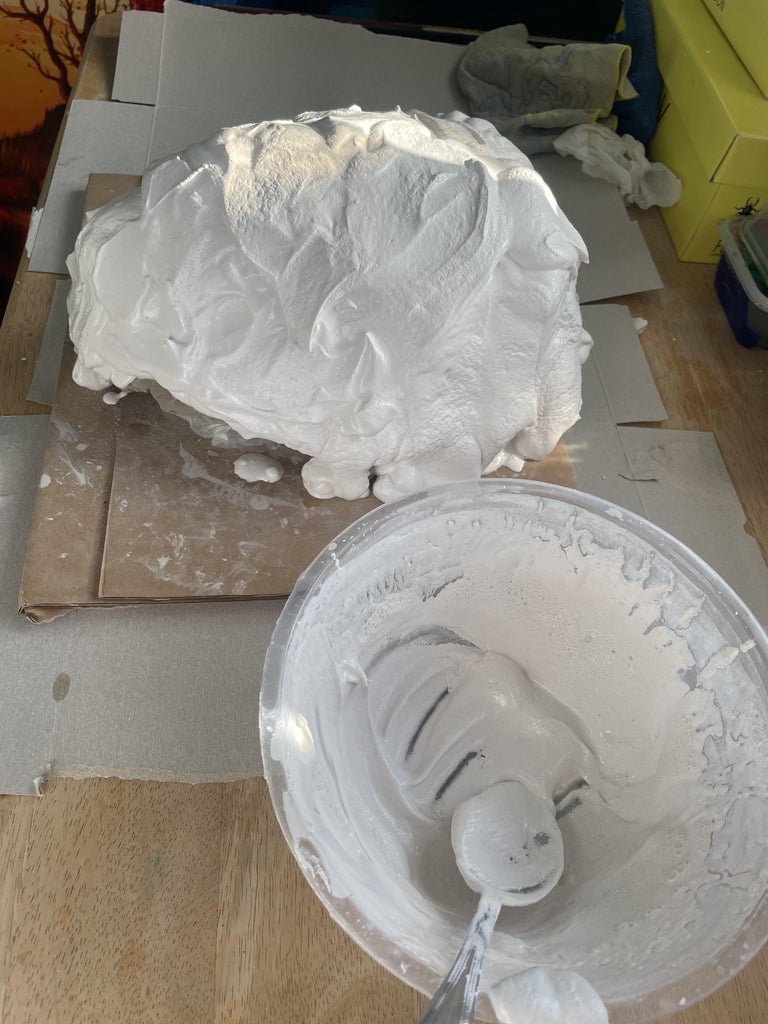
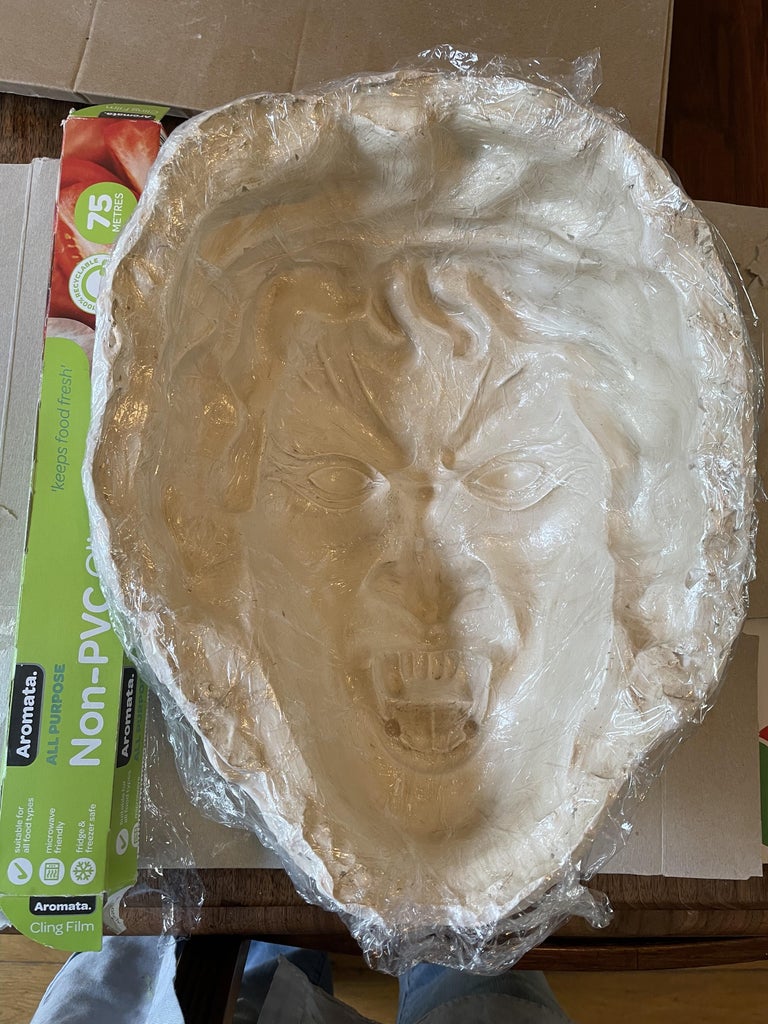
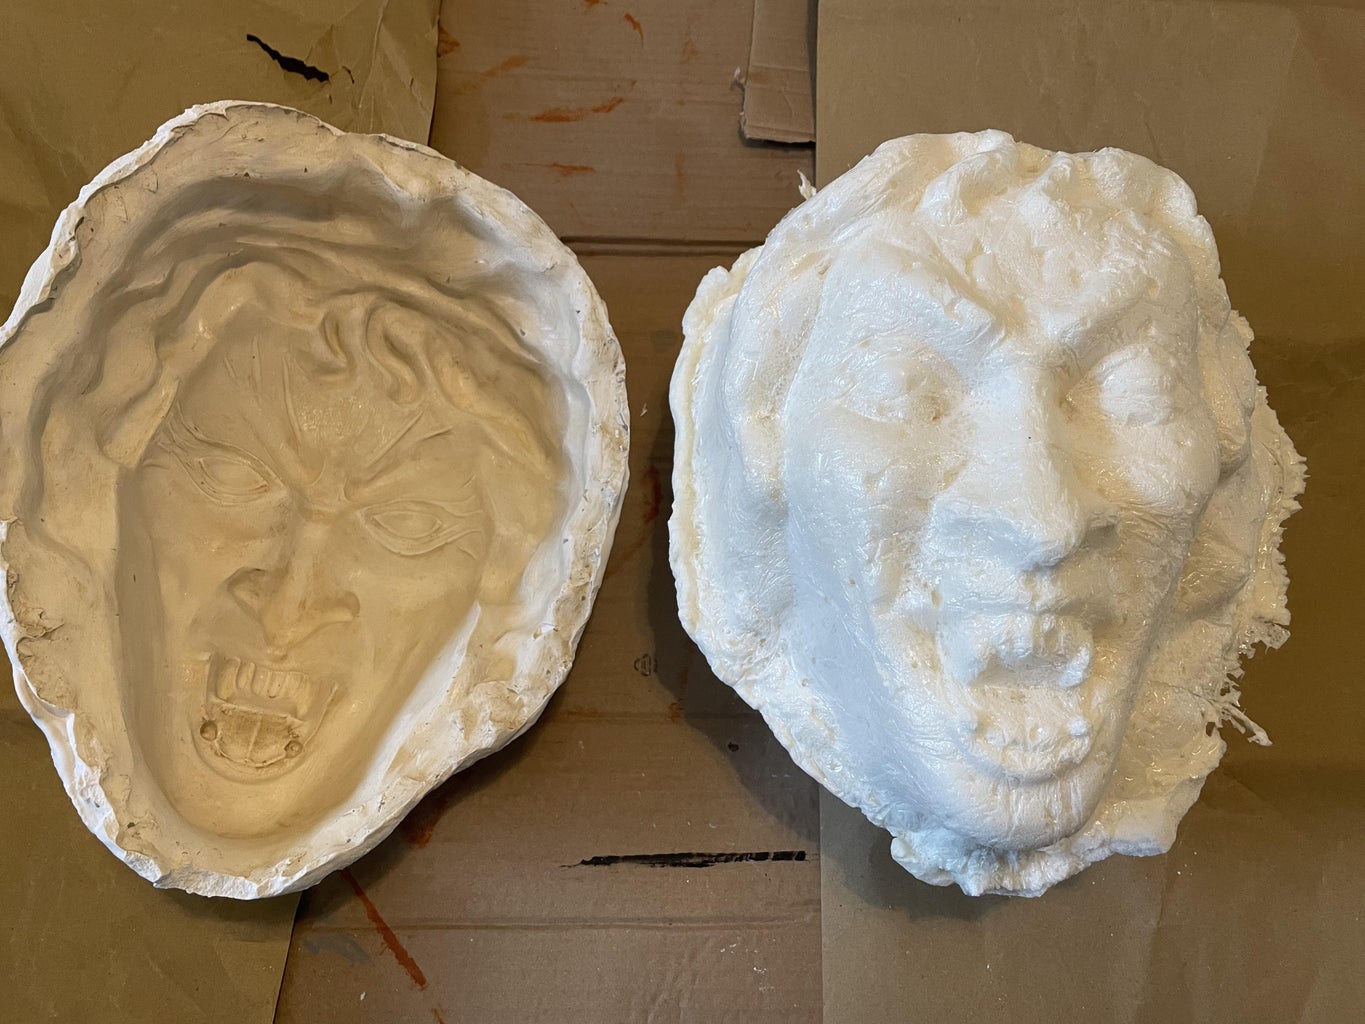
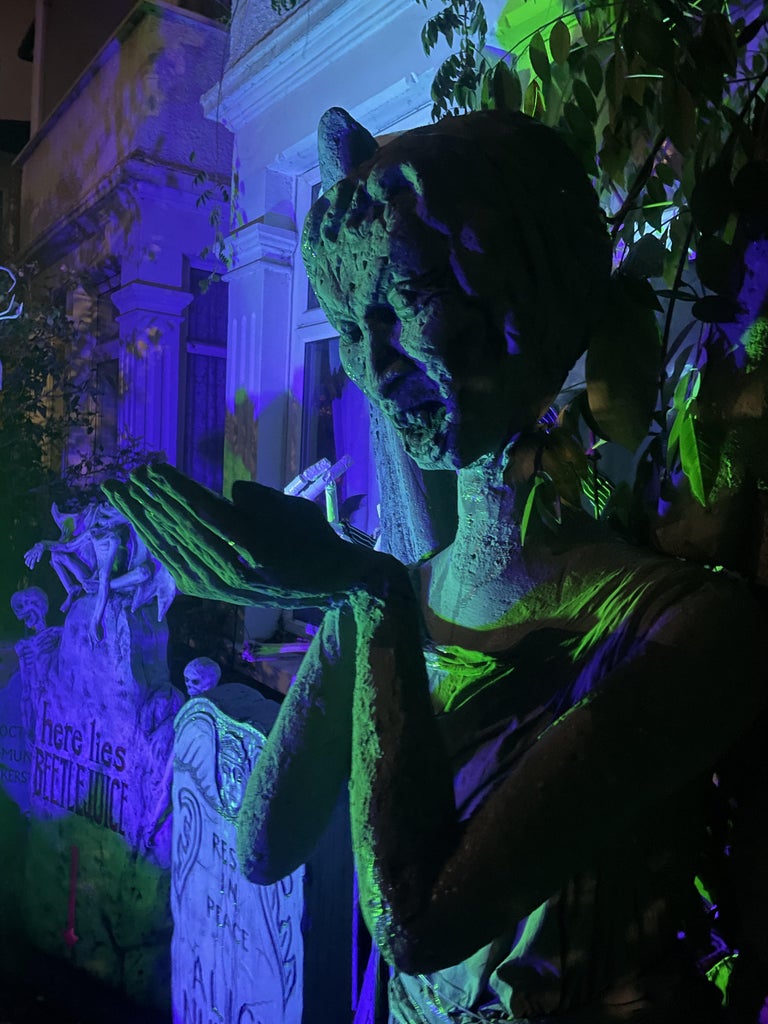
After the cast foam hands worked pretty well, I decided to give it a try with the face too. Using the same technique I use for making masks, I sculpted the face out of clay (while re-watching the first Weeping Angel episode of Doctor Who for inspiration!) and then made a plaster mold of it.
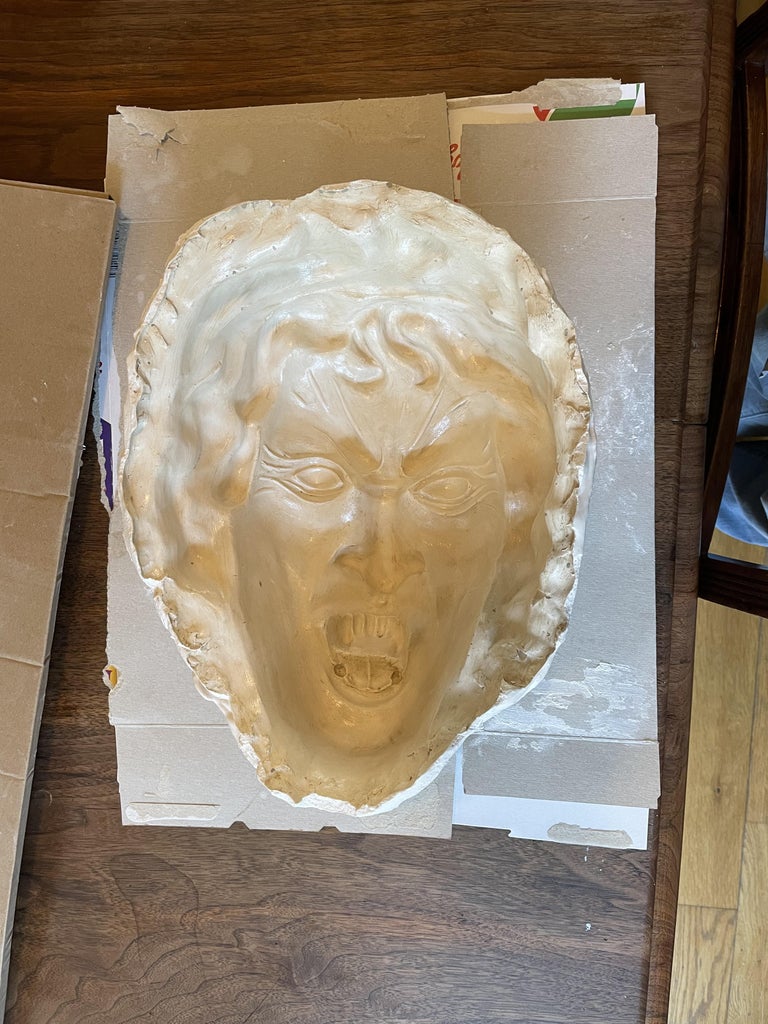
Just like with the hands, I smeared the mold with vaseline, lined it with plastic wrap and then filled it with expanding foam. I waited two days before taking it out of the mold, just to be safe -- I'd experimented with another mask mold and it collapsed because I took it out too soon, after about 18 hours. Luckily it worked! A few small bubbles, but overall she looked pretty good. By Weeping Angel standards, anyway.
Step 11: An Embarrassingly Long Process


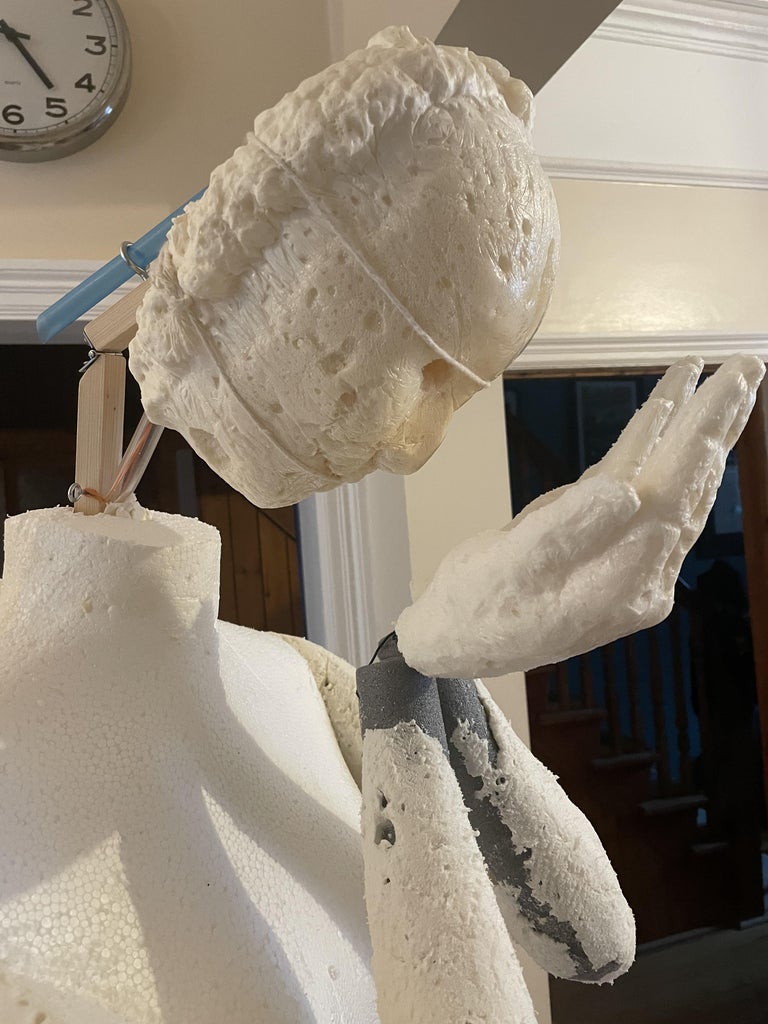
After a fair amount of trial and error (and a lot of standing around staring at her from many angles) I finally figured out how to make her head work. (And it's pretty basic. My engineering skills are not impressive.) I carved a channel in the middle of her head, angled slightly toward the face, and glued the top half of the neck into it. I'd screwed an eye hook into the top and tied a sturdy cord around it, then threaded the cord through a thick plastic tube (a bubble tea straw would do the job too) so it would come out the back of her head.
Next I found a big off-cut of foam and shaped it into the back of her head (I could have sprayed foam straight onto it but happened to have a piece that worked), then cut a hole for the tube/cord. I positioned it in place and glued it down with Gorilla glue. Once it was dry I carved the foam at the back of her head to look like hair, but I wasn't too worried about the details since it's not very visible.
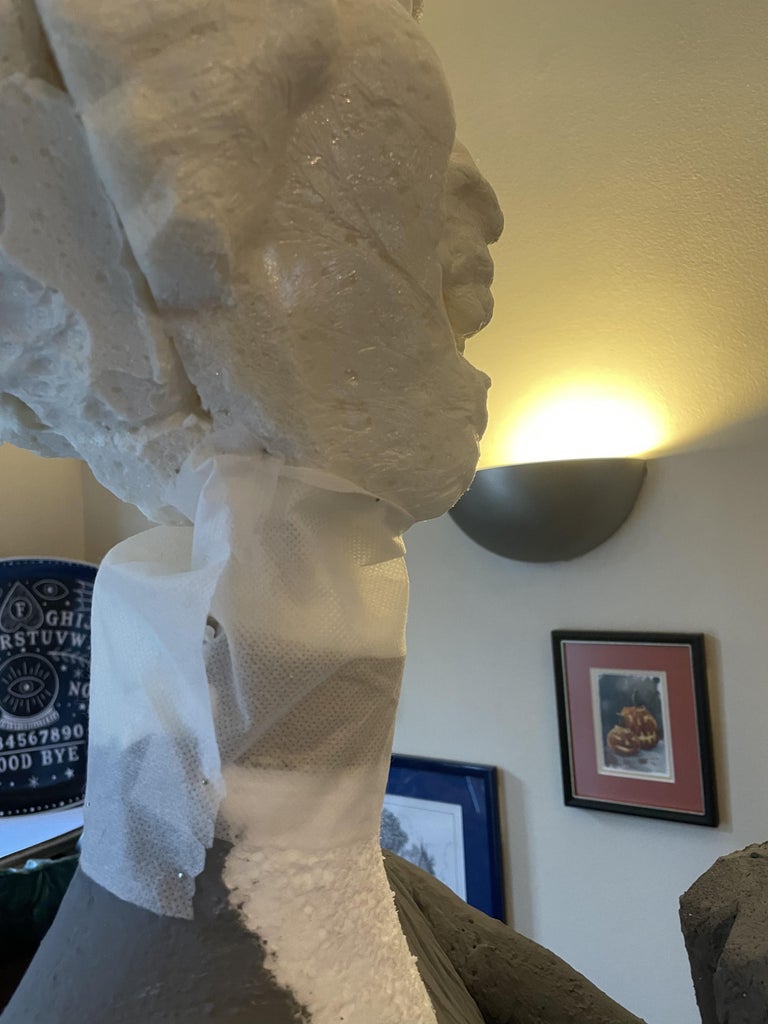
I tested the angle of the bottom of neck to make sure that when I pulled the cord her head would move up to the right height, so she's looking straight ahead, but then gravity would pull it forward again when I let go of the cord. And then I realized the neck was WAY too long so I cut it back and repeated the whole process. Once I was happy with the height and the angle, I glued it in place with Gorilla glue and then added more expanding foam around the sides and back.
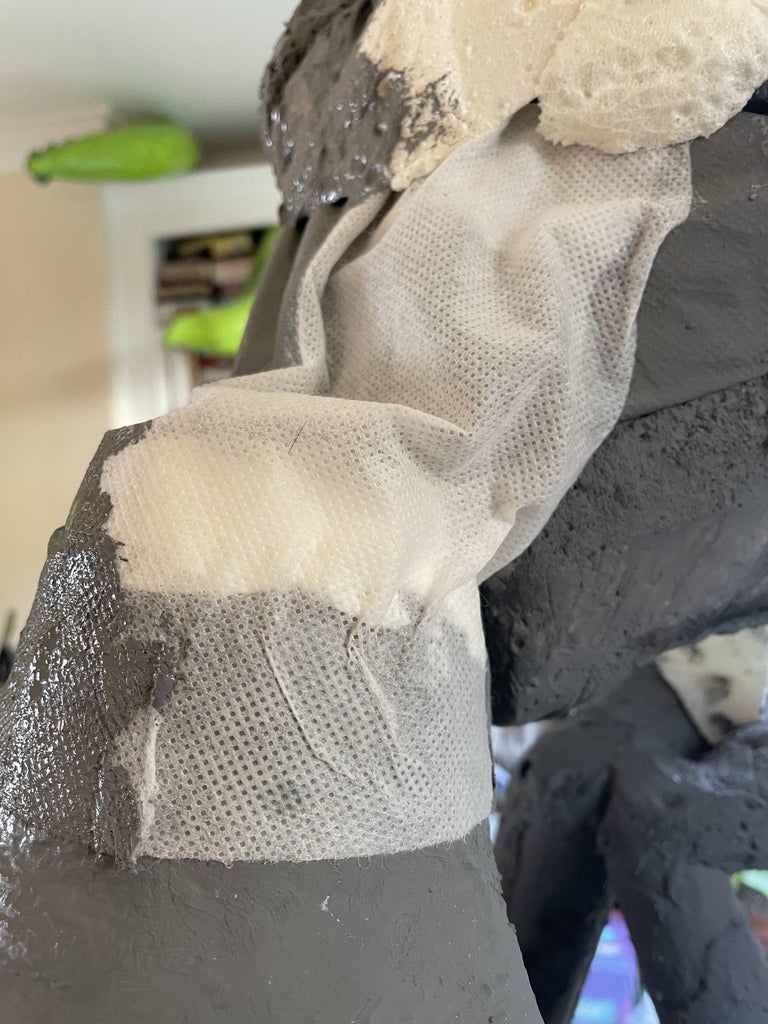
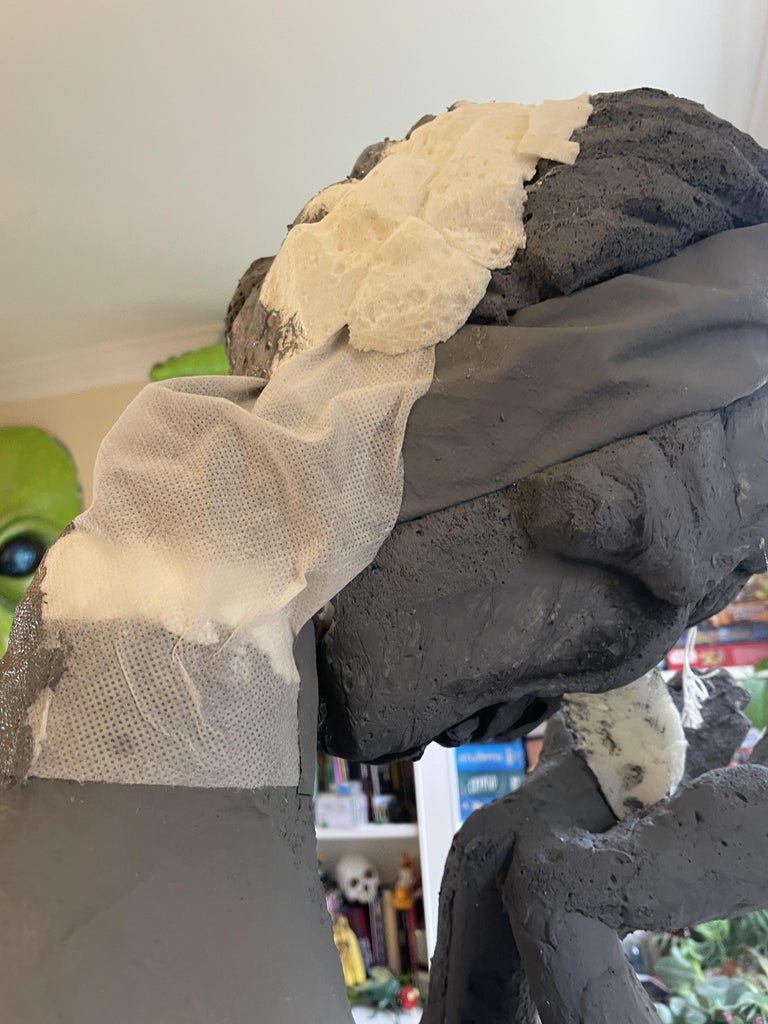
The trickiest part was figuring out what to do with her throat, since it couldn't be solid but I didn't want a visible gap. I decided on painted fabric all the way around the neck to disguise the gaps. The shape is a little funny from the back but it won't be too visible.
I'd definitely do things differently if I had more time, but at this point it was October 26 so it was going to be good enough. I wonder if one of those flexible dryer vent tubes might be a good solution. If you try it please show me the results!!
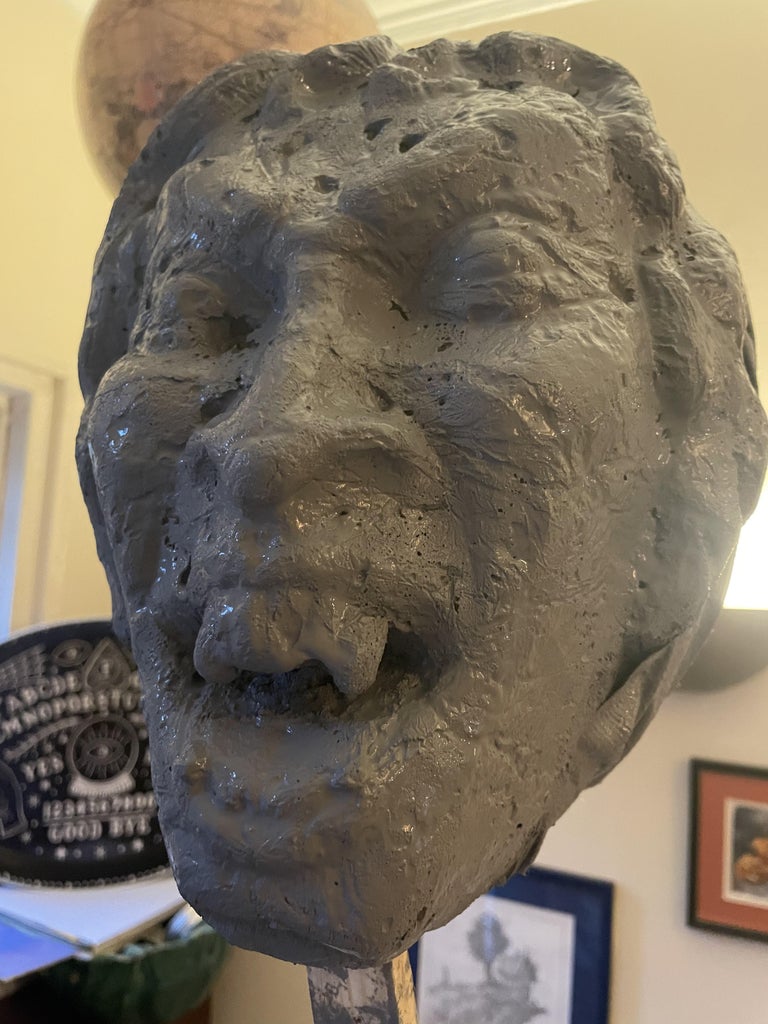
Step 12: Everything's Better With a Little Shading
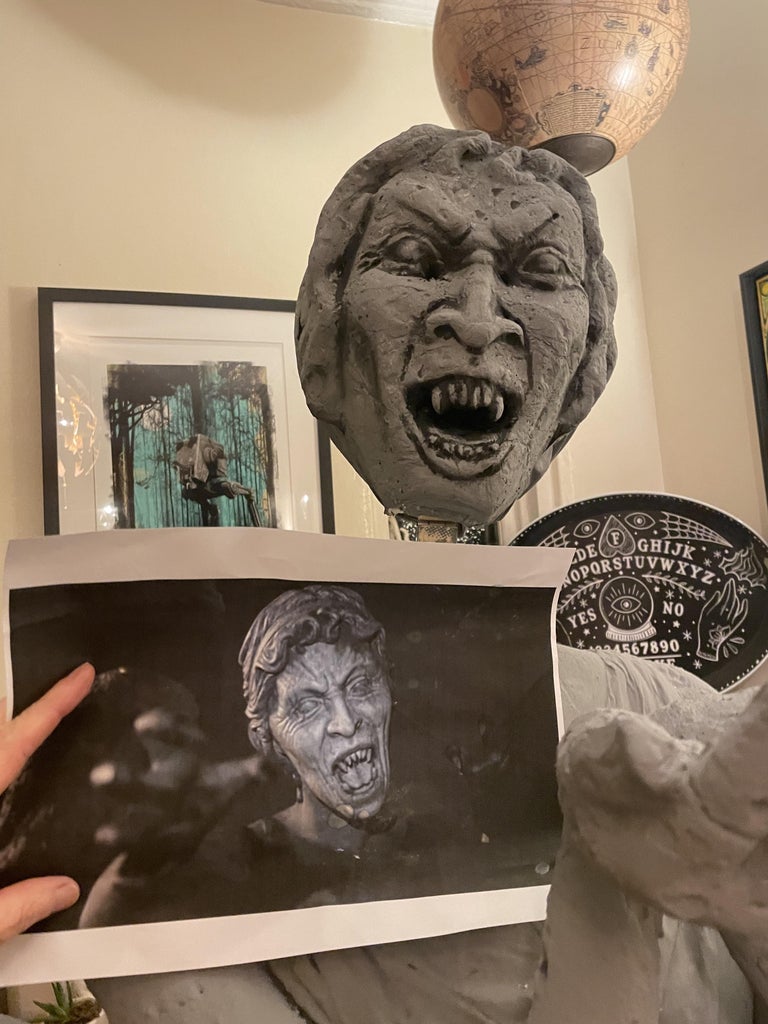
I decided a little shading on the face would make her teeth pop and help disguise the bubble on one of her eyes. I was tempted to add a little shading on the body too, but decided I'd better get her outside before Halloween!
Step 13: Installation
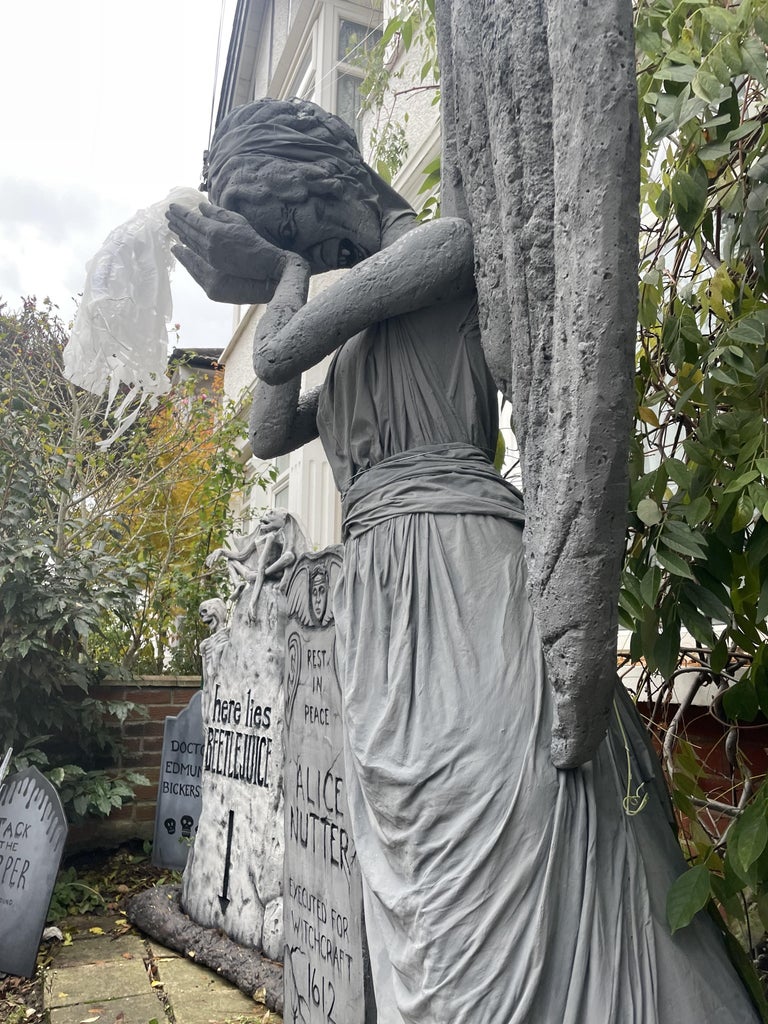
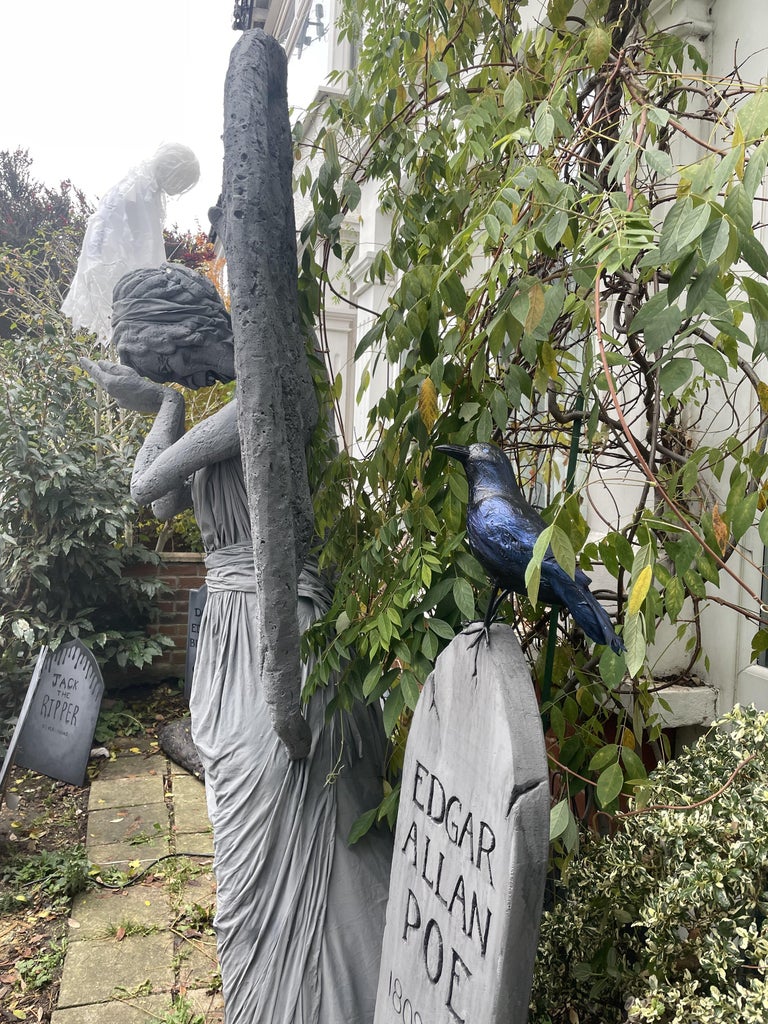

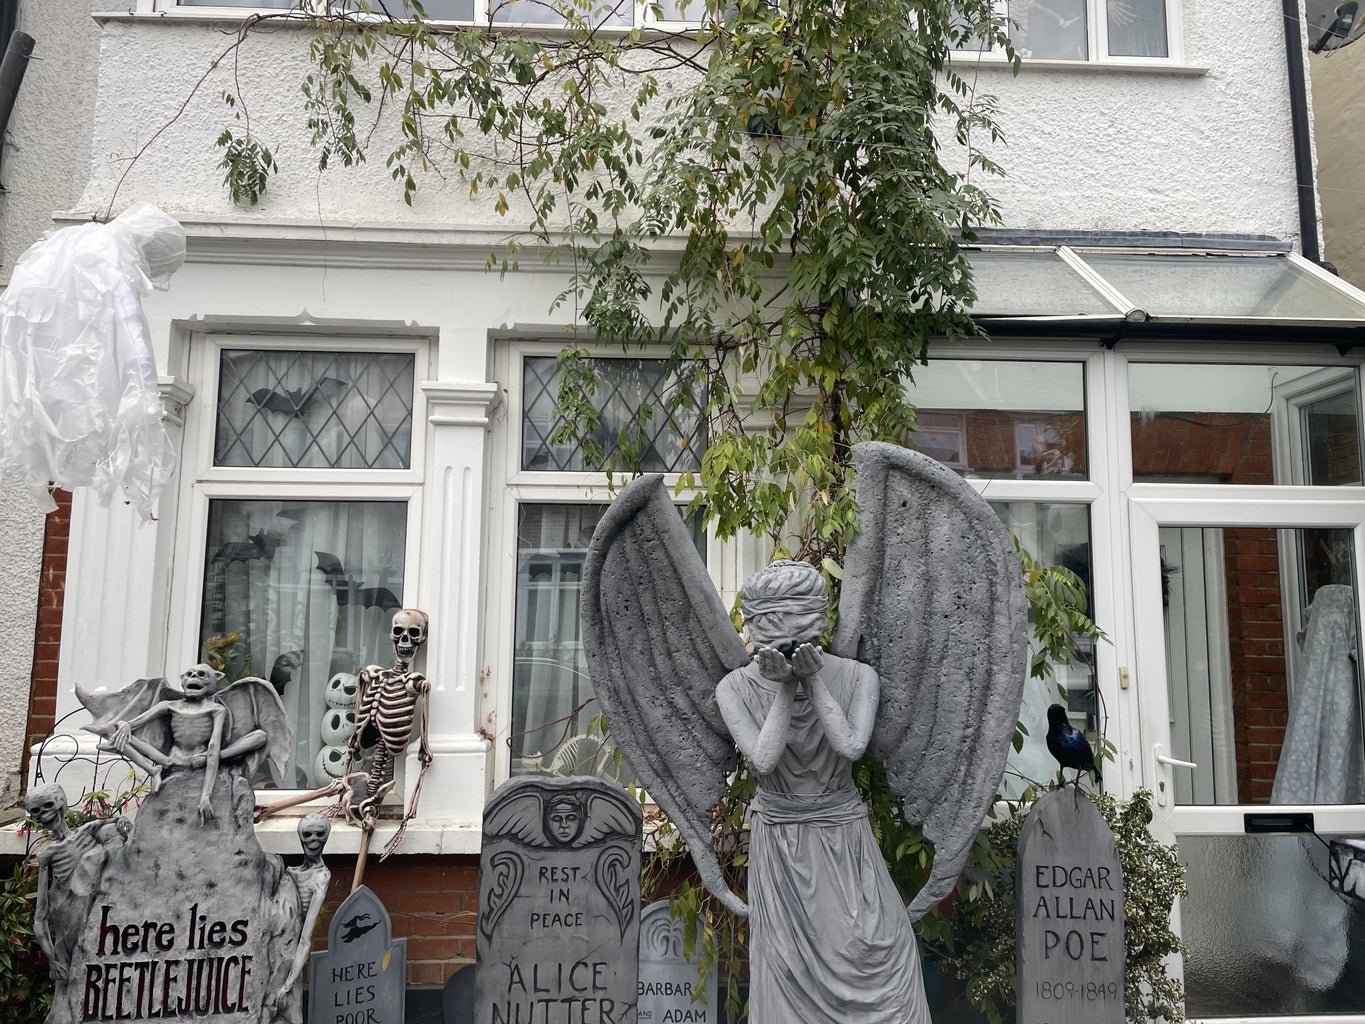
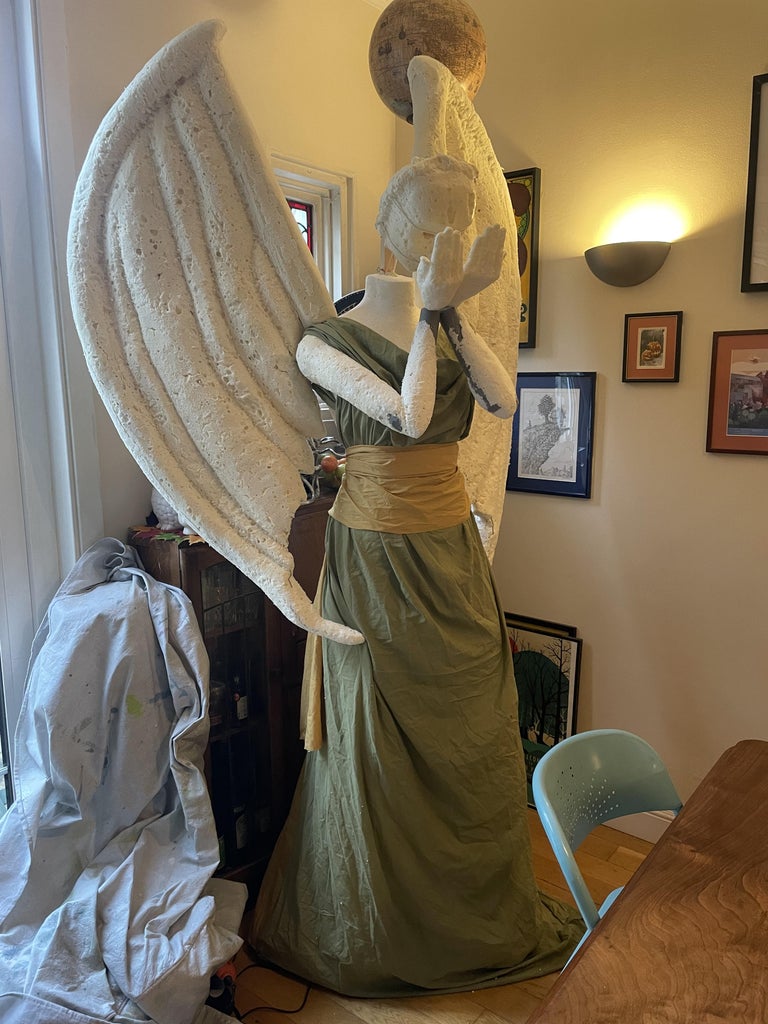
It finally stopped raining for a few minutes (ah, October in London) so I got her set up outside, attached her wings, and added a few bricks on top of the base to help stabilize her. A sudden gust of wind (yep, that's October in London) made me realize I should also wire her in place, so I looped a wire around her waist and anchored it to a trellis.
I attached fishing line to the cord coming out the back of her head, and I looped that up through an eye hook mounted just below the upstairs window of the house. The line comes back down (behind the overgrown vines) and is hooked near the front door. It's a slightly awkward location, but I don't have much room to work with. It would be fun to operate her from somewhere hidden, so I could scare people more effectively, but it'll be chaotic enough during trick or treat that I think it'll work pretty well.
Step 14: Somebody Call the Doctor!

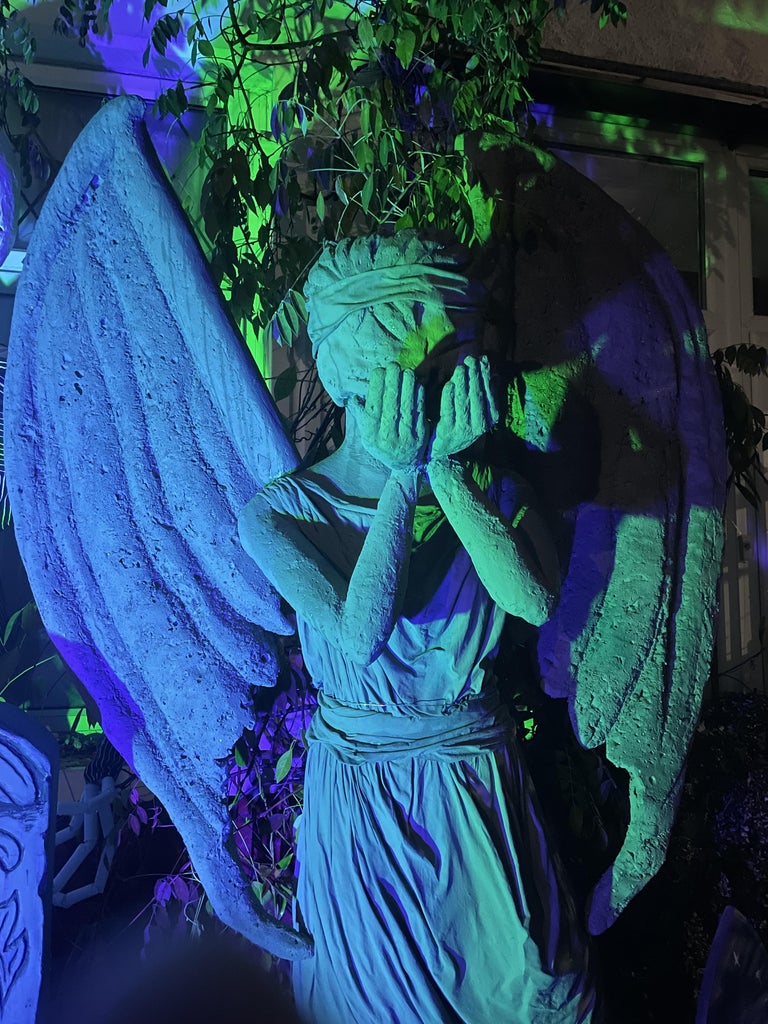
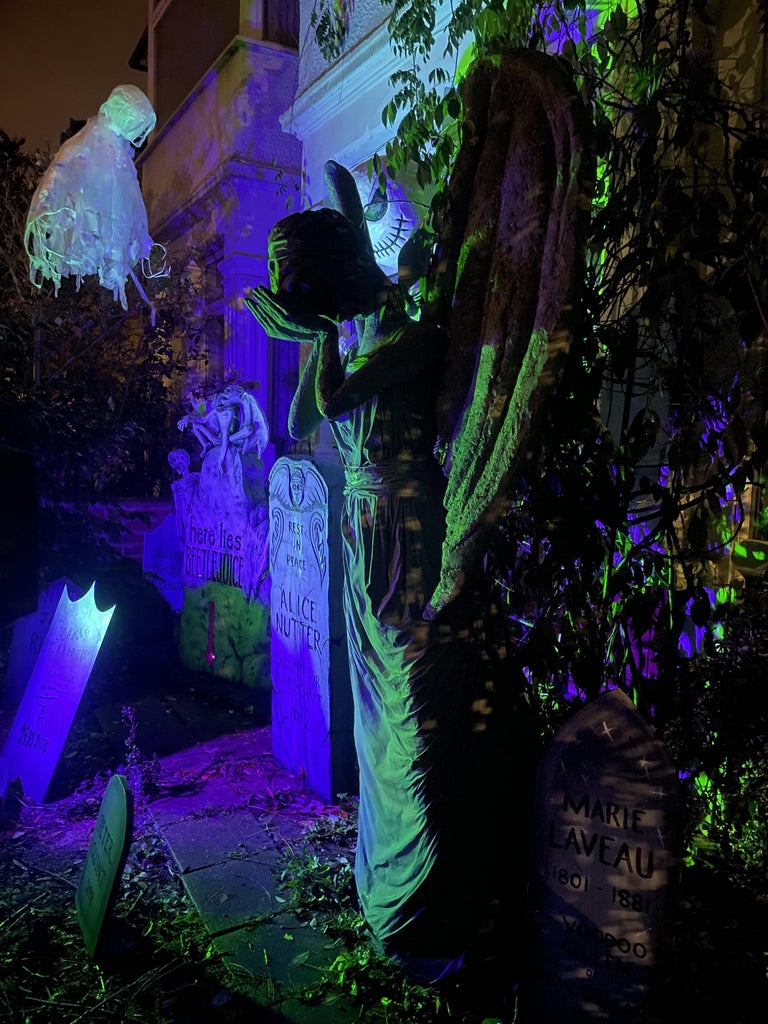
She's installed in the cemetery and ready for her big night!

Seventh Prize in the
Halloween Contest


26 Comments
11 days ago
Amazing! The weeping angels are one of my favourite parts of Dr. Who!
Reply 10 days ago
Thank you! :-)
12 days ago on Step 14
Hi! I just happened by this instructable and I loved how you described the process so clearly that I actually could do it. Mainly I just enjoyed watching your build come to life and the weeping angels scared the hell out of me!
Reply 12 days ago
Thank you! She continues to scare me because she's currently right outside our back door and I'm often *not quite sure* if she's in the exact same position as the day before!
The monster mud is holding up really well so far. We have very limited storage so she's still out in the backyard until I figure out if I can squeeze her into our loft (also it's fun to scare the neighbors and/or my family). The foam is still is great shape and the only place there's any damage is on one section of the fabric, but only in the area where I used a wire to hold her in place so she wouldn't get blown over by windy London weather.
Reply 12 days ago
I was also wondering if that monster mud hold up when it is rainy, since I live in the midlands?
4 weeks ago
What an epic creation! Extraordinary detail. Very well done!👏
Reply 4 weeks ago
Thank you!!
6 weeks ago
Folks argue over who the scariest villains are in Doctor Who and my bet is definitely weeping angels! You did a fantastic job making this one and inspired me to try to make one also. Not sure what I’ll do with it afterwards because my youngest daughter would delight in scaring the living daylights out of me by moving it to where I would come up on it suddenly! Your instructions are spot on and easy to follow so thank you for that also. Having a step by step guide cuts down on my chances of screwing up. Great build and great instructions and share!
Reply 5 weeks ago
They're SO much scarier than silly garbage-can Daleks! Good luck with your build and I hope your daughter has many hours of fun scaring the heck out of you with it afterwards :-)
6 weeks ago
Fantastic job! Wish I could have seen it in person!
Reply 5 weeks ago
Thank you! :-)
6 weeks ago
I'm curious about the plaster you use to mold the hands as plaster has the potential for serious problems:
https://www.thoughtco.com/plaster-of-paris-exother...
https://josr-online.biomedcentral.com/articles/10....
Other than that, this angel is so amazing it seems a shame to put it away until next Halloween and instead might be a treat for the unsuspecting if left out year-round while half-hidden in some bushes with a scary garden gnome. Well done!
Reply 5 weeks ago
Good point -- always important to be safe with materials! The British-made gypsum plaster I use is considered completely safe by EU standards, and I wear a mask when I'm mixing it. I don't wear gloves, but my skin contact is usually minimal. As for the risk of burns, I don't recommend completely submerging your hands in plaster (for one thing it might be hard to escape!) but as you can see from my hand molds, I only put the backs of my hands in -- the palms aren't visible in the build anyway. If someone was really set on full-hand casts, there are alginate casting kits that would work better than plaster.
And I'd *love* to keep her up all the time, but I'm in London and we have really small yards... and I worry the neighbors might kill me :-)
6 weeks ago
Well I know what I’m building in the lead up to next Halloween- I’m not sure I have the skills to do it but I’m imagining it might be fun to attach it to some basic facial recognition so when it recognizes that a person is nearby it drops and hides its face.
Reply 6 weeks ago
That would be amazing! Please share if you figure out how to do it because I would LOVE to see that in action!
6 weeks ago
Absolutely stunning build, but I think you may have mis-spelled the name on onenof the headstones. Agnes Nutter is the author of "the Nice and Accurate Prophecies," though that might not be the reference you were going for.
Reply 6 weeks ago
Thank you! :-)
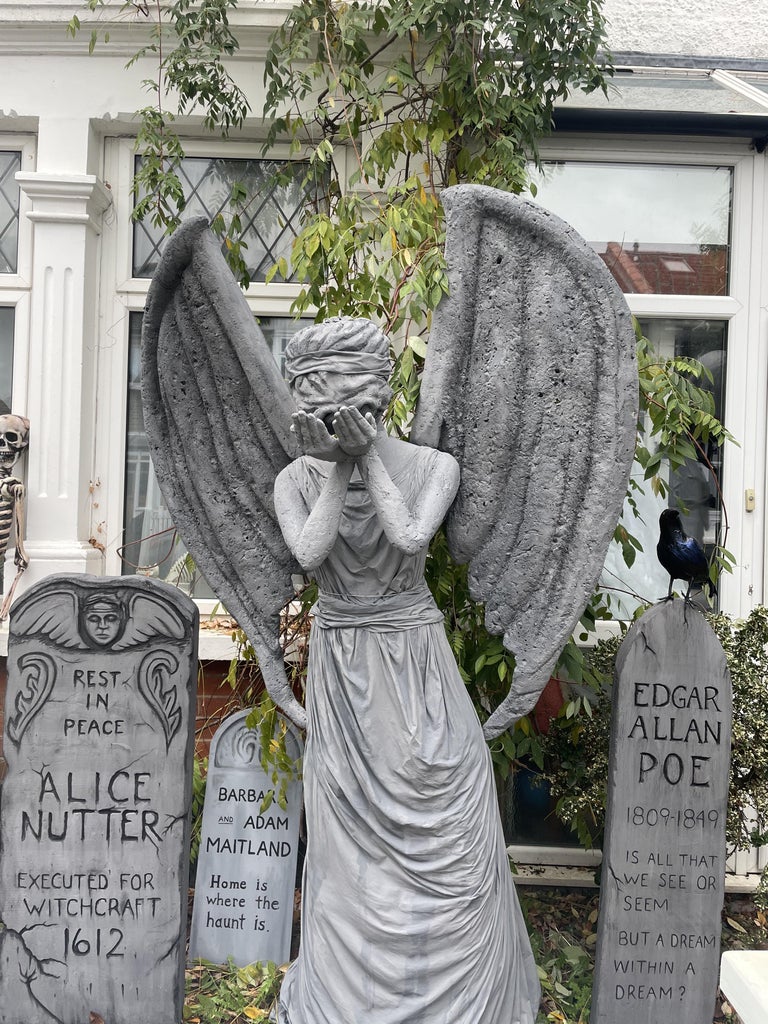
Though Good Omens is one of my favorite books, I was actually referencing the real woman who was accused of witchcraft in Britain's Pendle witch trials of 1612. Alice Nutter and several members of the Device family were executed for witchcraft and Gaiman and Pratchett were referencing them with the character names in the book https://en.wikipedia.org/wiki/Alice_Nutter_(allege...
6 weeks ago
Very cool! I always wanted one that was hidden or far away as the kids approach the door and pops out or gets close after they get their treats and turn to leave. Aaaaaaahhhhhhh!!!
Reply 6 weeks ago
Ooh, yes! That's a great idea!
6 weeks ago
Woohoo! It looks like I can reuse the head mold to make Weeping Angel masks!