

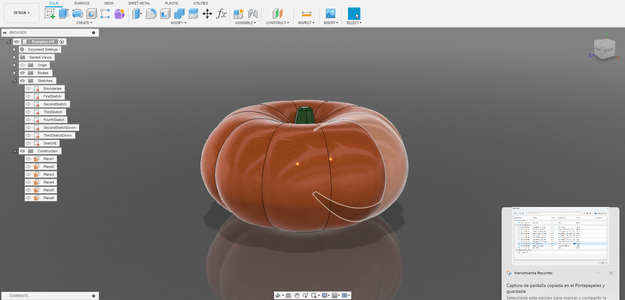
Introduction: The Parametric Pumpkin: Your Halloween, Your Way


Welcome to "The Parametric Pumpkin," a project designed for those who love to decorate and are passionate about 3D printing. Here, you can easily create your ideal Halloween decoration. Adjust one parameter to make it the size you prefer, and resize the face to match your creative vision. It's Halloween on your terms. Let's get started!
Supplies
- Fusion 360: 3D design software.
- 3D Printer (Optional).


Step 1: Preparation
Before we dive into sketches, let’s define some parameters to streamline our workflow and keep things organized. Follow these steps:
- Open Fusion 360 and navigate to the “Modify” tab in “Solid.”
- Within the “Modify” tab, you’ll find the option “Change Parameters.”
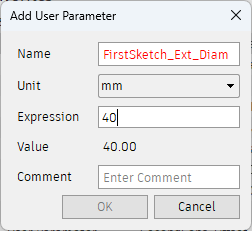
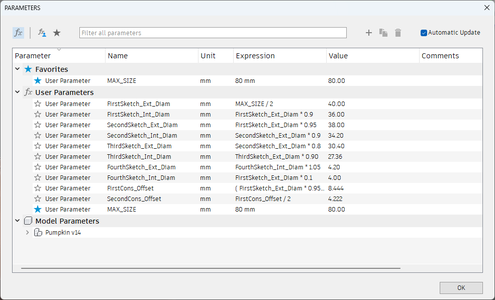
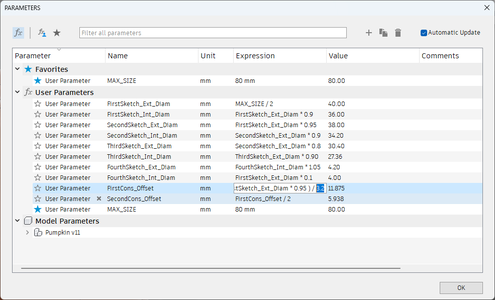
- Now, add the following parameters with their respective values:
- MAX_SIZE = 40
- FirstSketch_Ext_Diam = MAX_SIZE/2
- FirstSketch_Int_Diam = FirstSketch_Ext_Diam * 0.9
- SecondSketch_Ext_Diam = FirstSketch_Ext_Diam * 0.95
- SecondSketch_Int_Diam = SecondSketch_Ext_Diam * 0.9
- ThirdSketch_Ext_Diam = SecondSketch_Ext_Diam * 0.7
- ThirdSketch_Int_Diam = ThirdSketch_Ext_Diam * 0.9
- FourthSketch_Int_Diam = FirstSketch_Ext_Diam * 0.1
- FourthSketch_Ext_Diam = FourthSketch_Int_Diam * 1.05
- FirstCons_Offset = (FirstSketch_Ext_Diam *0.9)/3.2
- SecondCons_Offset = FirstCons_Offset/2
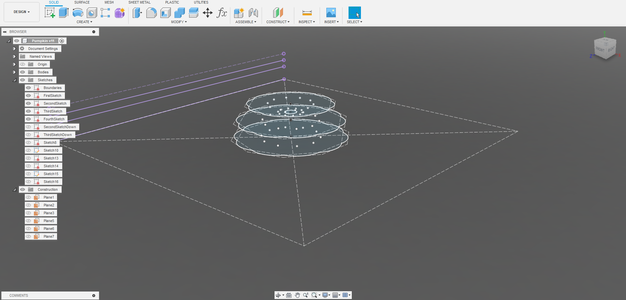
These parameters will be used throughout the process and later, I’ll show you how to adjust them. The initial images are for reference, giving you an idea of how they will look and how to configure the values.
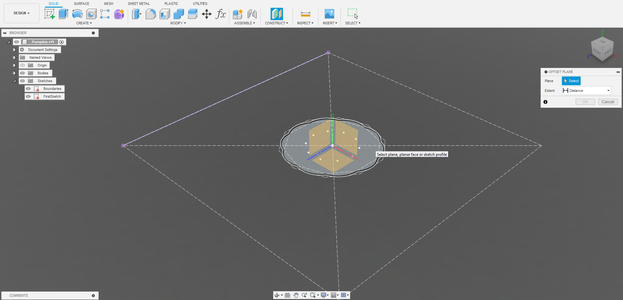
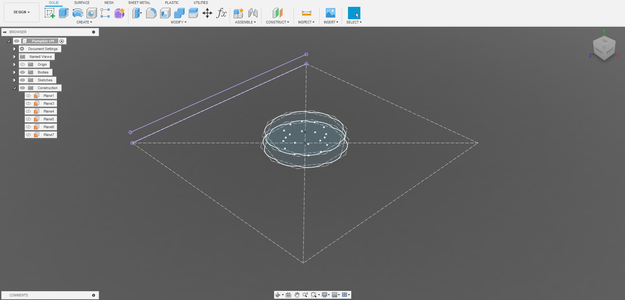
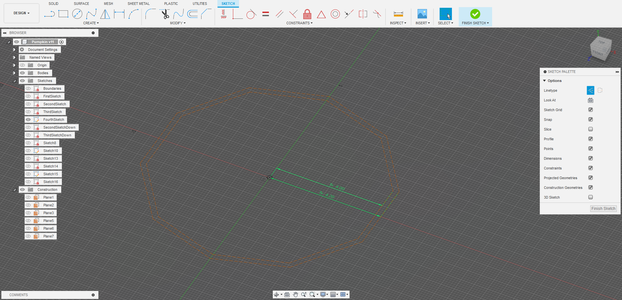
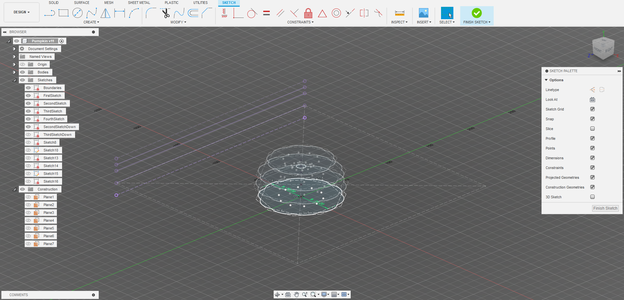
Step 2: Set Boundaries
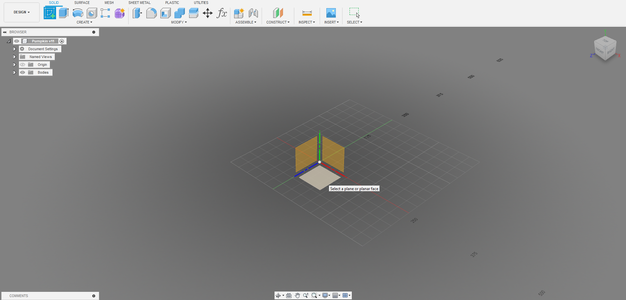
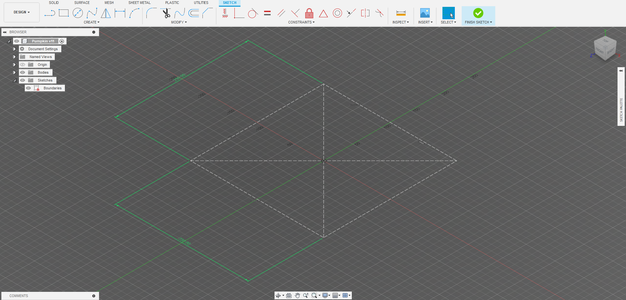
In the “Create” tab under “Solid”, ” Surface,” ”Sheet Metal,” or “Plastic,” you’ll find “Create Sketch”. Click on it to create a sketch on the XZ plane.
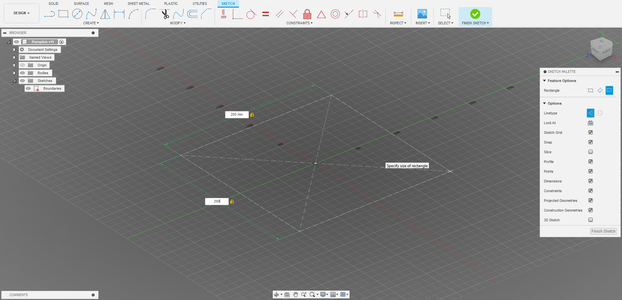
- In this sketch, use the “Center Rectangle” tool with the construction line type activated located under “Rectangle” in the “Create” menu.
- Click at the center of your sketch and set the dimensions to the maximum size your 3D printer can handle. For instance, input these values if your printer’s bed size is 200mm x 200mm. This sketch will serve as a reference for constraints later on, ensuring that your model maintains its shape when you modify parameters after completing the model.
- Finish the sketch and name it “Boundaries.”
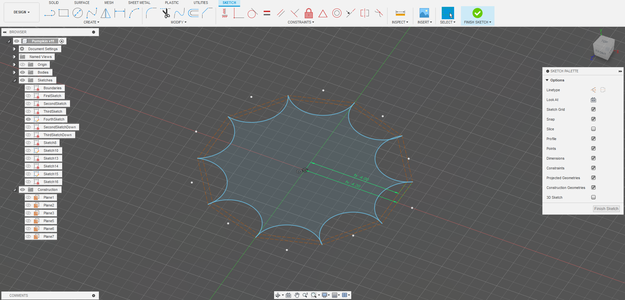
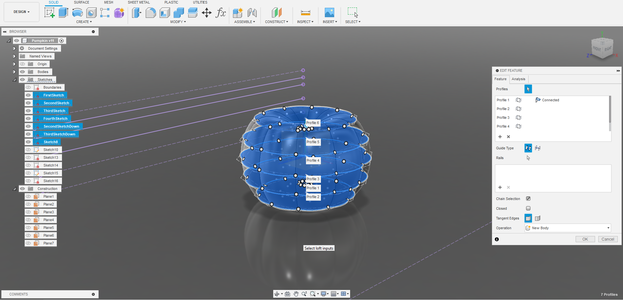
Step 3: Pumpkin Shape.
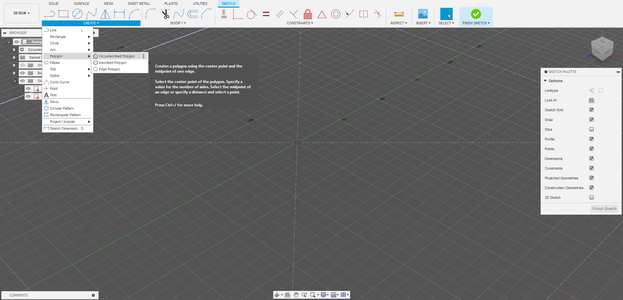
Now that we've visually defined the boundaries, let's create another sketch on the XZ plane.
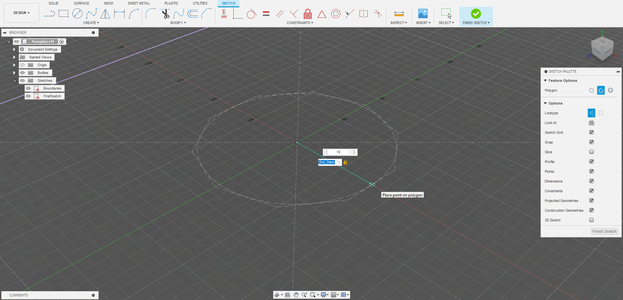
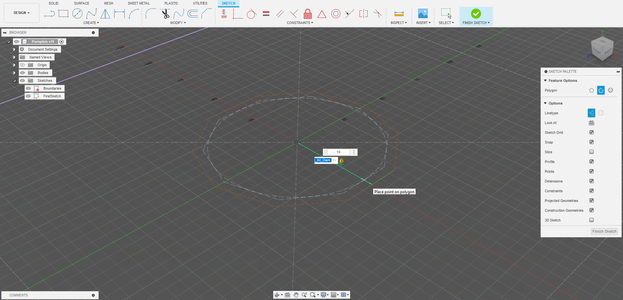
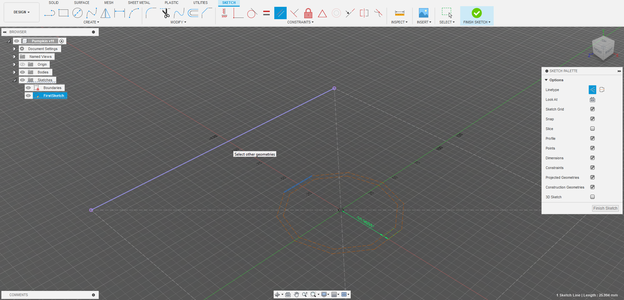
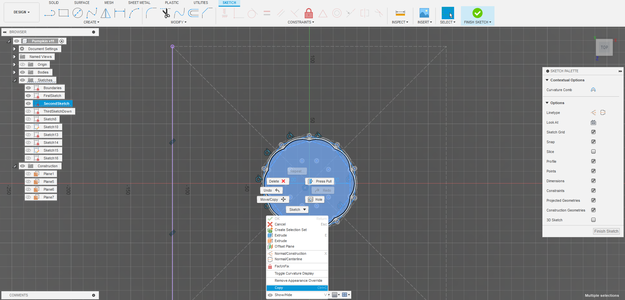
- While in the sketch, we'll use the "Circumscribed Polygon" tool, found under "Polygon" in the "Create" menu.
- Create it from the center of the sketch with the "Construction" line type option enabled to make it a construction line. Set the polygon's size to the "FirstSketch_Ext_Diam" parameter and specify the number of sides; for this example, we'll use 10 sides, but you can choose the best number for you. Repeat this process to create another polygon, using the "FirstSketch_Int_Diam" parameter for its size. Ensure you use the same number of sides for both polygons unless instructed otherwise.
- Next, apply the "Parallel" constraint by clicking on any flat face of the first polygon and then clicking on the nearest wall of the "Boundaries" sketch. Repeat the same step for the smaller polygon.
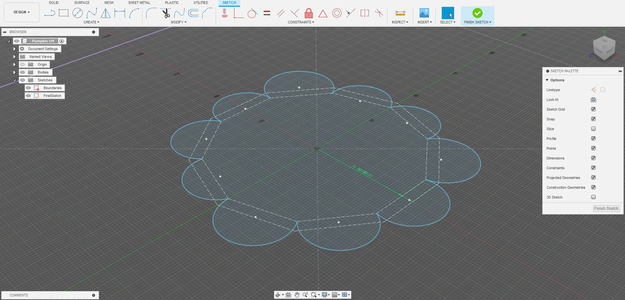
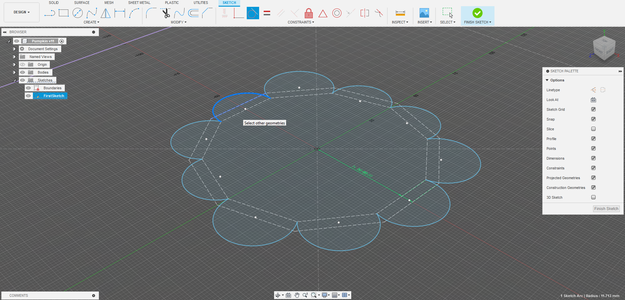
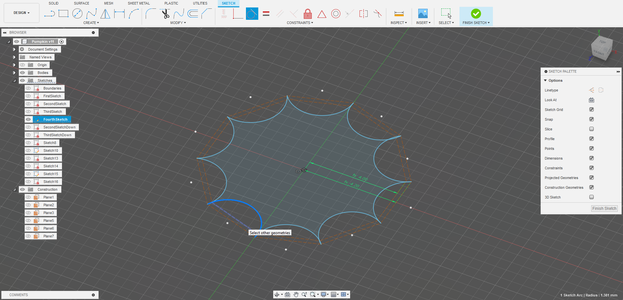
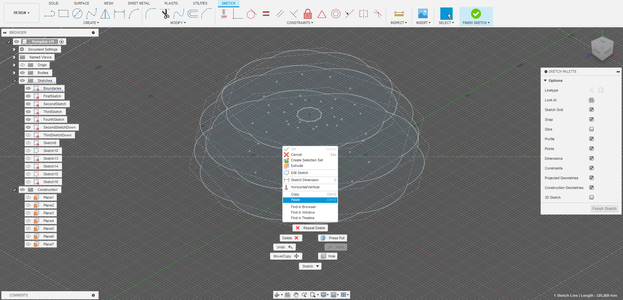
- After creating constraints on both polygons, use the "3 point arc" tool, located in "Arc" under "Create," to create arcs that connect each vertex of the smaller polygon, with the "Construction" line type option disabled. Position the arcs outside the larger polygon, to enable the creation of necessary constraints.
- Once you've completed all sides of the smaller polygon with arcs, use the "Tangent" constraint. Select one of the arcs and then select the nearest side of the larger polygon. Repeat this step for all arcs you've created, following the reference images.
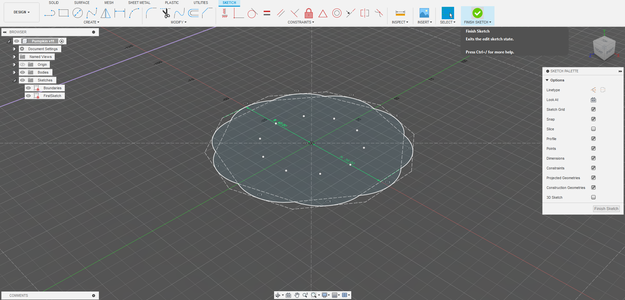
- Finish the sketch and name it "FirstSketch."
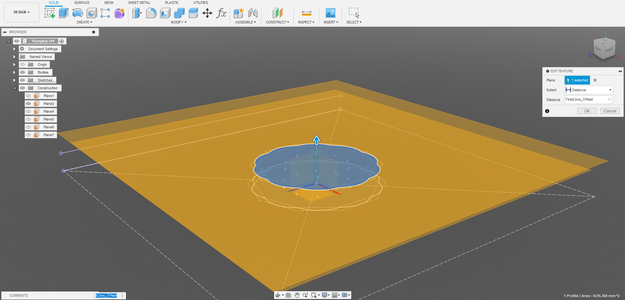
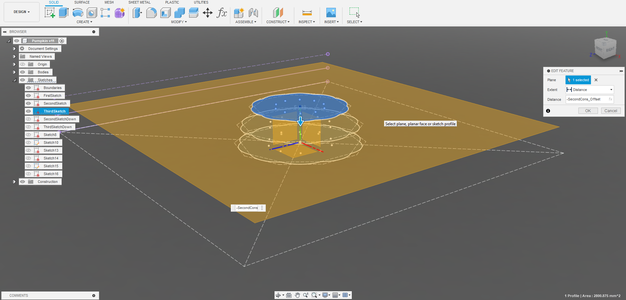
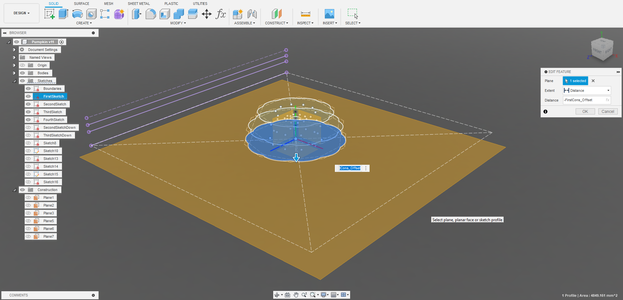
Step 4: Offset Planes
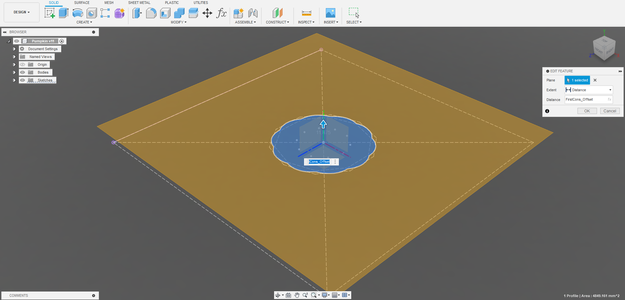
- Utilize the “Offset Plane” tool found under “Solid” and select “FirstSketch.”
- In the “Distance” field, use the “FirstCons_Offset” parameter. This will create a plane that is not at the same height as the first sketch.
Step 5: Repeat, Repeat, Repeat.
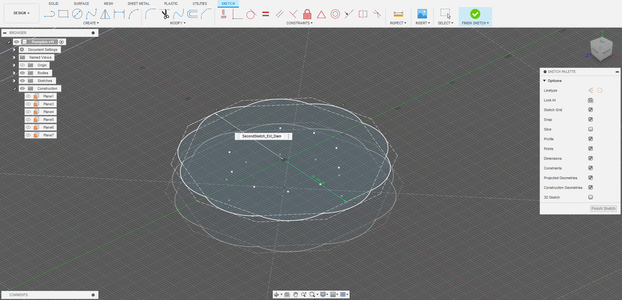
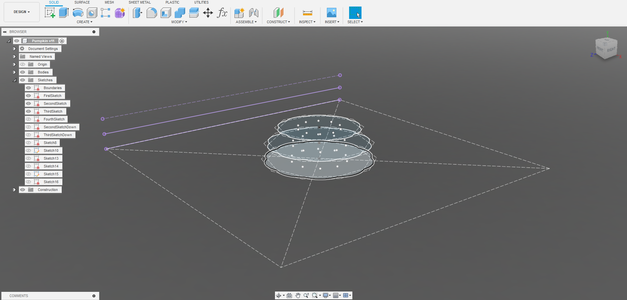
We’ll create a new sketch and repeat the same process from Step 3. However, this time, we’ll change the parameters for both polygons, instead of using “FirstSketch_Ext_Diam” and “FistSketch_Int_Diam” we’ll use “SecondSketch_Ext_Diam” and “SecondSketch_Int_Diam”. The name of the Sketch will be “SecondSketch.” The number of sides remains the same, and all other steps remain unchanged.
Repeat Step 4 with “SecondSketch.”
Next, repeat Step 3 with “ThirdSketch”, making sure to adjust the parameters according to its name.
Repeat Step 4 with “ThirdSketch” but this time, use the parameter “-SecondCons_Offset” which is negative since it should be below “ThirdSketch.”
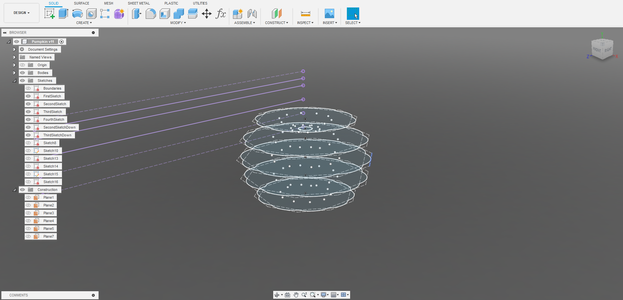
Step 6: Pumpkin Shape 2.0
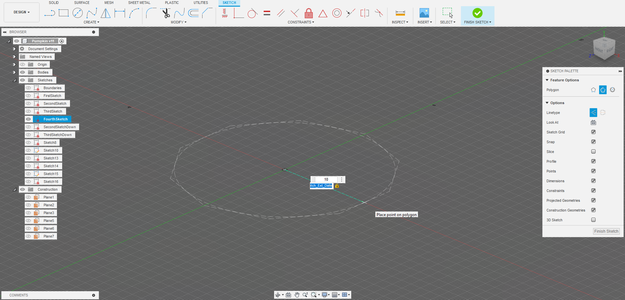
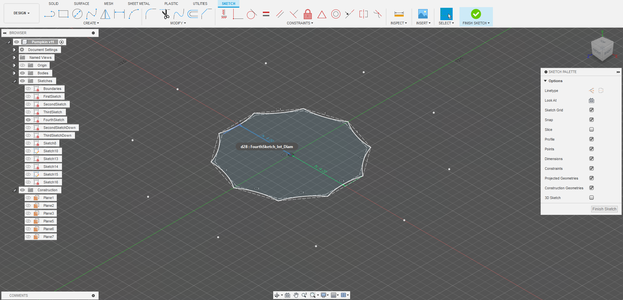
After completing the previous step, follow these instructions:
- Start by creating a sketch on the plane located just below “ThirdSketch”
- Proceed to create two polygons a large one and a small one, with the same number of sides used in previous sketches. This time, use “FourthSketch_Int_Diam” and “FourthSketch_Ext_Diam” as the parameters (make sure to use the parallel constraint with the boundaries walls and polygons).
- Create arcs as before, but now, start connecting edge to edge on the large polygon, and the arcs should be on the side of the smaller polygon, as shown in the reference image.
- Use the “Tangent” constraint, selecting the arc and the closest side of the smaller polygon. Repeat this step for all arcs.
- Finish the sketch and name it “FourthSketch”.
Step 7: Second Half
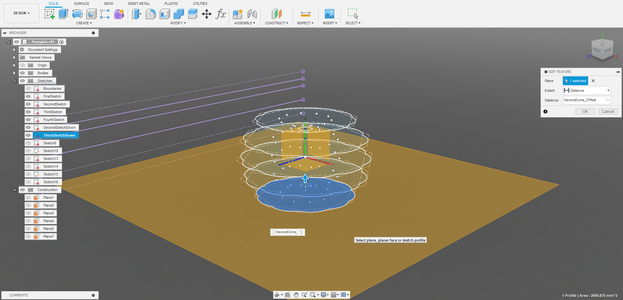
Up to this point, we’ve completed the first half of the pumpkin. Now, we’ll proceed to create the second half. We will begin by copying “SecondSketch” and “ThirdSketch”.
You can choose to do the same for “FourthSketch”, depending on whether you want a pumpkin with a flat base or a round base. For this example, we’ll use the round base.
- Repeat Step 4, but this time, select “FirstSketch” and use “-FirstCons_Offset”. The value is negative since we’re creating the bottom half.
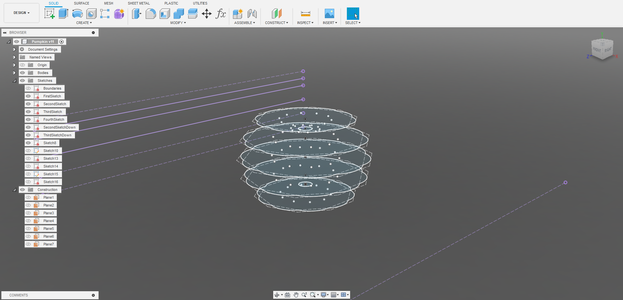
- Open “SecondSketch” and copy both the arcs and polygons.
- Now, paste this into the new sketch and create the same constraints as in Step 3 to ensure everything aligns properly.
- Finish the sketch and name it “SecondSketchDown”
- Repeat the same process for “ThirdSketch” and “FourthSketch”, but this time, use “SecondCons_Offset” instead of “-SecondCons_Offset” to create a plane going upward.
- Copy “FourthSketch” and continue to verify that the constraints are correct.
- Finish the sketch and name it “FourthSketchDown”
This will complete the second half of the pumpkin.
Step 8: Solid Body
Now we'll move on to the simpler and quicker steps.
- Start by using the "Loft" tool located in "Create" under "Solid."
- Select the planes on either the top or bottom side, beginning with one of the "FourthSketch" sketches. There are two possible orderings:
- "FourthSketch," "ThirdSketch," "SecondSketch," "FirstSketch," "SecondSketchDown," "ThirdSketchDown," and "FourthSketchDown."
- "FourthSketchDown," "ThirdSketchDown," "SecondSketchDown," "FirstSketch," "SecondSketch," "ThirdSketch," and "FourthSketch."
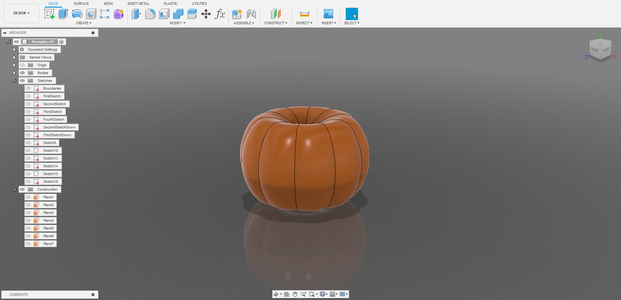
Press "Enter," and you will have the solid body of the pumpkin. Name this solid body "PumpkinMainBody."
Step 9: Pumpkin Stem

Creating the pumpkin stem offers various methods, such as using Sweep, Loft, or Extrude. For this example, we'll use Extrude since the stem will be short and a simpler approach works best.
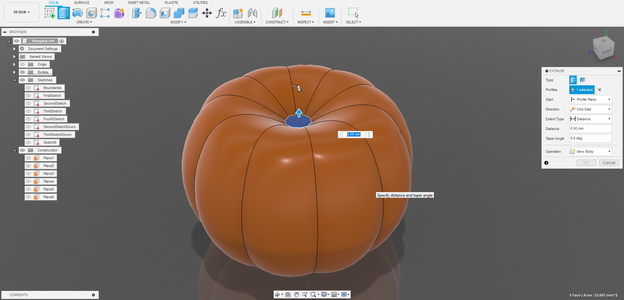
- Start by using the "Extrude" tool located in "Create." Select the flat face on the top of your pumpkin.
- In the "Distance" field, use the "FirstCons_Offset" parameter. For the "Taper Angle," input the value "-10" to extrude the stem toward the center.
- Press "Enter," and your stem will be created.
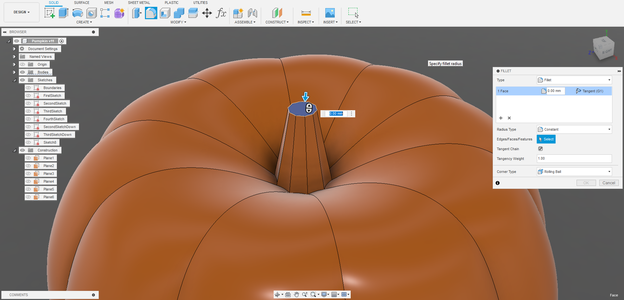
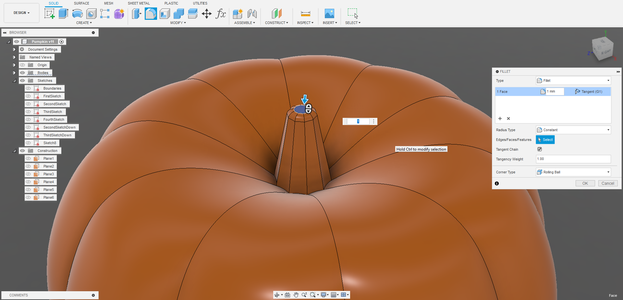
- To finish, apply a "Fillet" to the top face of the stem. The radius you use may vary, but for reference, a 1mm radius is often a good starting point. Adjust it to your preference.
Step 10: Time to Stop
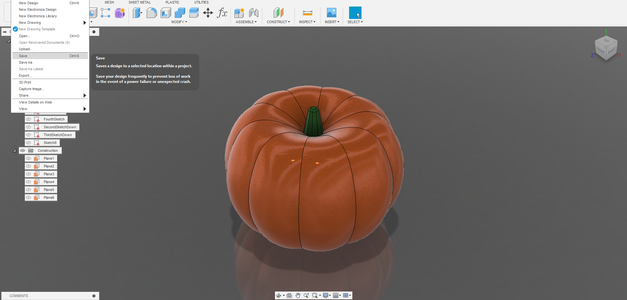

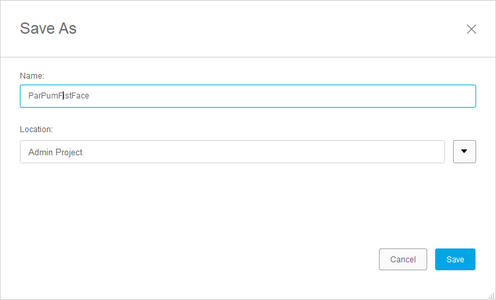

Let's take a moment to save this project. Name it "Parametric Pumpkin." Then, save it again using "Save As," naming it "ParPumFirstFace." This will serve as a backup, preserving your progress on the main shape.
Now that you have a new backup document, feel free to play with the parameters until you achieve a design you like. Normally, you’ll only need to adjust the parameter multipliers to achieve the desired design. If you can't quite get the look you want, you can always revert to the backup. If you like the shape of this pumpkin and want to change only the size, adjust the "MAX_SIZE" parameter to set the maximum size of "FirstSketch," which is the largest part of the pumpkin. With this, you're ready to start working on the faces.
Step 11: Finally, the Pumpkin
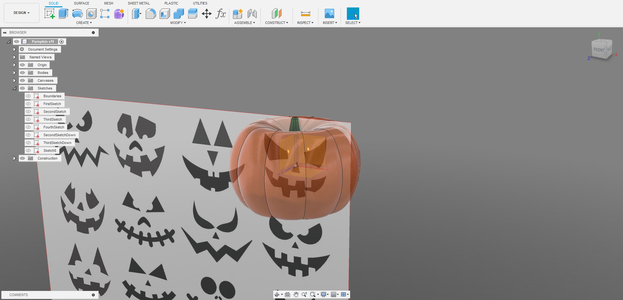
Now that we have the perfect pumpkin shape, let's finish it by adding spooky faces.
- Use "Insert Image" to bring the reference image of the face you want to use onto the XY plane. Scale the image to your desired size relative to the pumpkin.
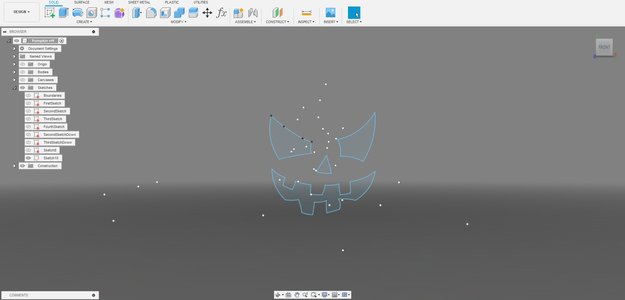
- Create a sketch on the XY plane, and use the "Curves" tool to outline your reference image.
- Upon completing the contours, finish the sketch and extrude it by 50mm with an offset start of “FirstSketch_Ext_Diam / 2”. In the "Operation," choose "New Body," and press "Enter."
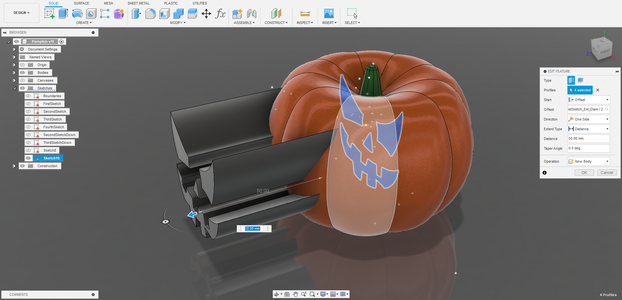
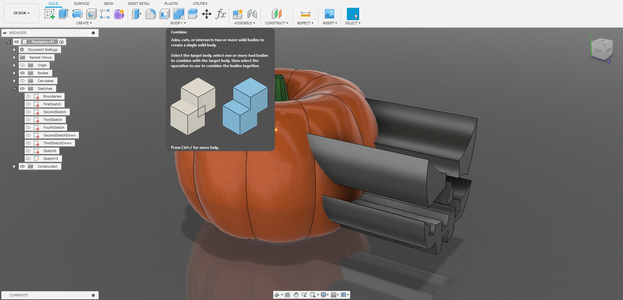
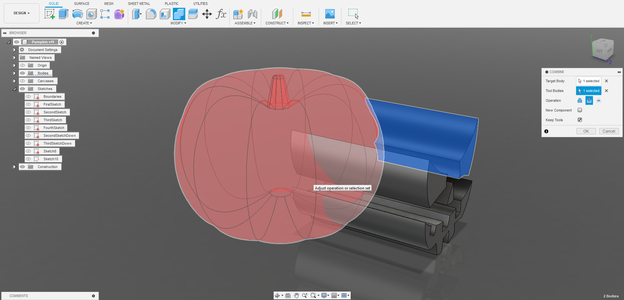
- Next, use the "Combine" tool, located in "Modify." Select one of the face parts you've just extruded, and then select the pumpkin. Set the "Operation" to "Cut" and enable "Keep Tools." Repeat this process for all parts of the face.
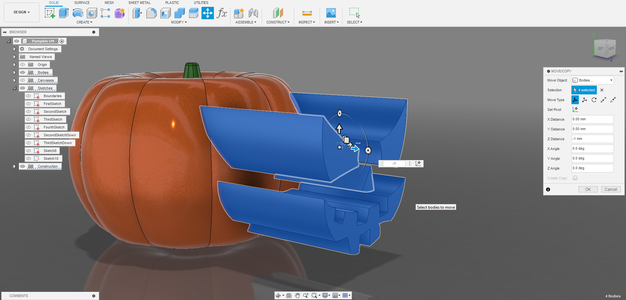
- Move the face parts 1 or 2mm inward into the pumpkin.
- Now, use the "Combine" tool again. This time, select the pumpkin first and then select all the face parts. Disable "Keep Tools." This will create the face cutout while retaining the pumpkin's curves.
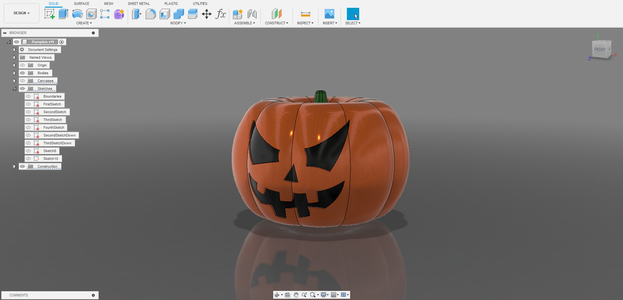
- There are various ways to create a more detailed face, but this method is relatively simple. With this, we conclude the modeling part. You can use this base to create a hollow pumpkin for a candle, or a candy bag, or integrate it into various projects. Now, let's move on to the final step.
Finally, you'll have a Printable pumpkin! I'll leave the F3D and STL files available for download. With this you’ll be able to quickly create a wide range of Halloween projects, making decorations in various shapes. faces and sizes easily.
With this, you've completed your 3D-printed pumpkin project. Enjoy your spooky creation!

Participated in the
Halloween Contest


Comments