

Introduction: Simple Wooden Skeletons
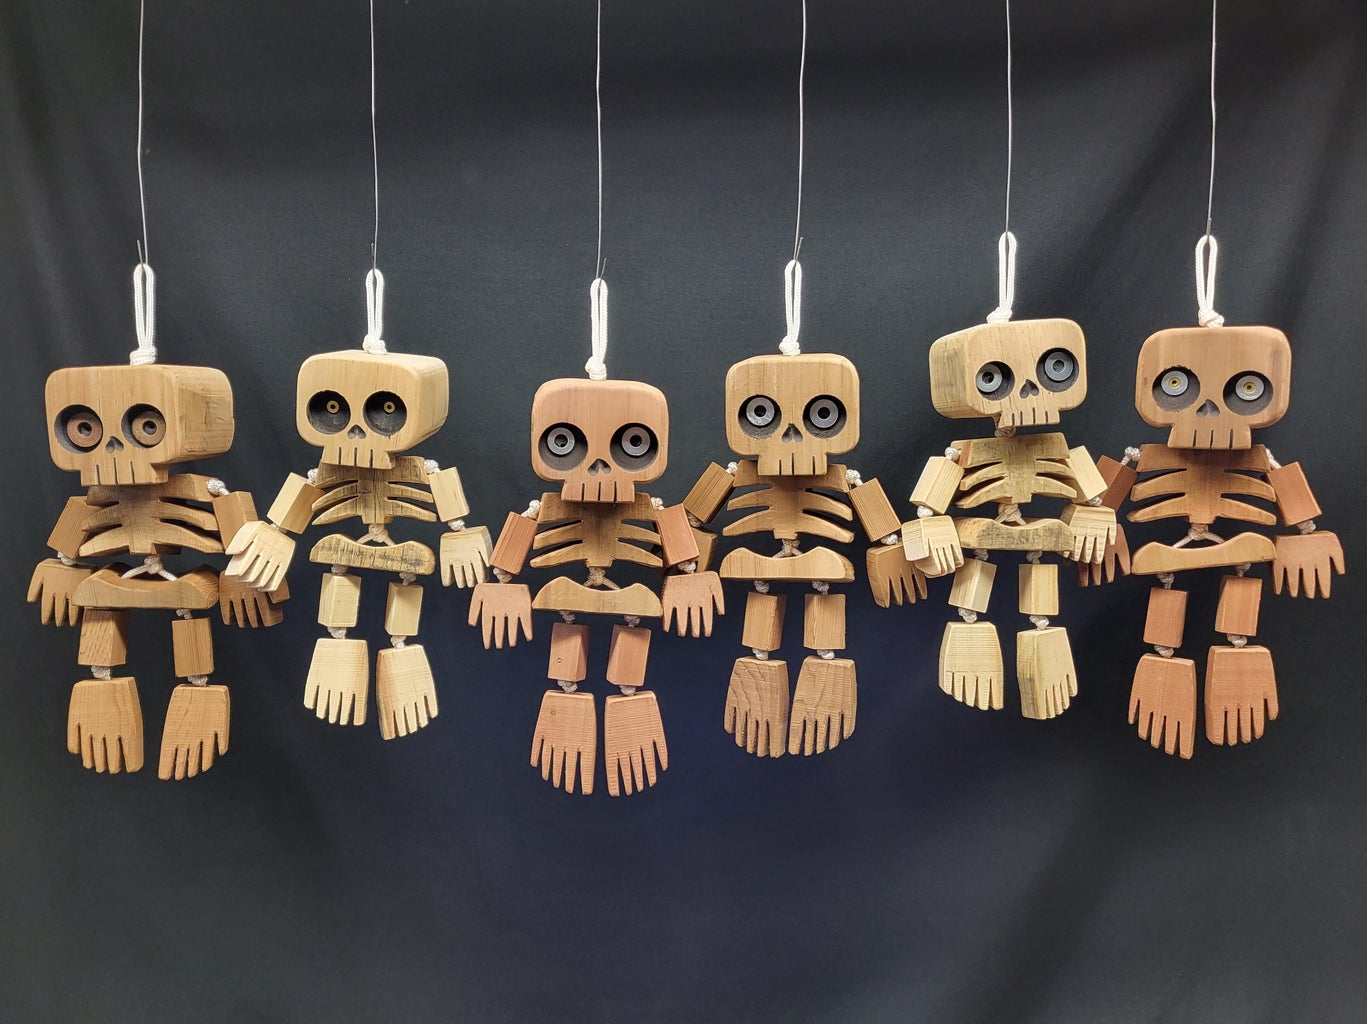
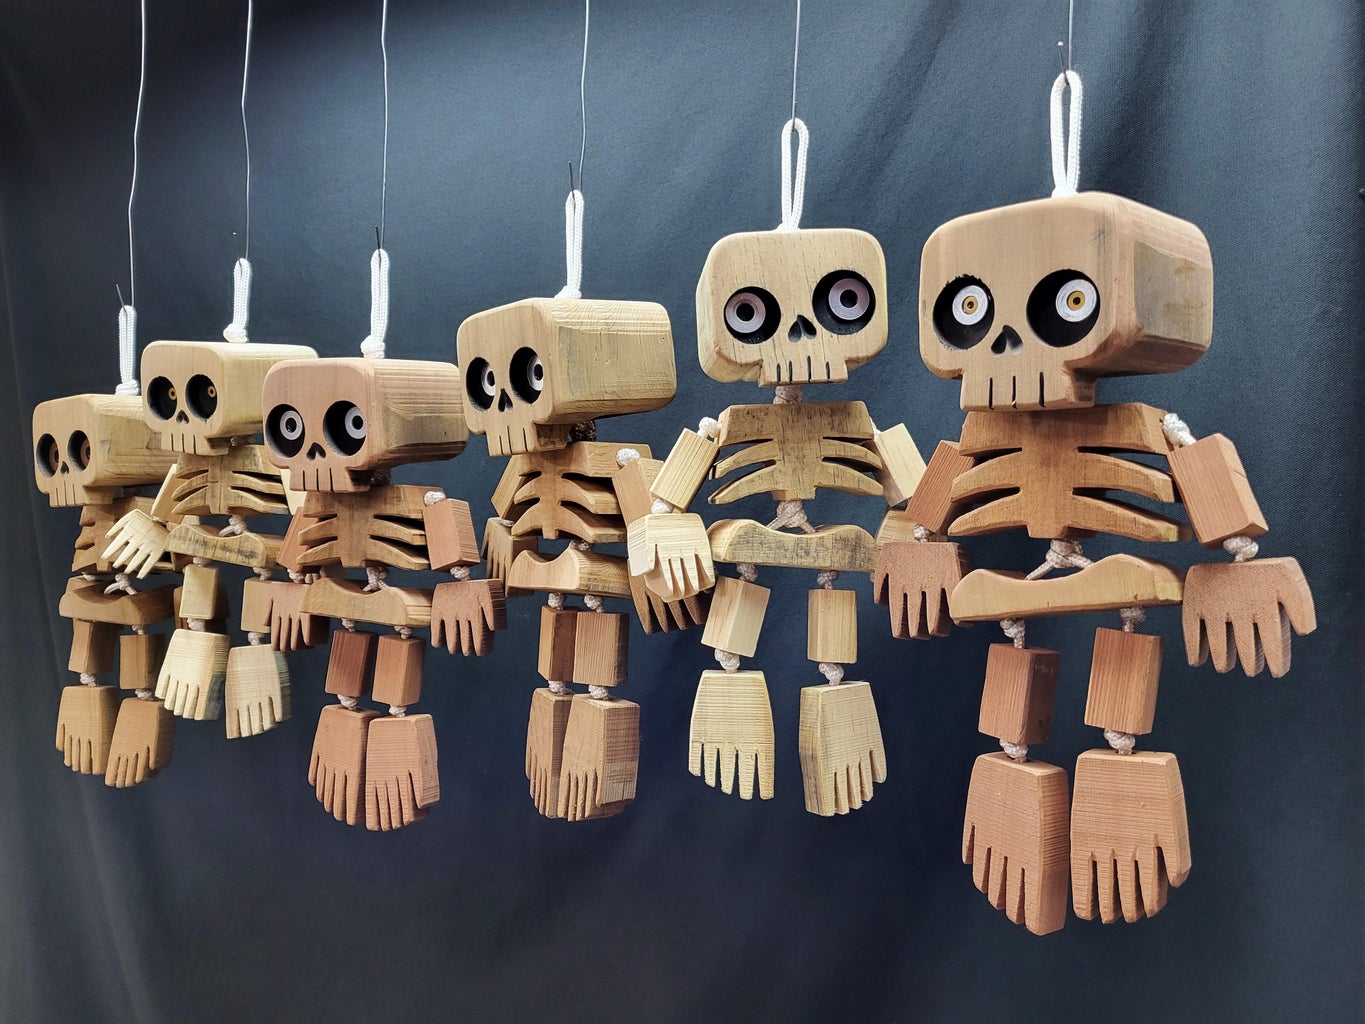


Here are some creepy-cute little wooden skeletons you can make for a bit of handmade Halloween decor.
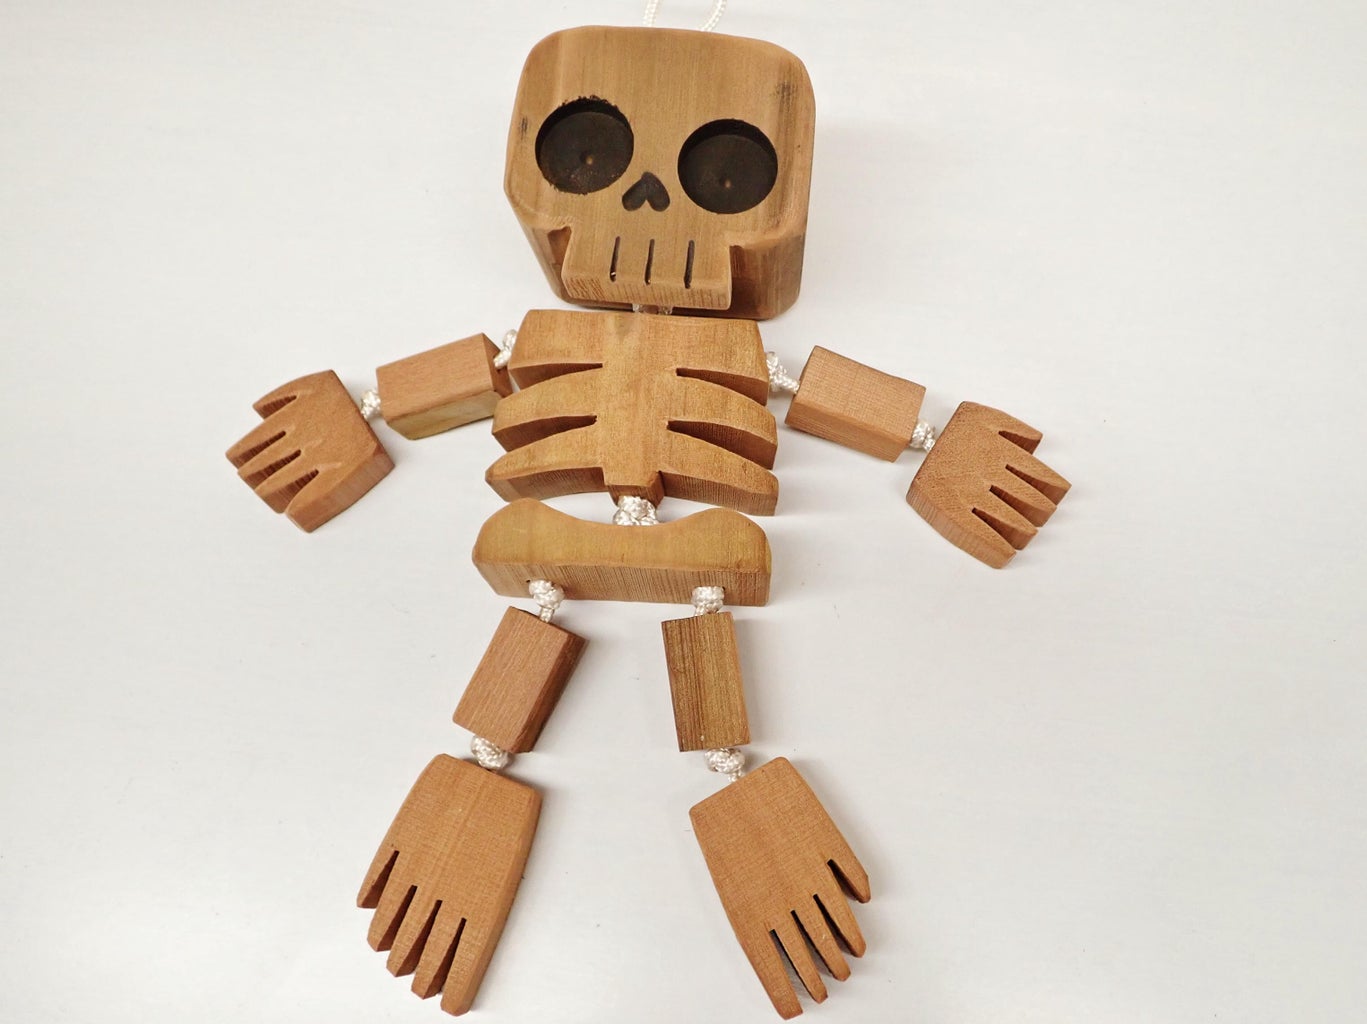
This is an ultra-simple blocky skeleton design that can be made either as a dangly version or as a stand-up posable version. The skull portion by itself makes a cute little decor piece as well!
This is a fun little Halloween project and perfect for new woodworkers.
I hope you'll make some and share your results in the comments! [Update! Many people have - be sure to check out their photos in the comments!]
This design is being shared for your personal non-commercial use only.
Supplies
This project builds on my previous instructable Easy Wood Block Figurines and focuses mainly on the dangly skeleton version, with a step about the stand-up version at the end.
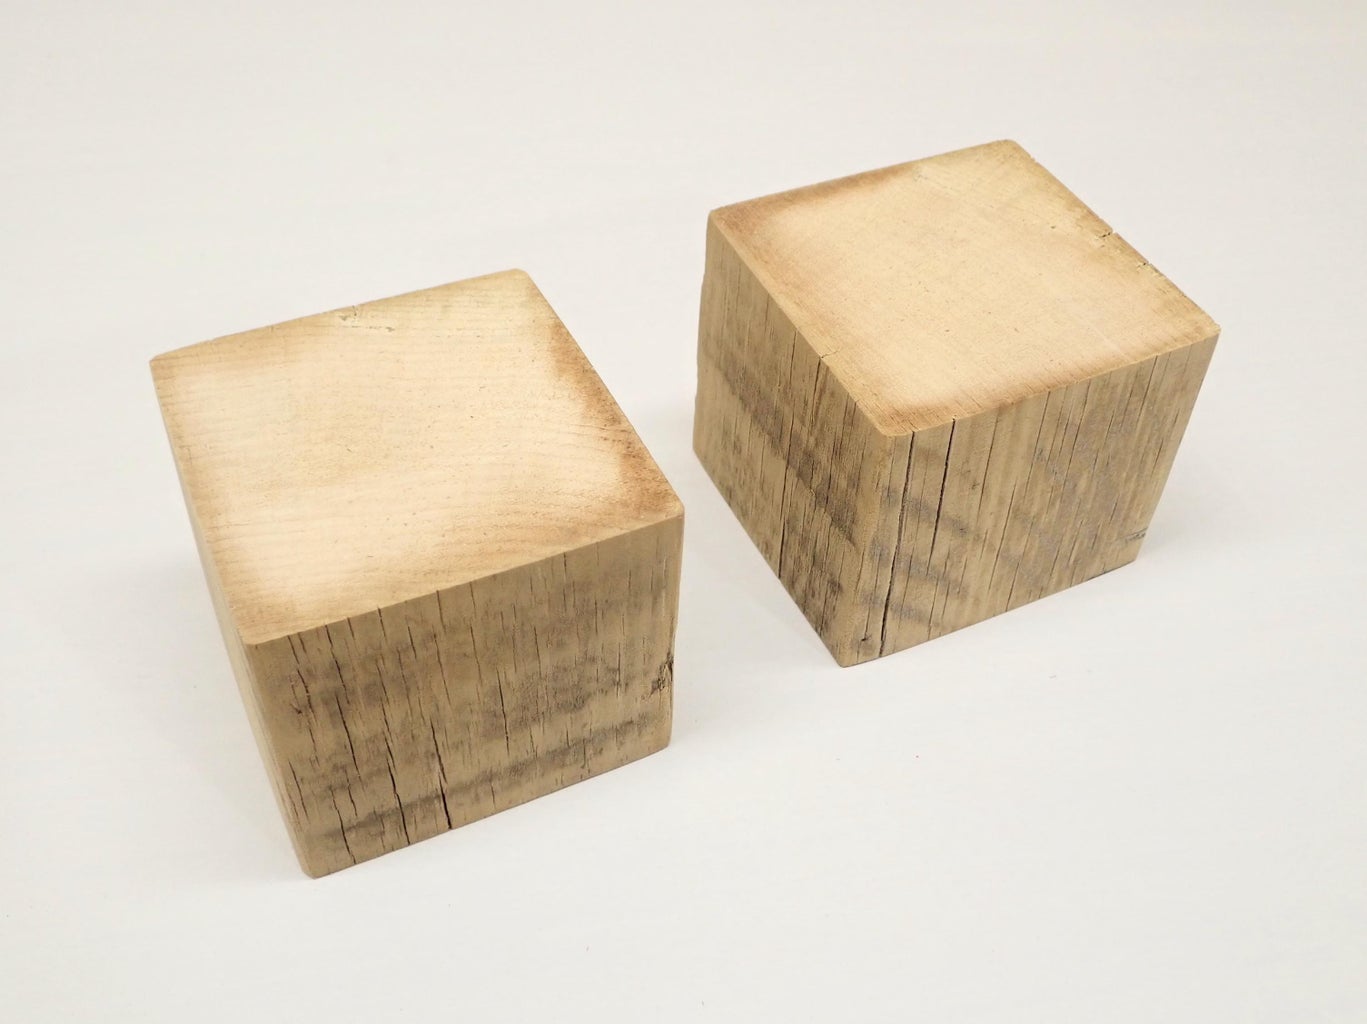
I like to make these out of old pine or cedar fence posts, which are typically about 3.5" square.
I don't recommend using new construction grade pine or spruce 4x4s, as the soft wet wood grain can be tricky to drill as precisely as needed for this project. Old dry fence posts work great and can often be obtained for free.
To make one skeleton figure you need two square blocks that are cut a little short of being a true cube shape - I recommend cutting them 1/8 less tall than they are wide.
You will need a bandsaw (I'm using a 1/4" blade, 6 teeth per inch), a drill press and drill press vise, drill bits (standard and Forstner style), along with some other common tools.
My bandsaw and drill press are basic benchtop versions, both purchased used. You don't need a ton of space or to spend a million bucks to get into making with wood!
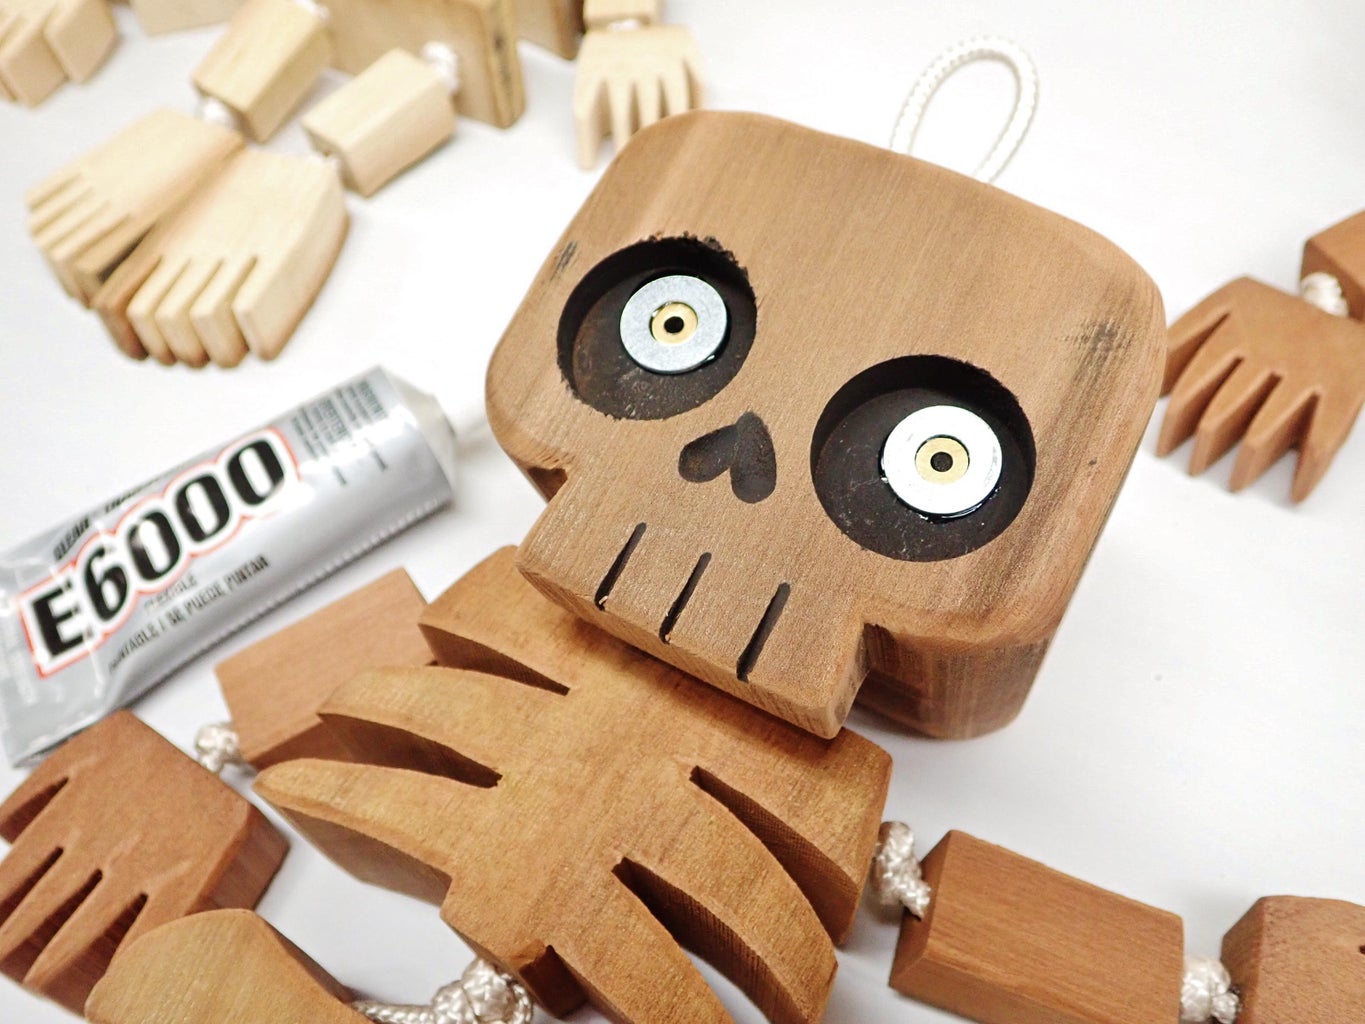
To make these dangly skeletons I use 3/16" nylon cord to tie them together. For the eyes I use various metal washers that are glued in place with E6000 craft glue.
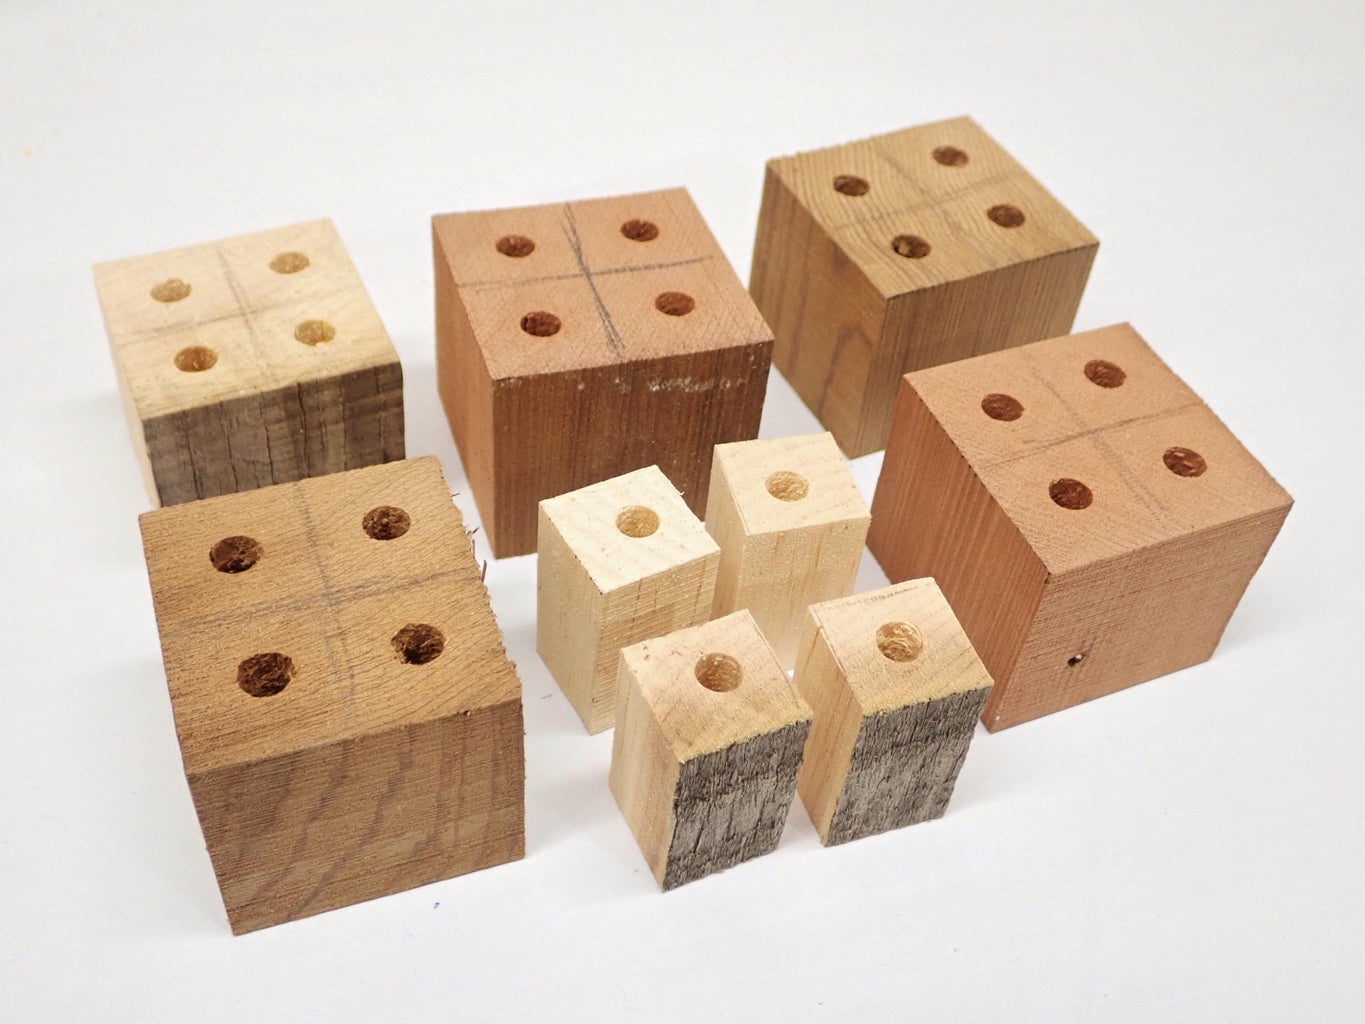
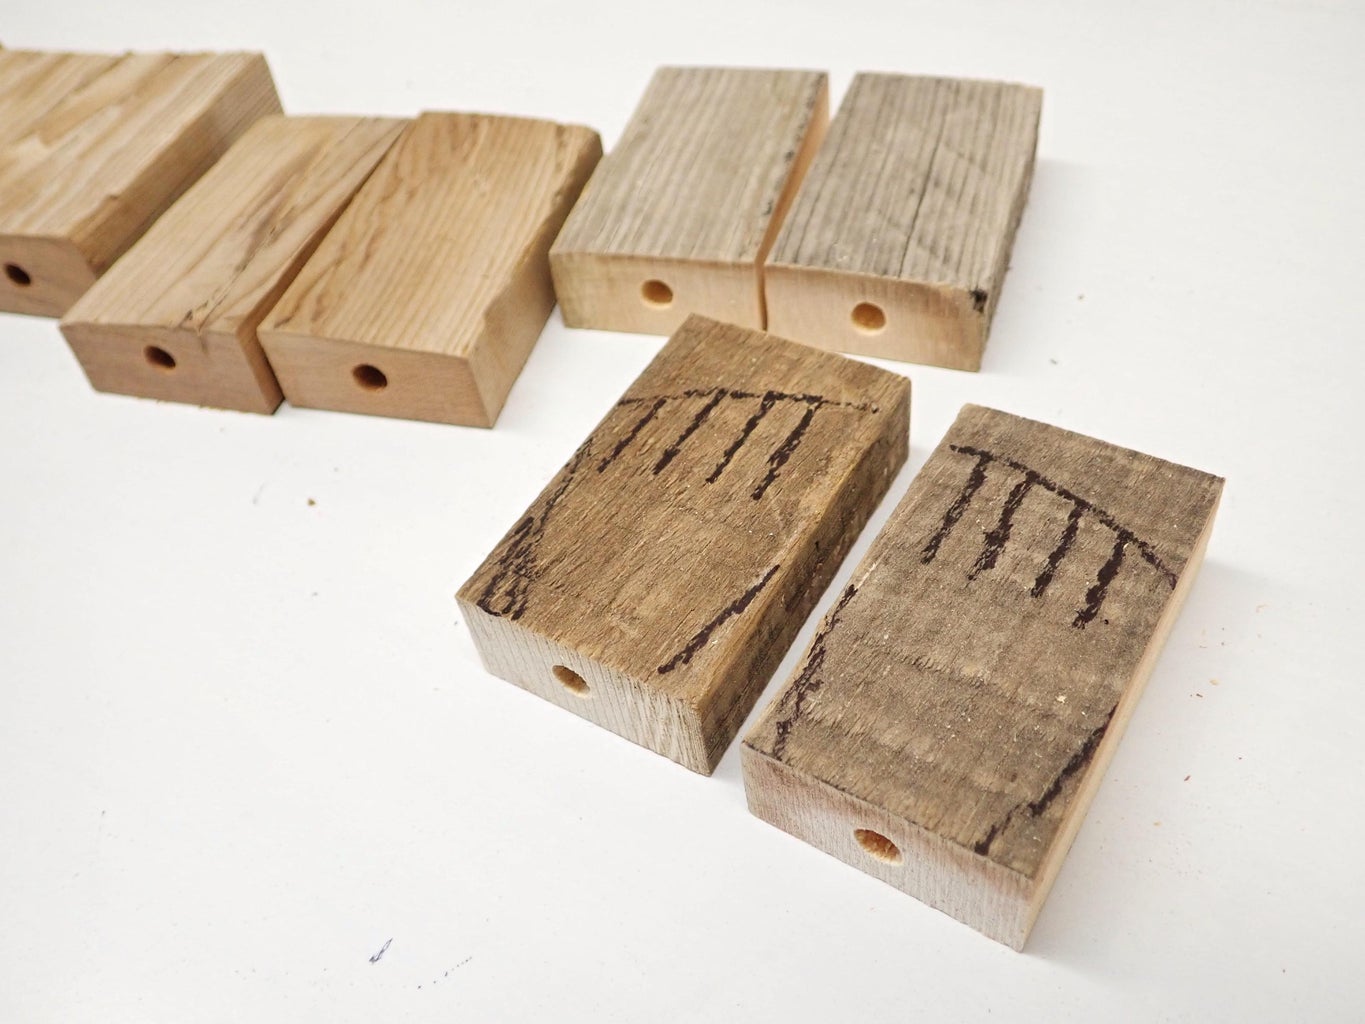
Step 1: Break Down Blocks
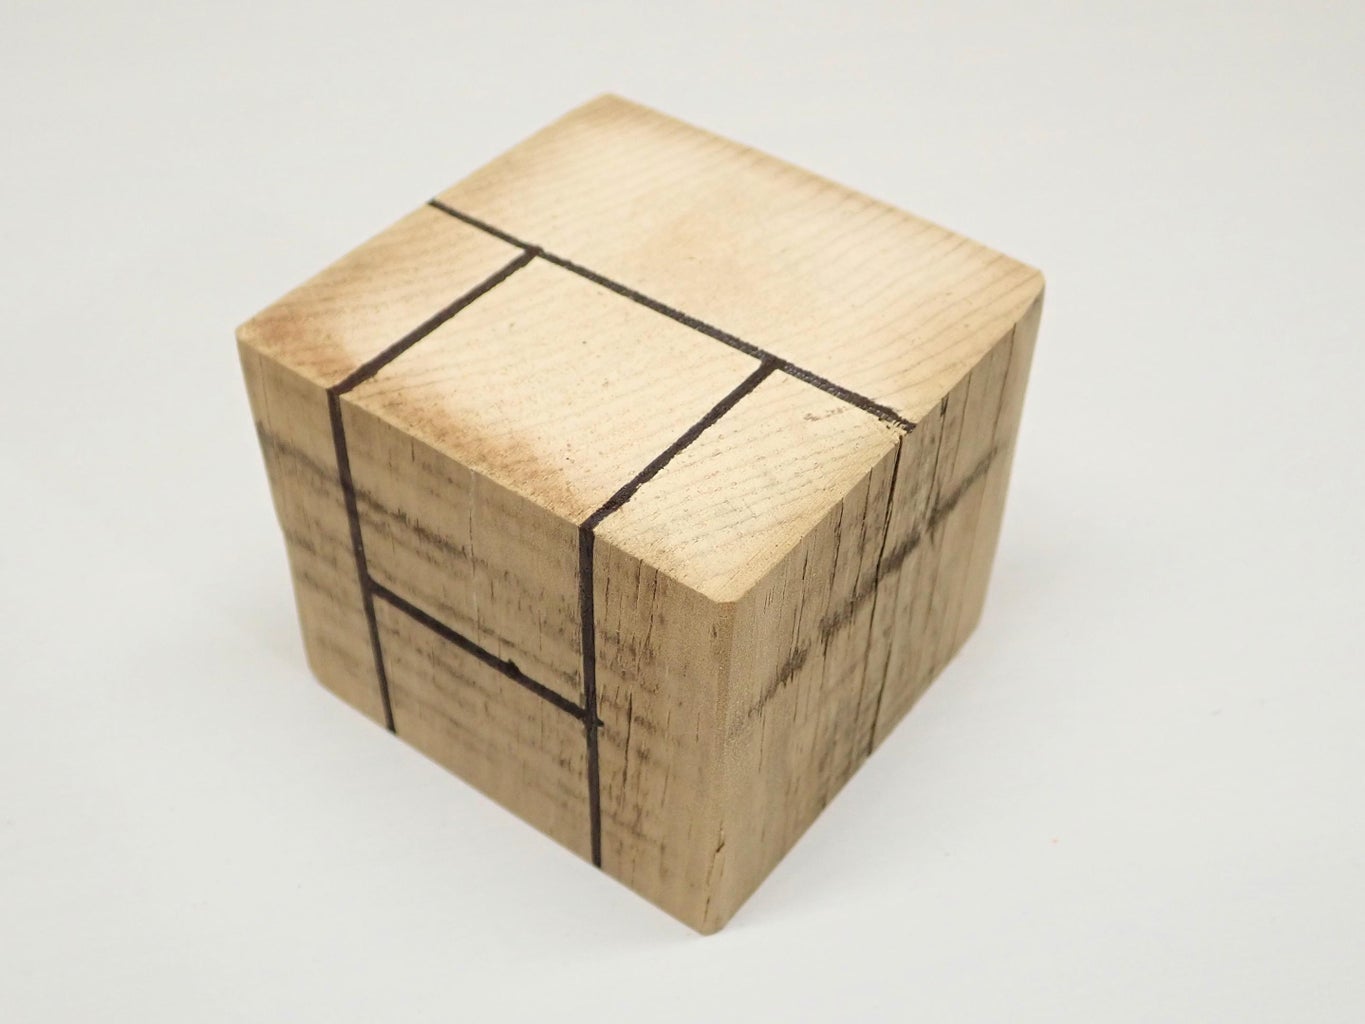

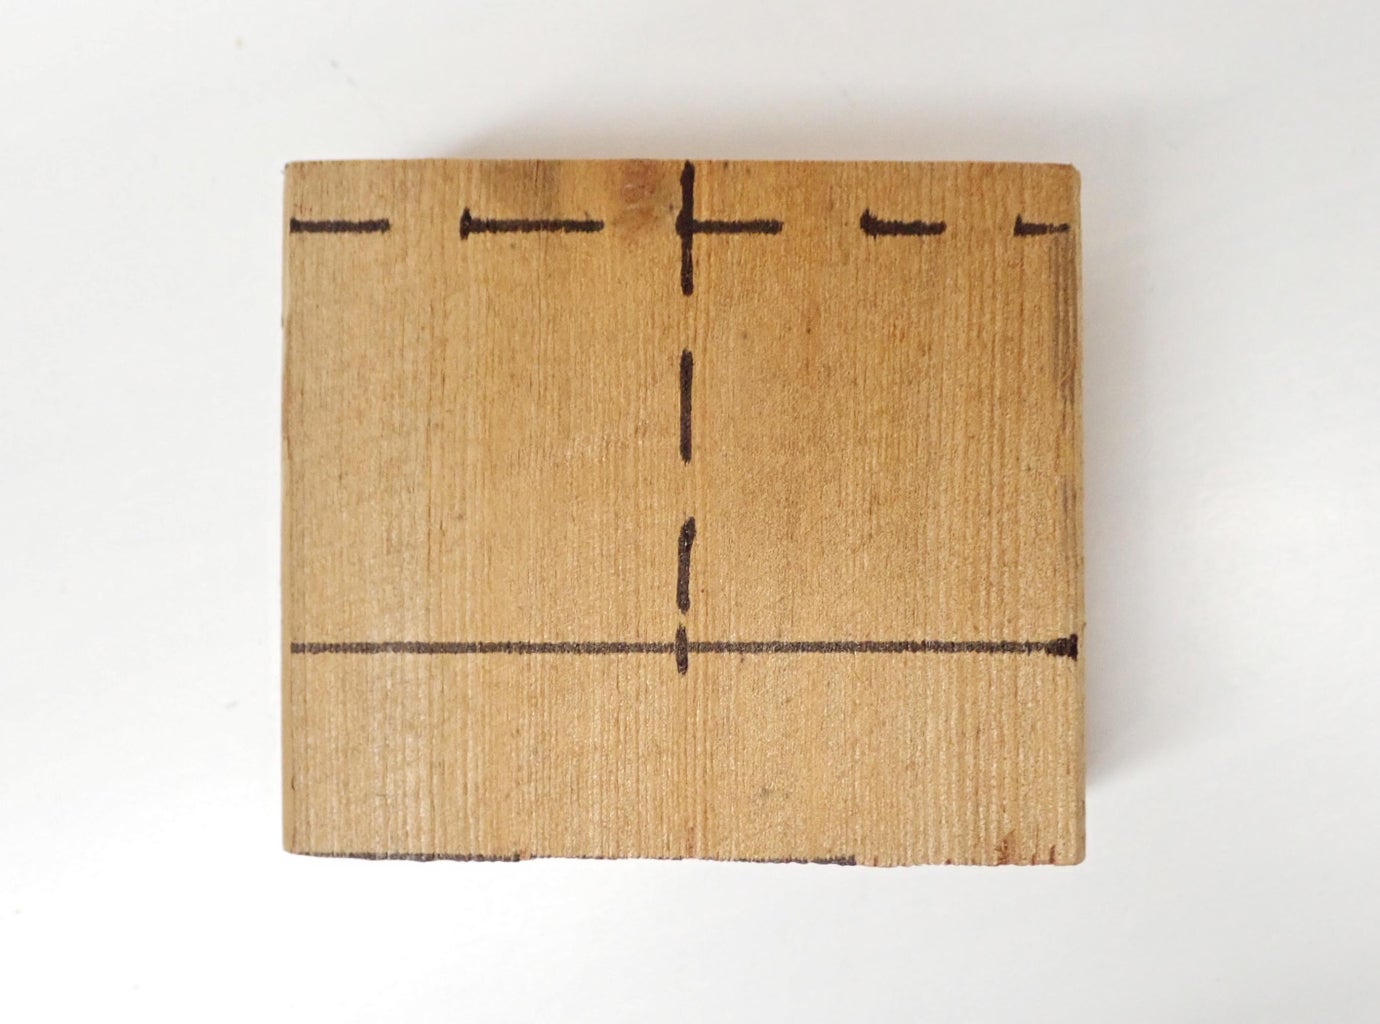
There are no real measurements after you have the initial blocks cut out. Everything is just done in proportions, measured by eye.
One block is set aside which will become the skull.
The 2nd block is cut in half as shown in the second photo. One half of this will become the torso.
The 2nd half is marked in quarters. The outer two quarters are cut off which will become the feet. The remaining middle section is cut in half across the narrow width to make two squarish chunks that will become the arms, legs, and hands.
All cuts are done using a bandsaw.
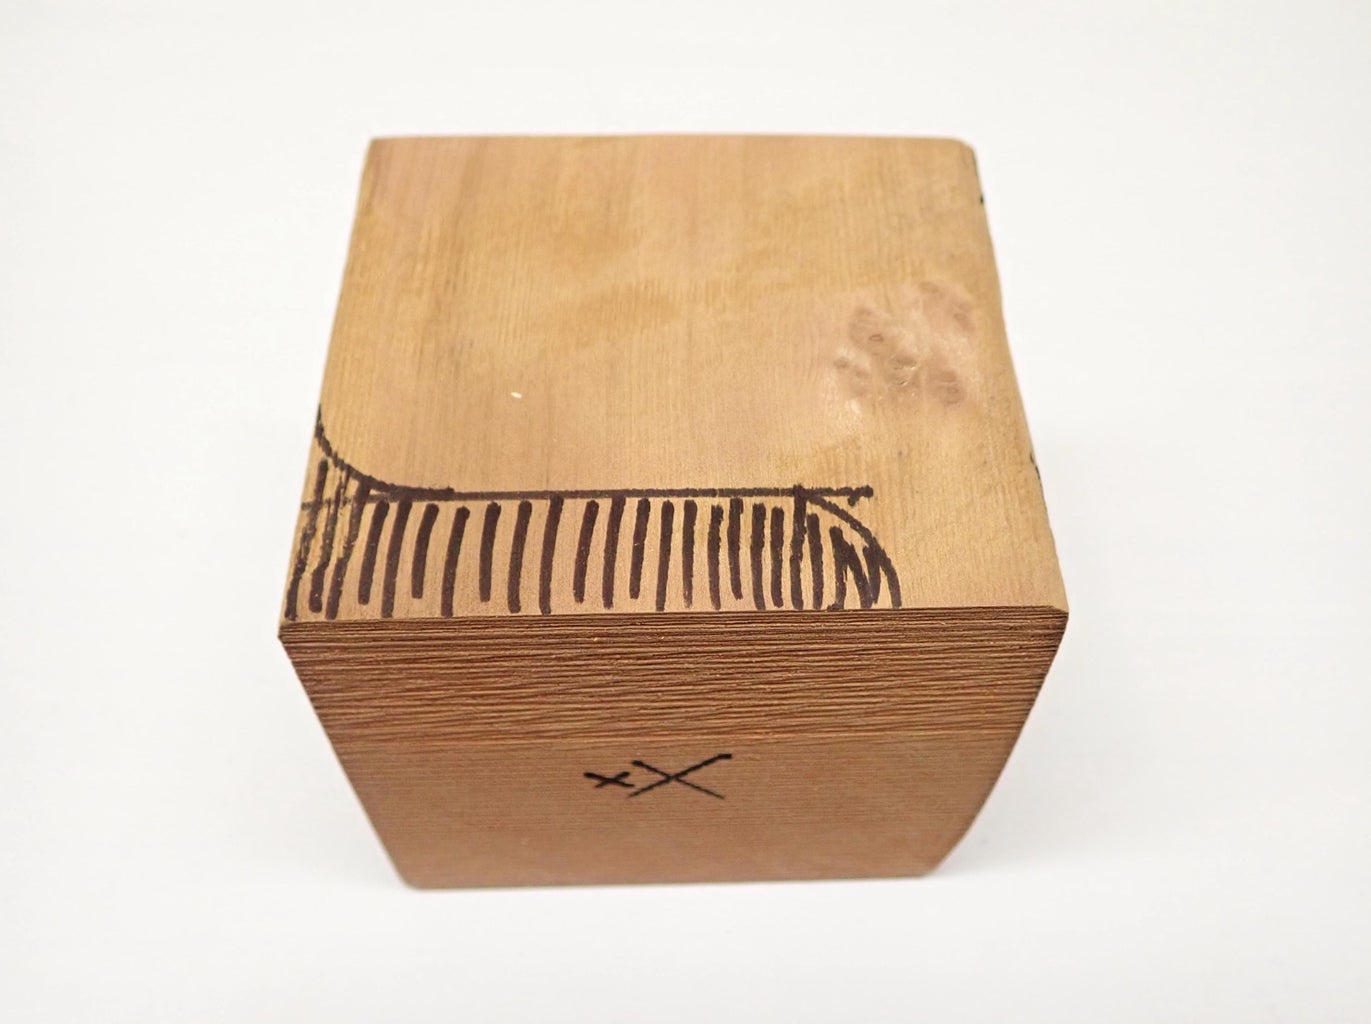
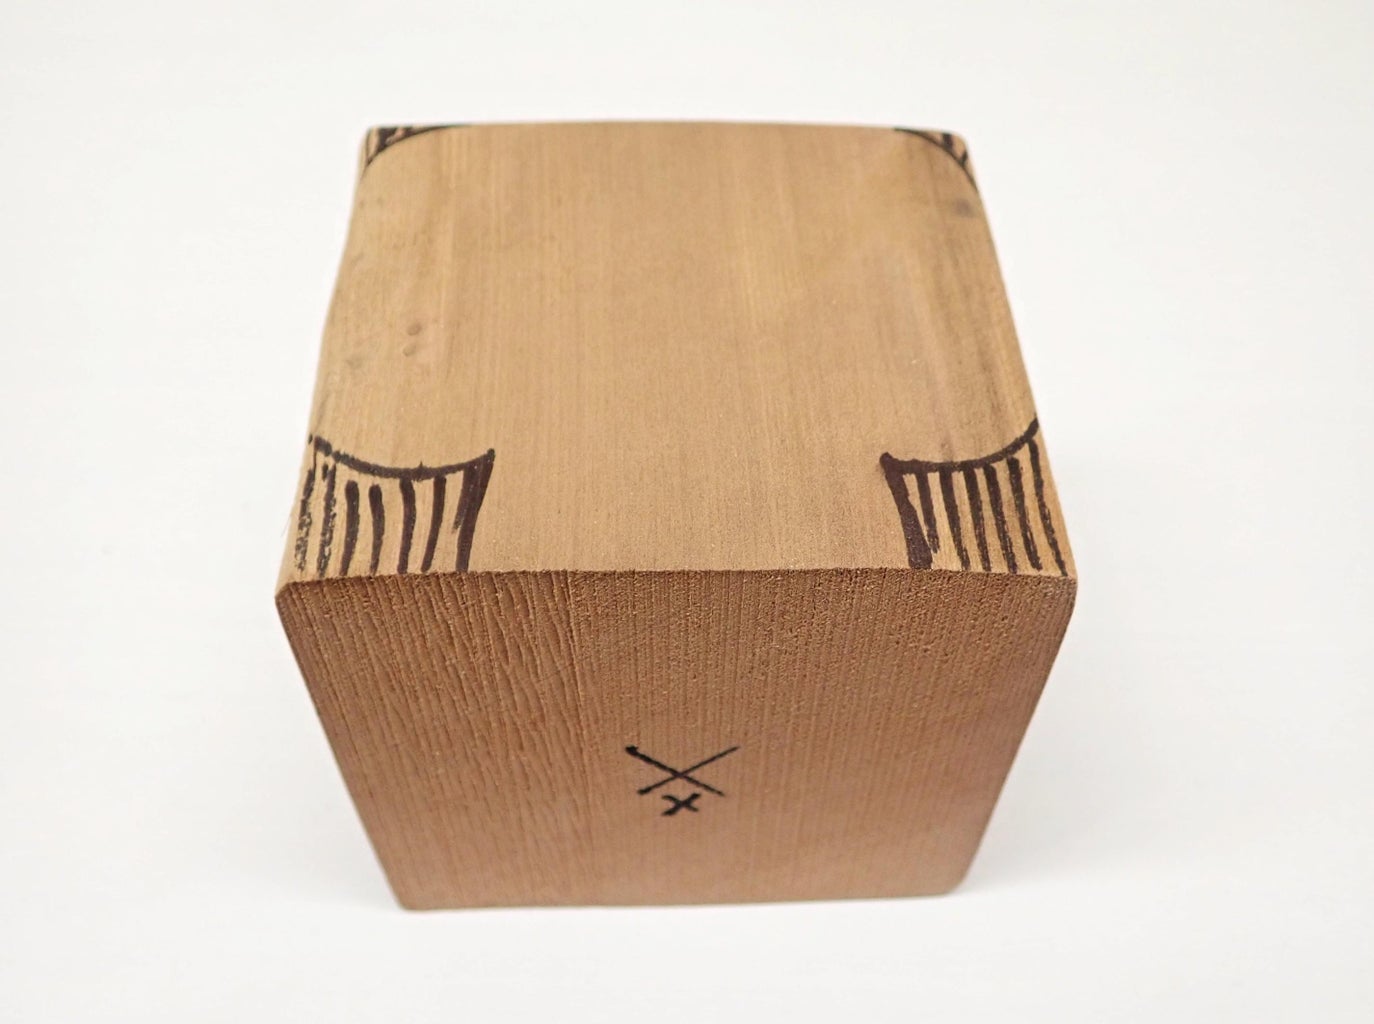
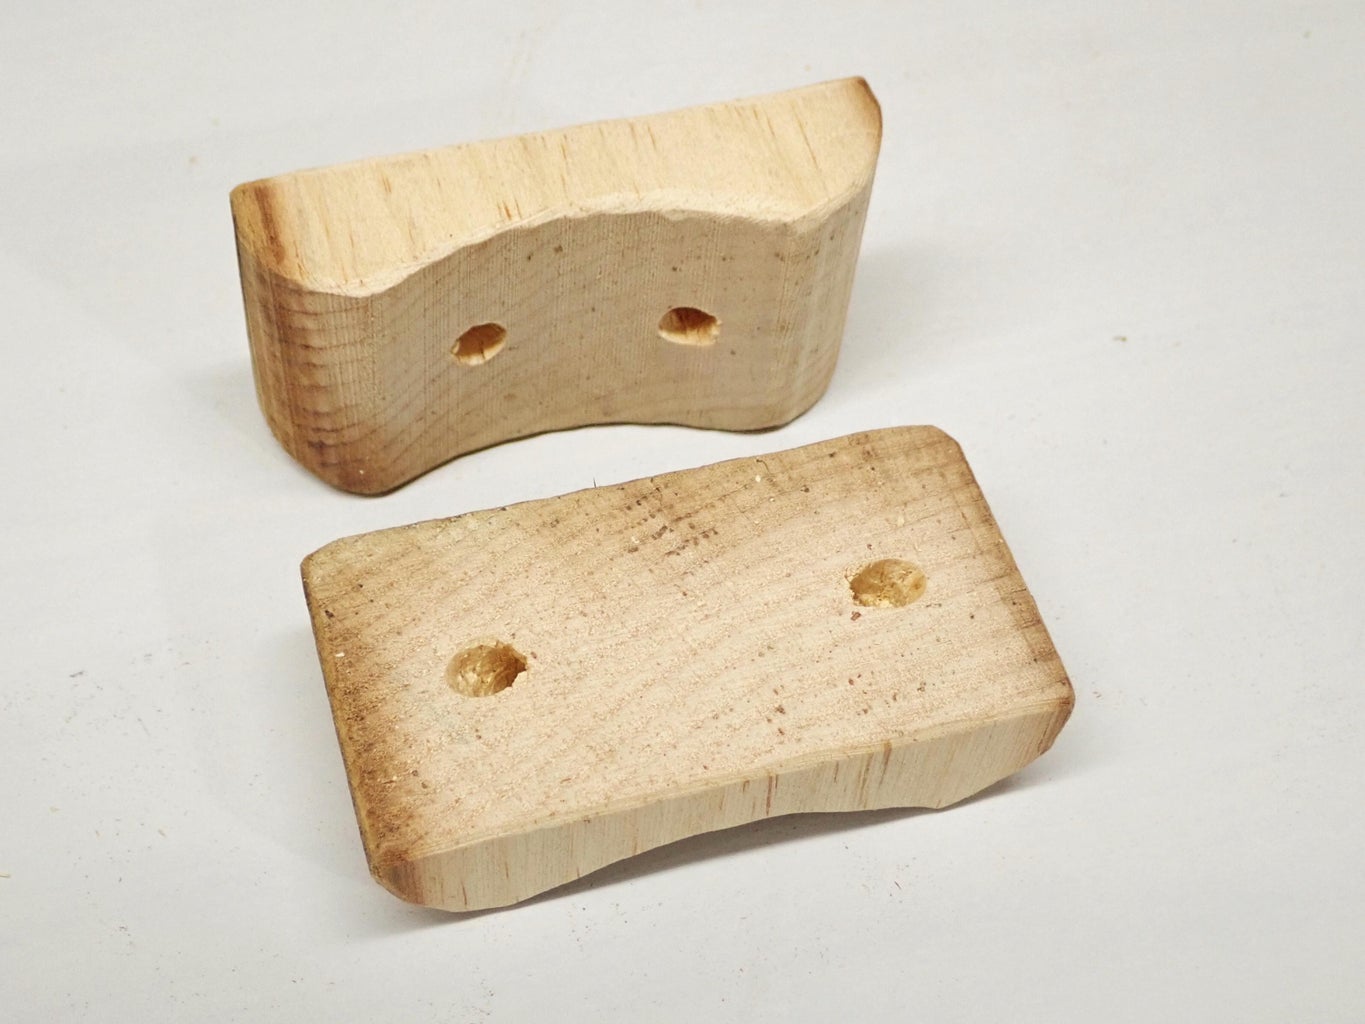
Step 2: Ribs and Hips
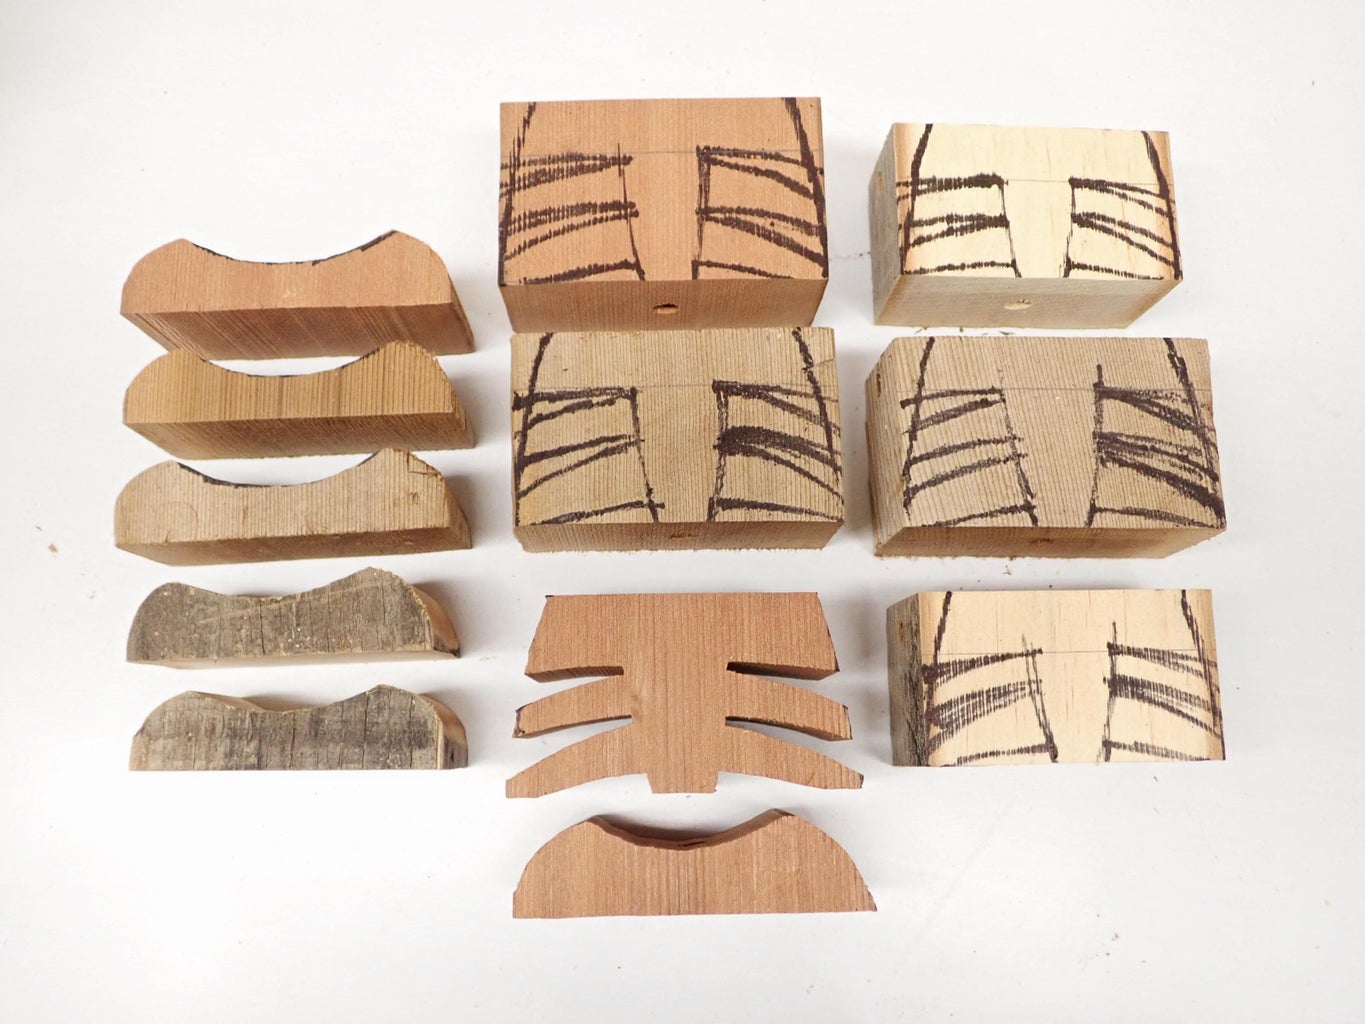
The torso portion that will become ribs and hip pieces requires drilling some holes before cutting. This is done using a drill press and drill press vise to hold the block safely.
A 1/4" hole is drilled close to the top edge horizontally. The rope for the arms will go through this hole.
A 3/8" hole is drilled through the middle section vertically, but not all the way through the bottom (see line indicating hole location in image). The head, hip piece, and legs will all be attached to the ribs through this hole.
With these holes drilled, the ribs and hip pieces are cut as shown. These are laid out by simply eye-balling it, but there are a couple things to keep in mind:
The hip piece should be 1/3 the height of the whole torso piece.
The "rib" section needs to be laid out so when the cuts are made they don't go into the drilled holes at all.
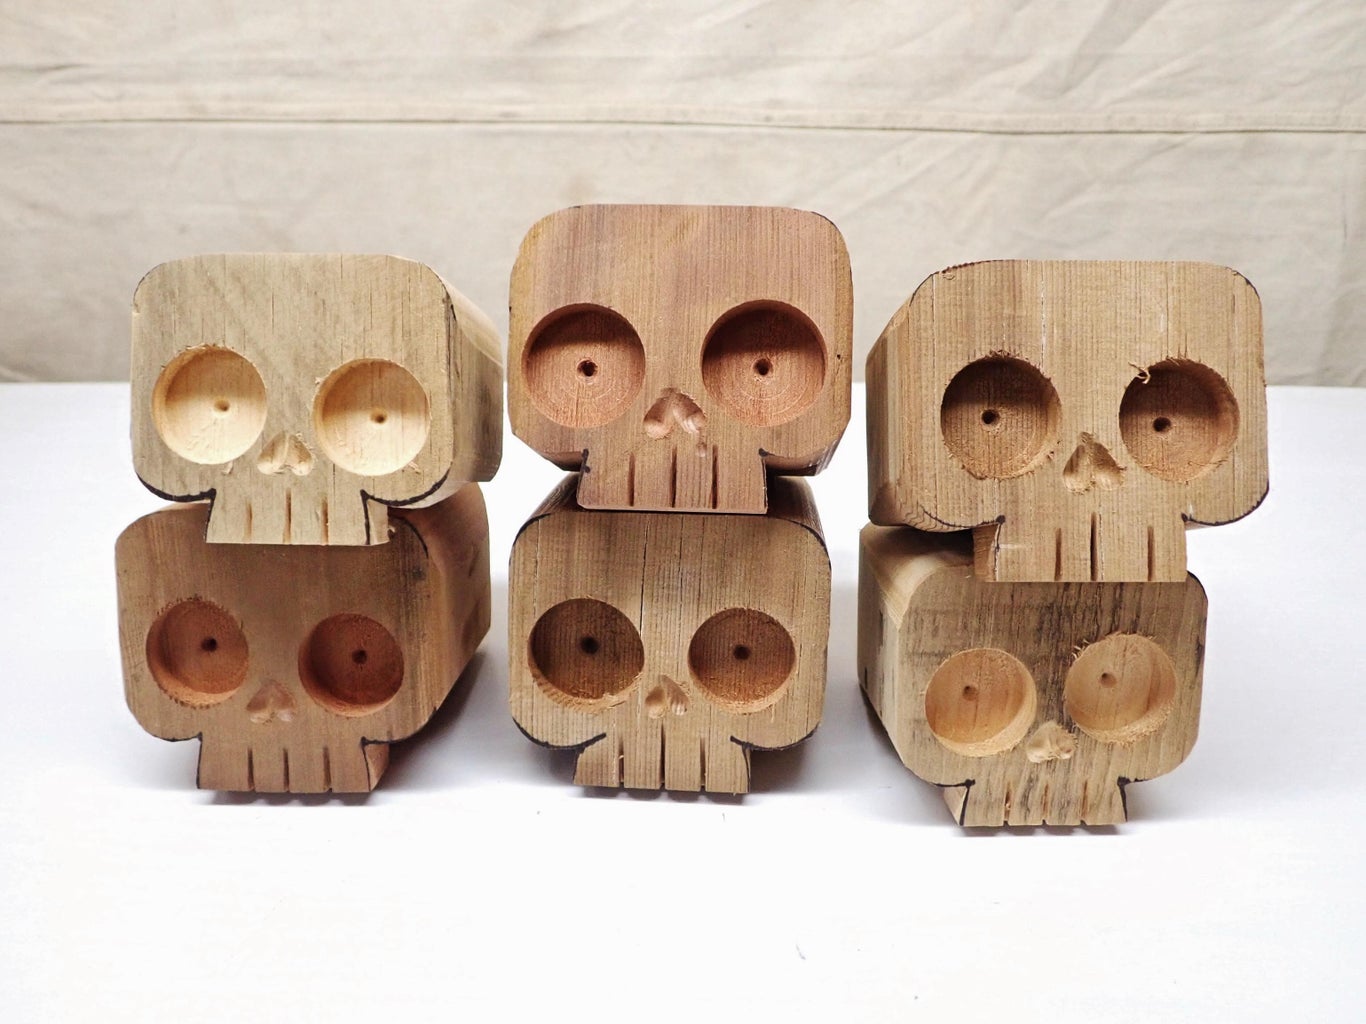
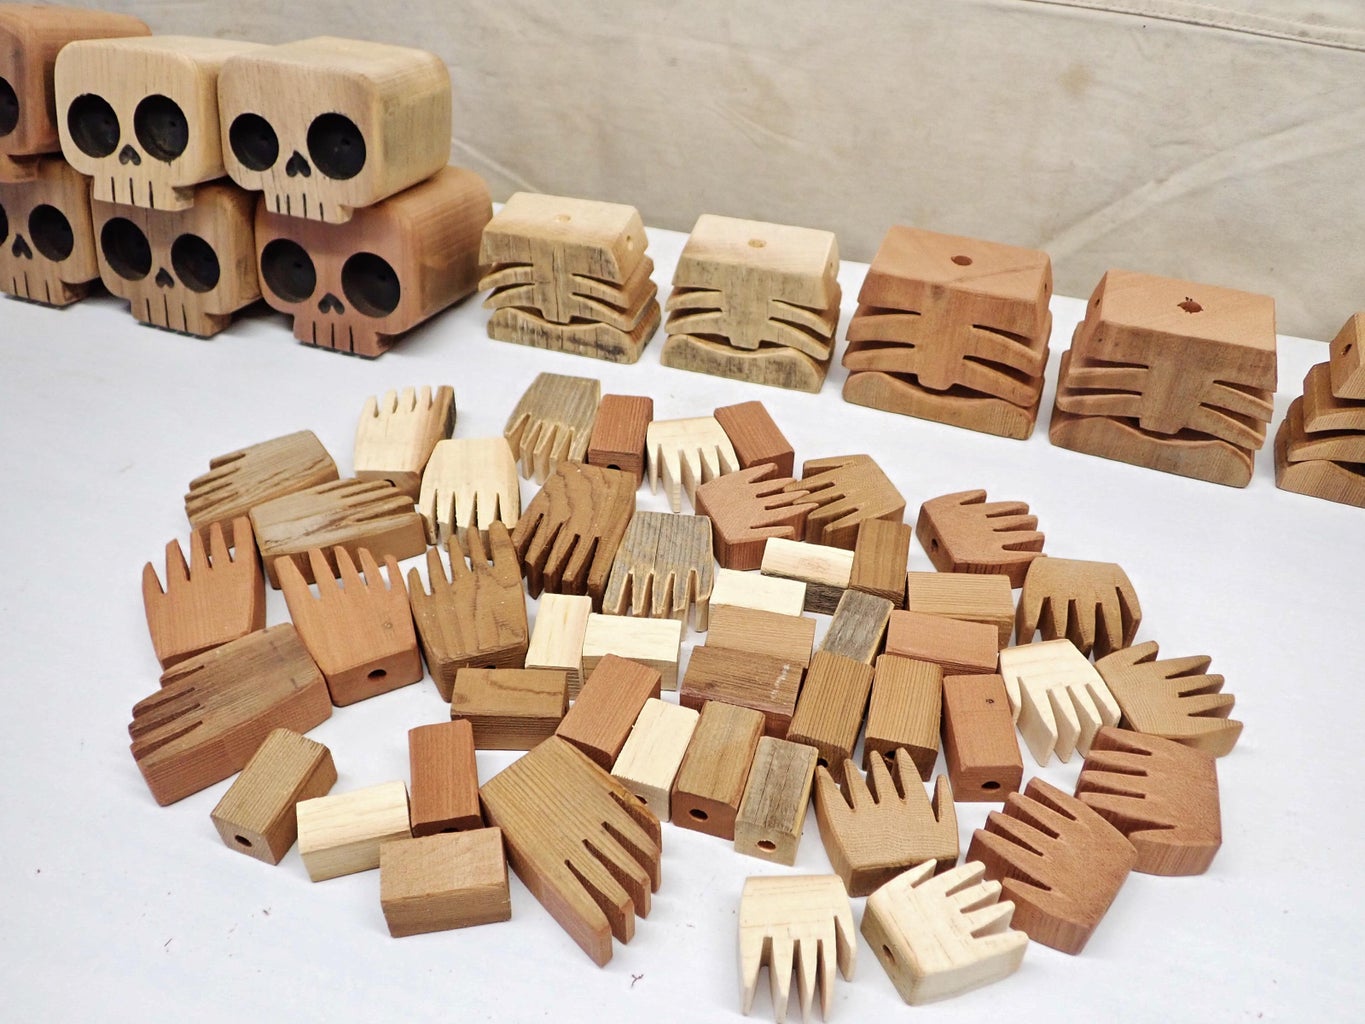
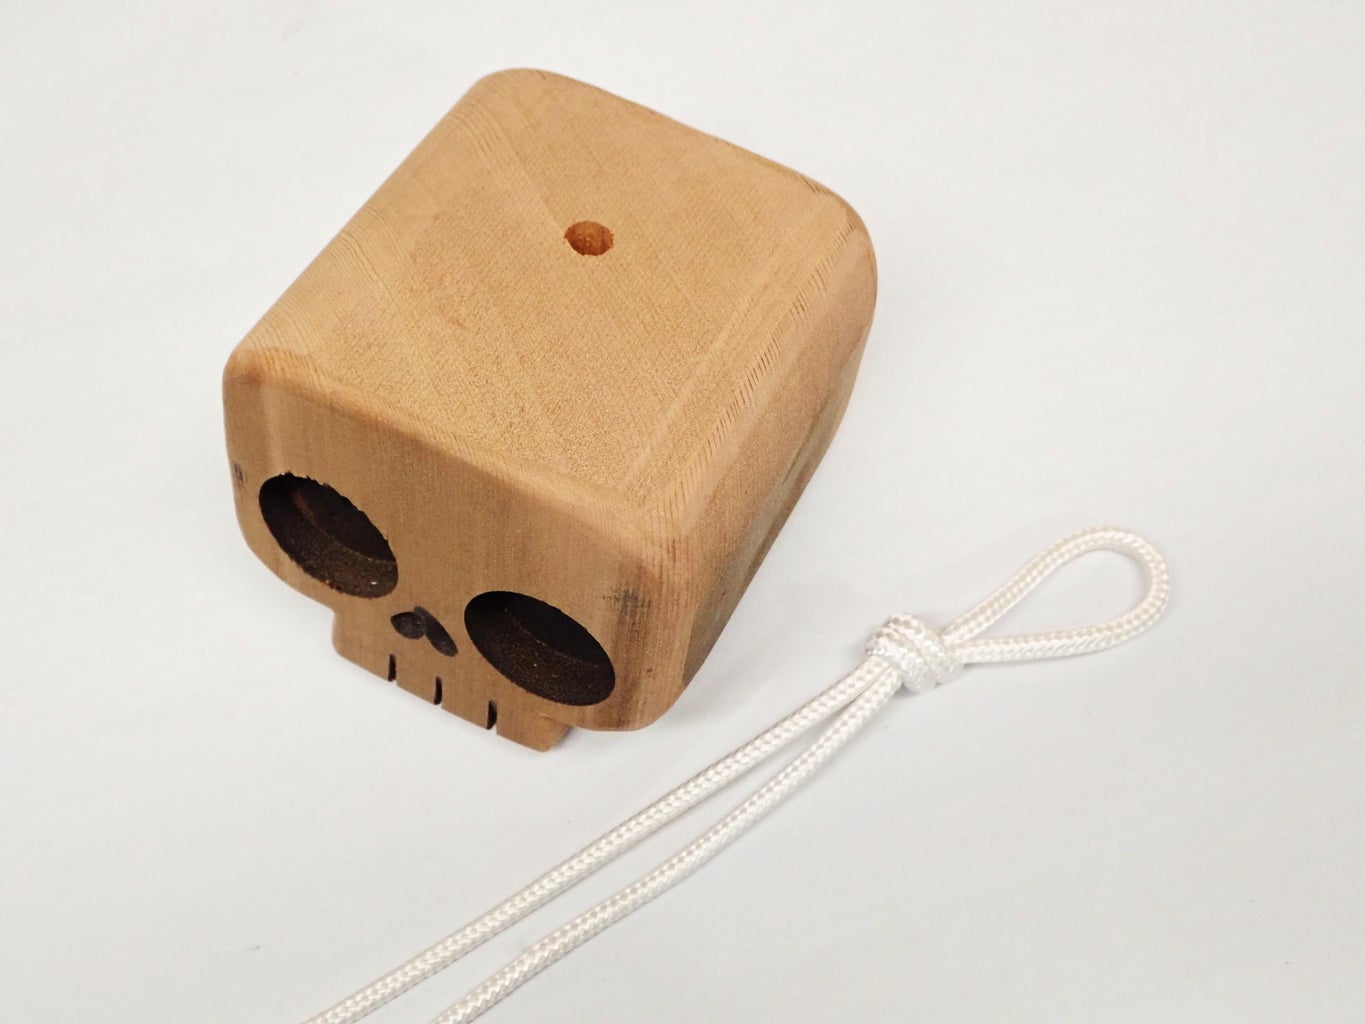
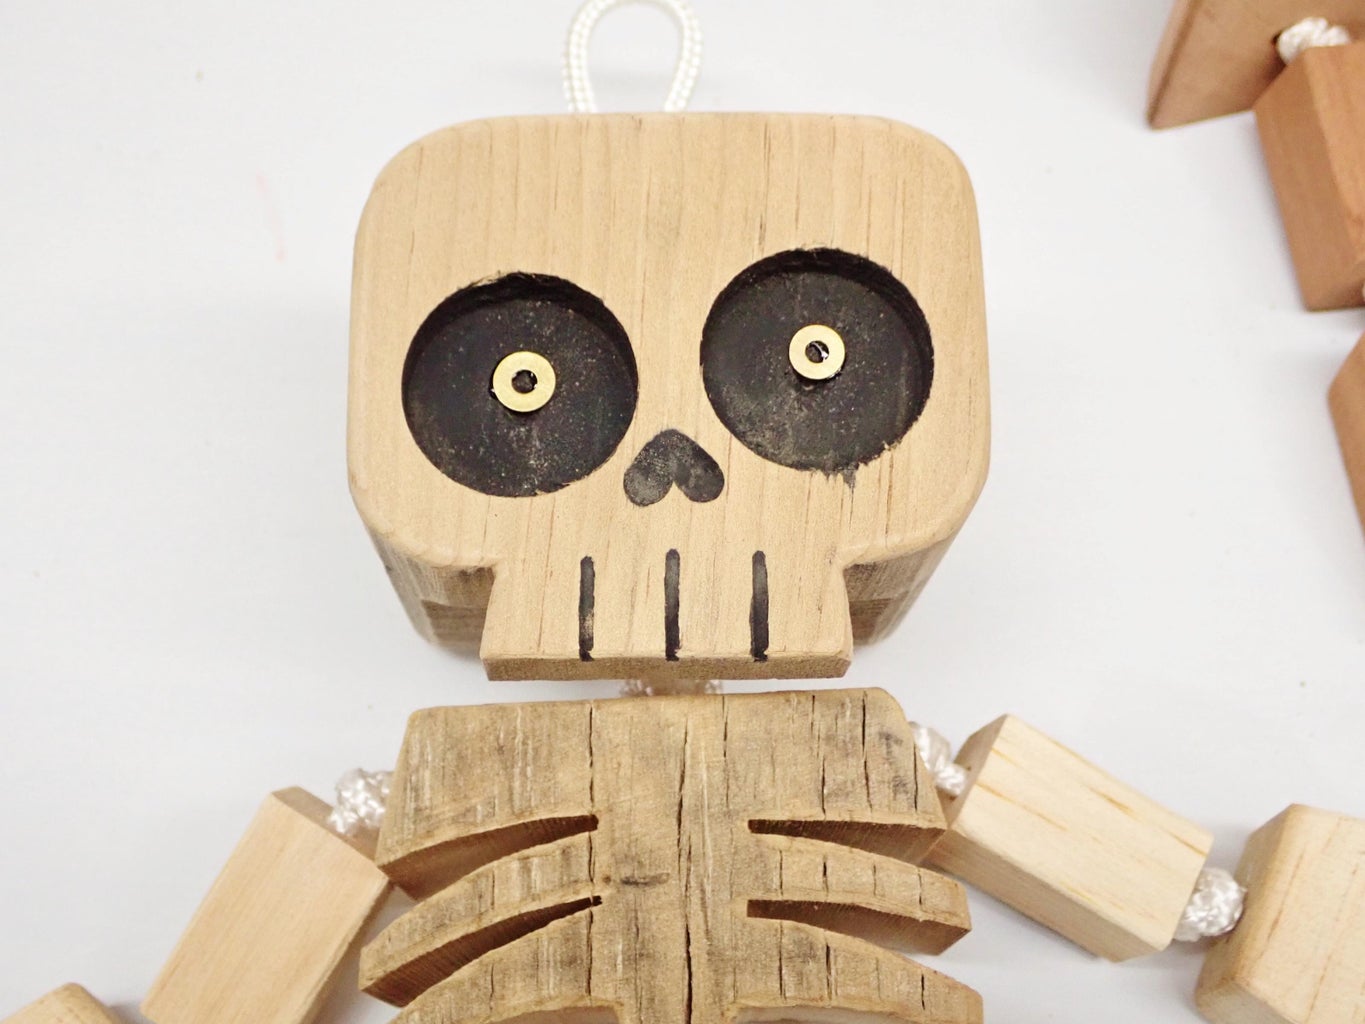
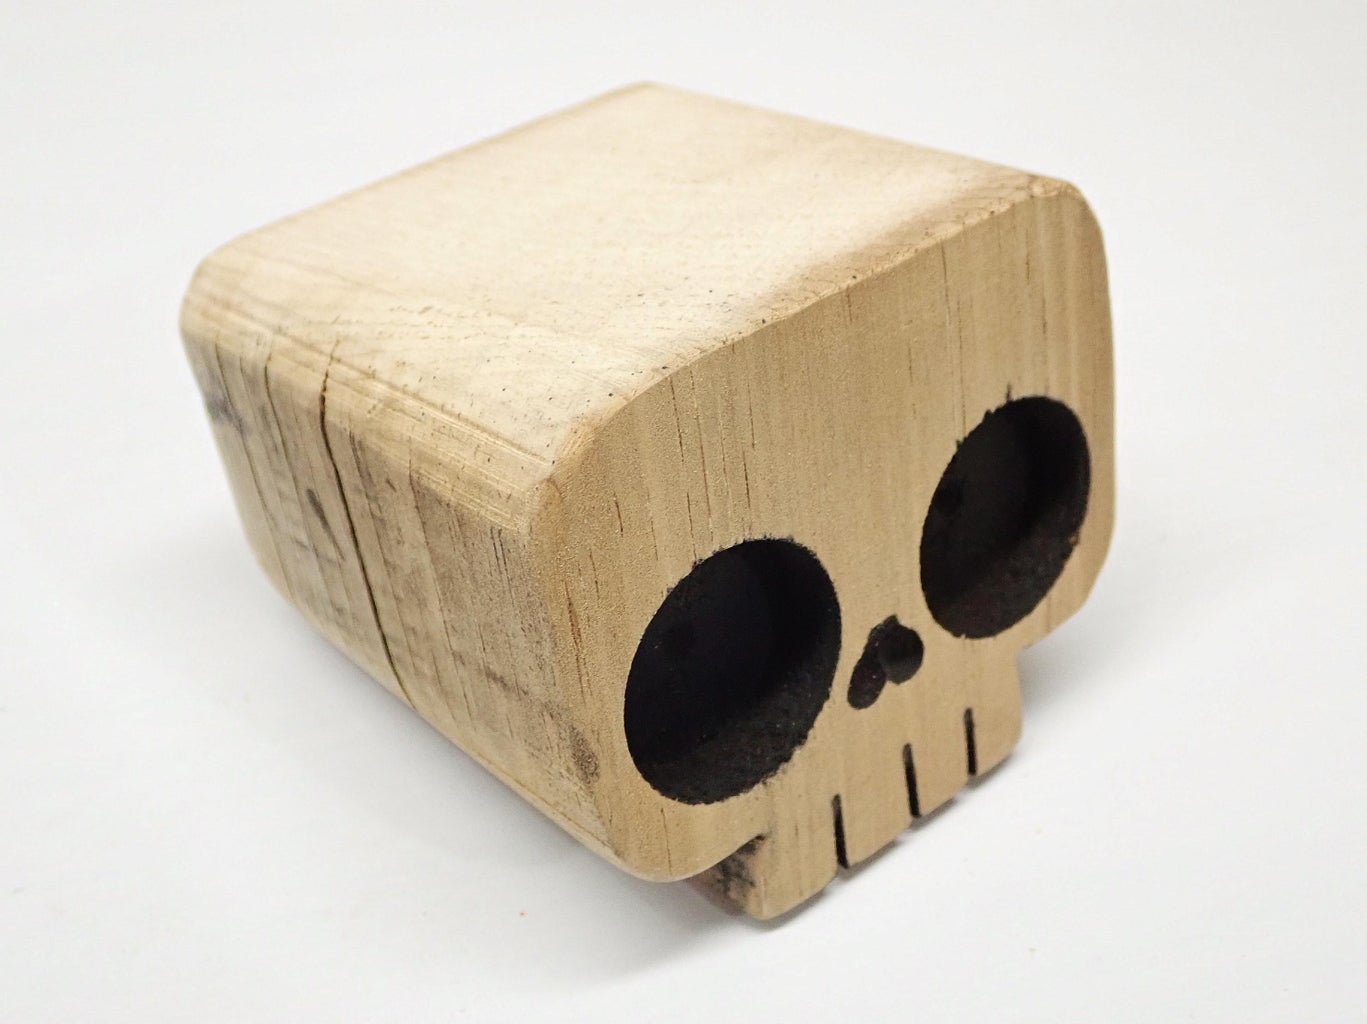
Step 3: Skulls
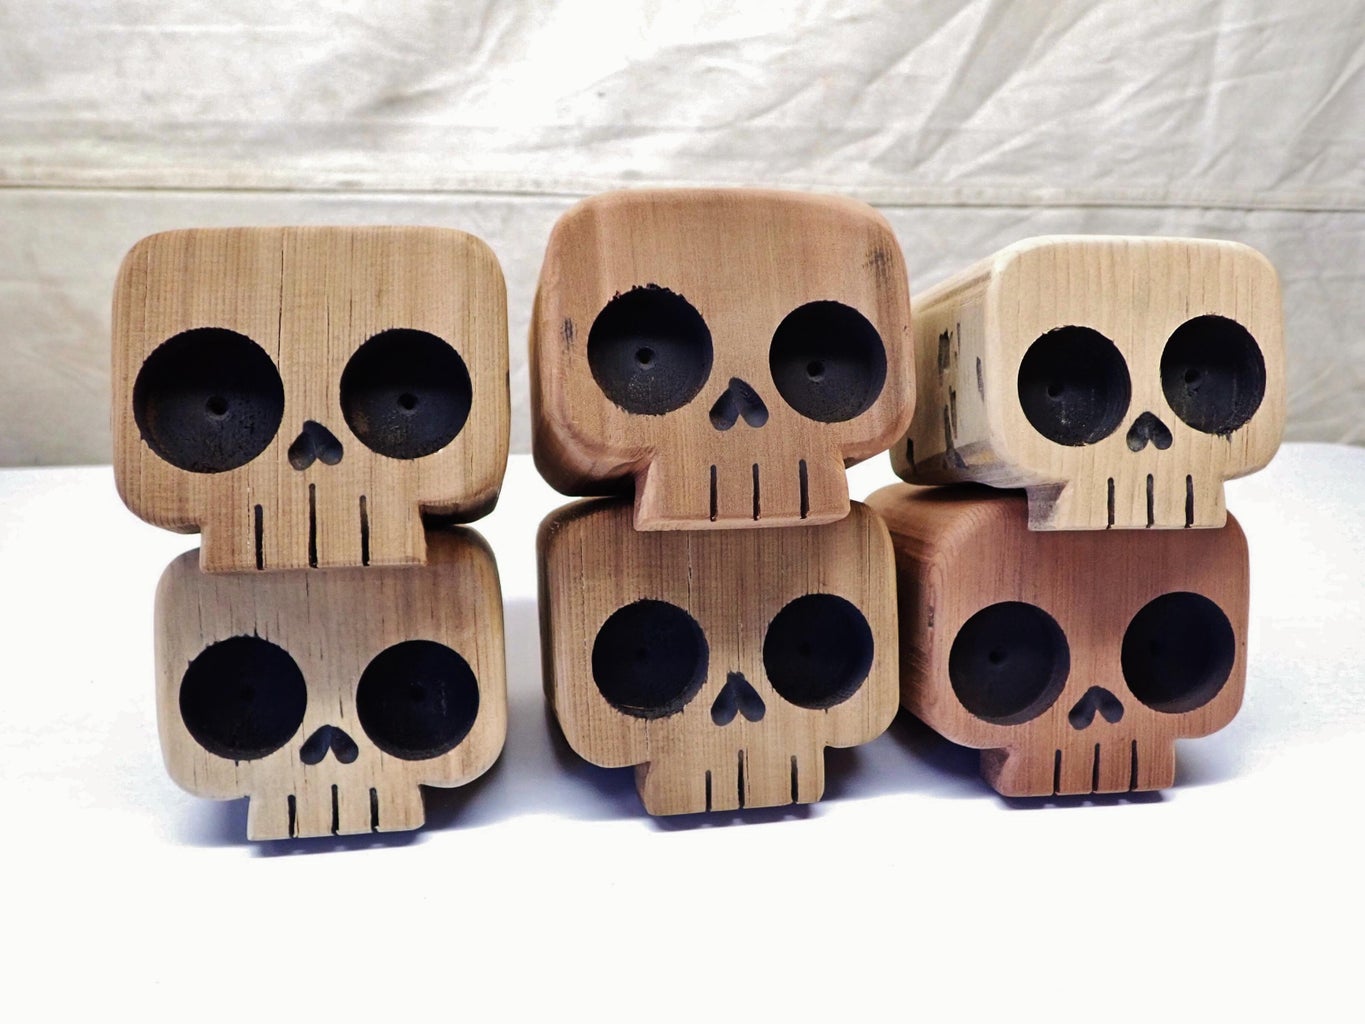
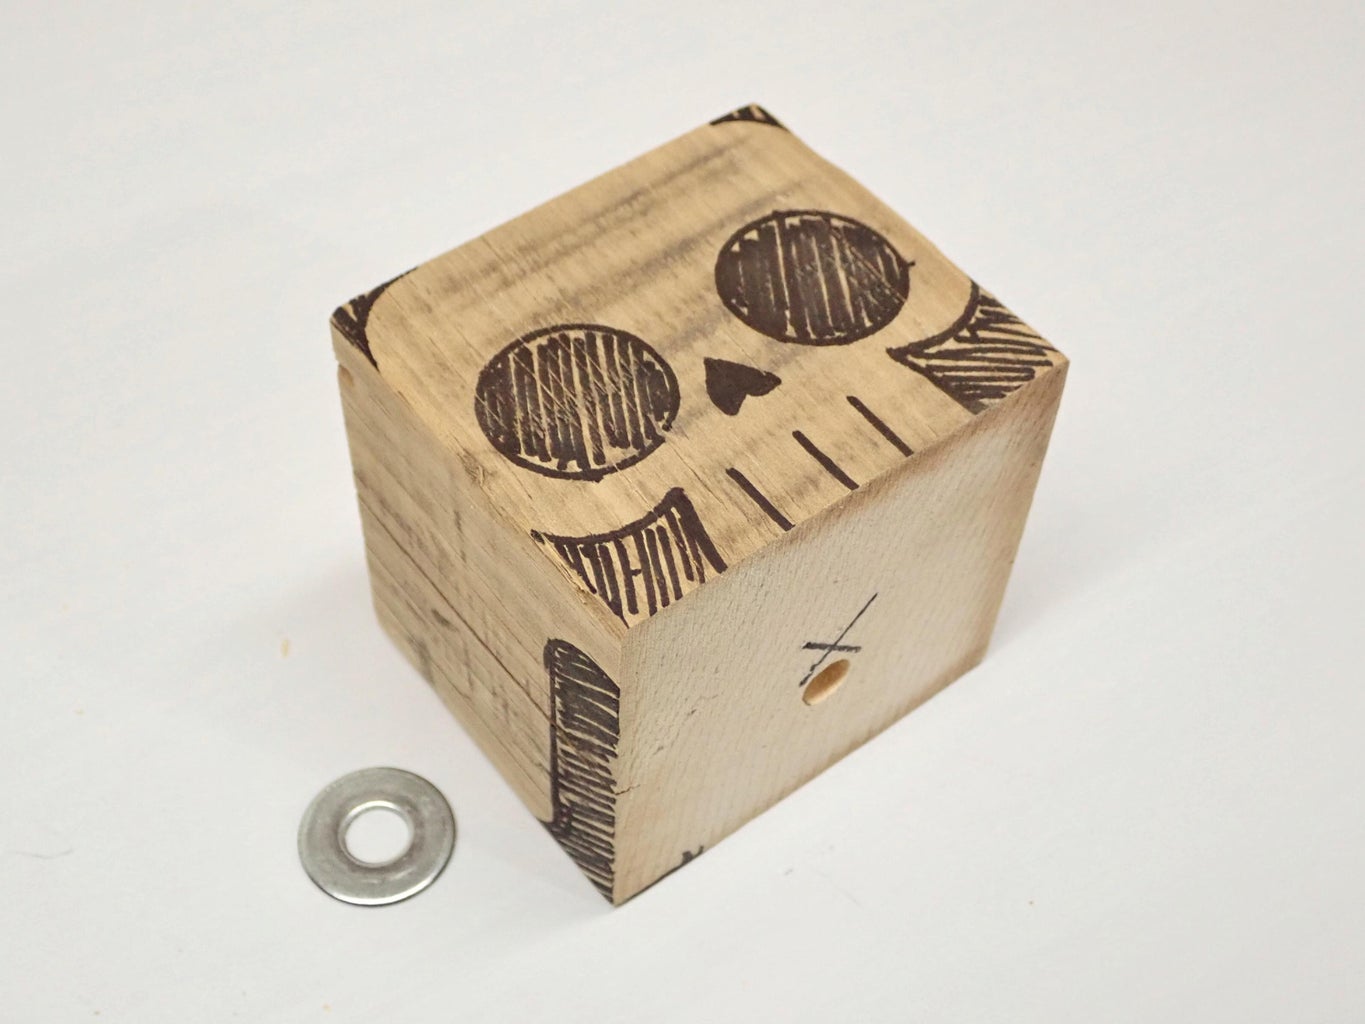
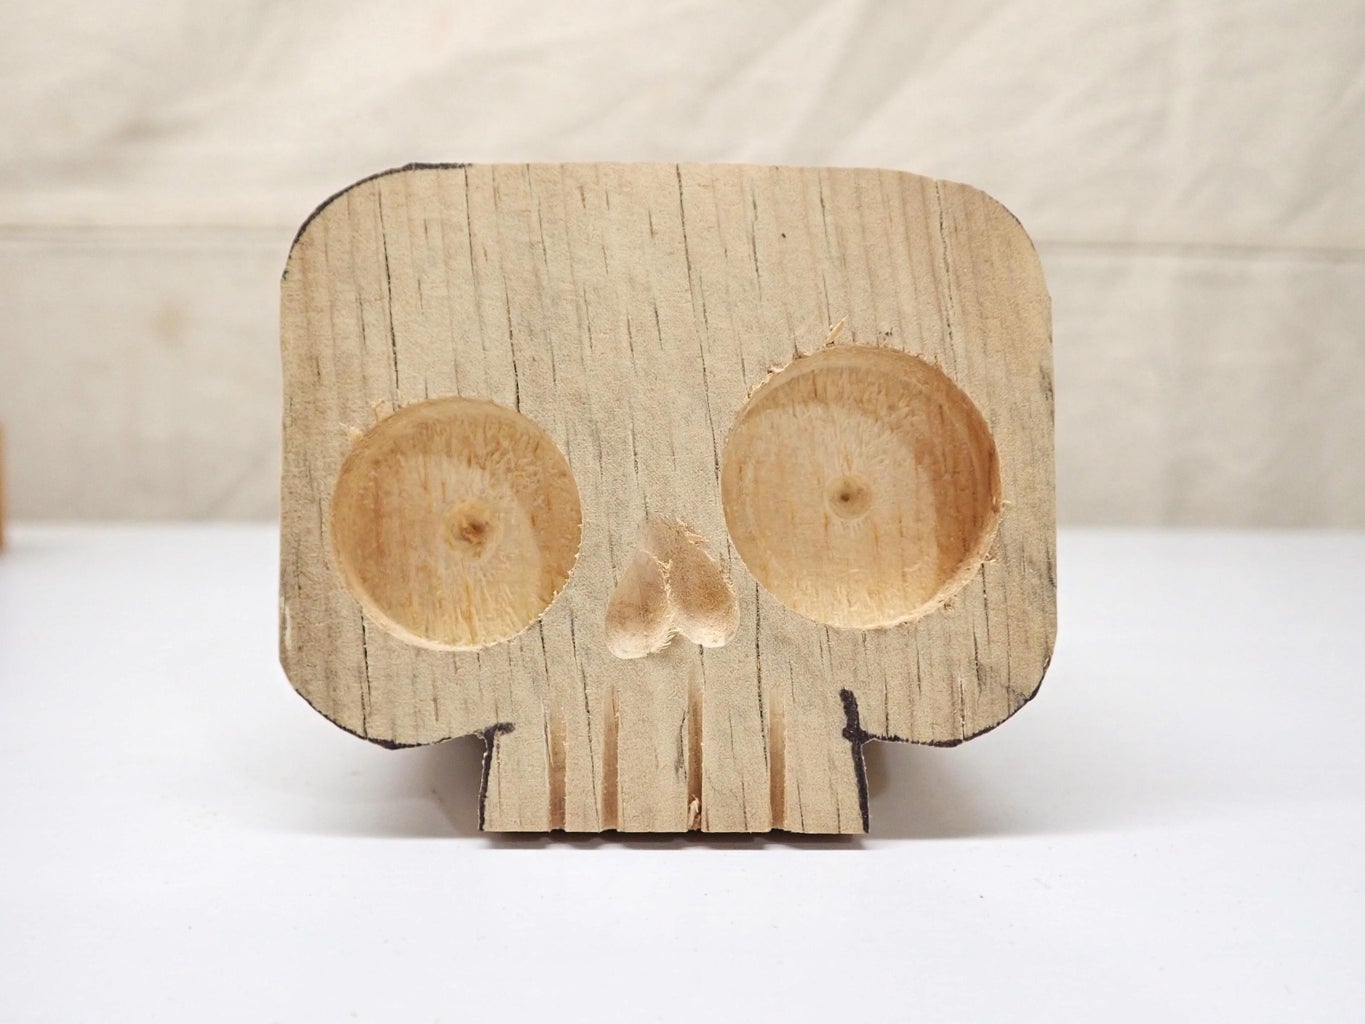

Each skull is made using a full block of wood.
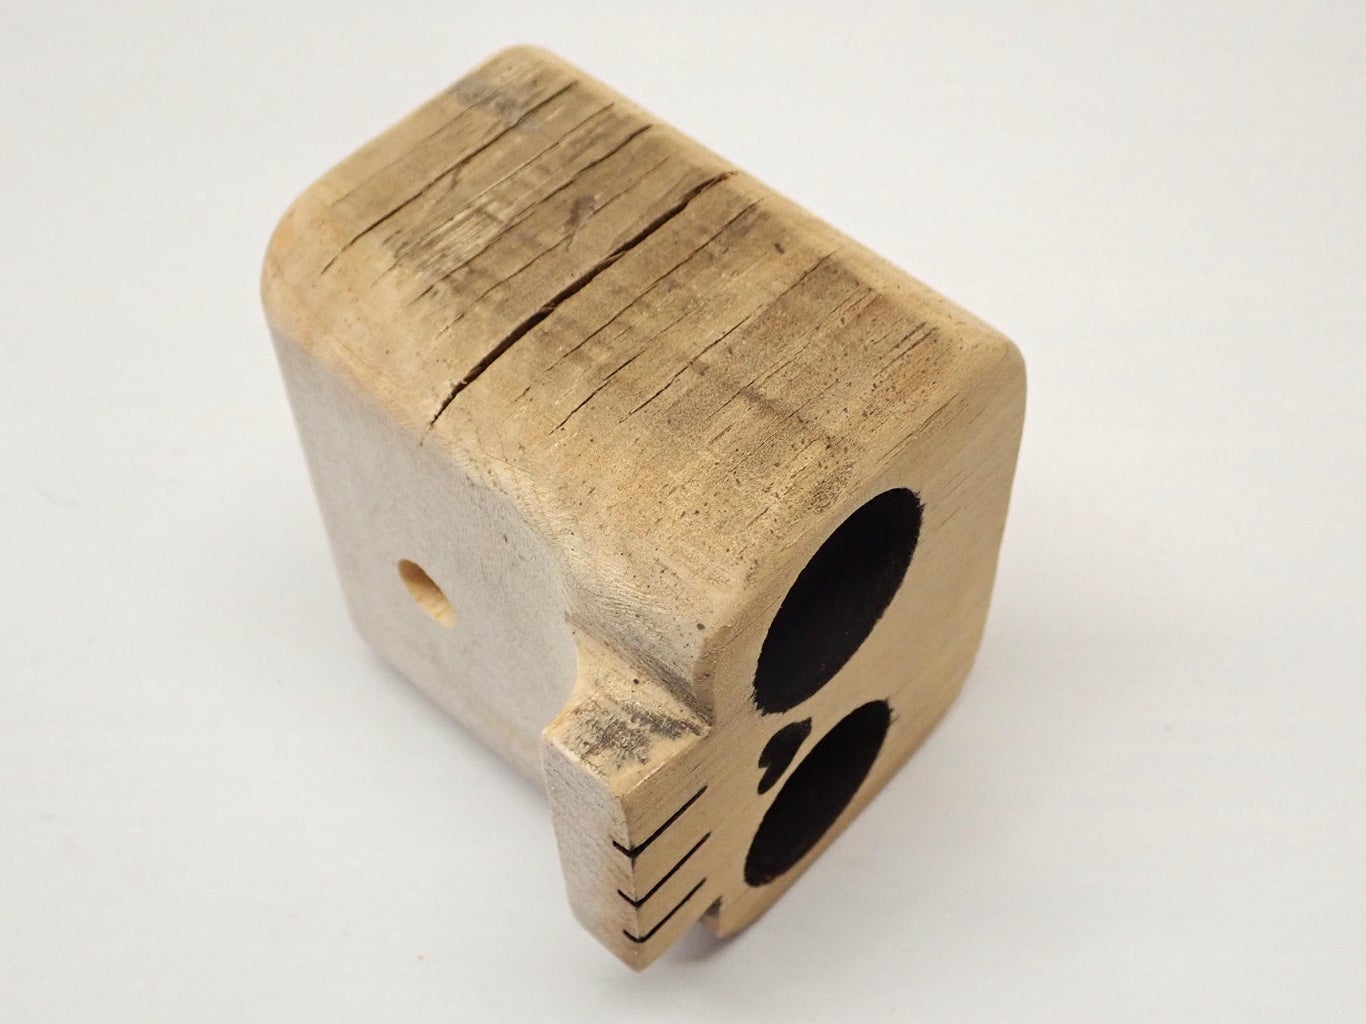
A 5/16" hole is drilled all the way through using a drill press for the rope to be threaded in later. I drill this hole just toward the rear of the center mark which positions the rope nicely to look like a spine.
After drilling the rope hole, the block is marked for the skull shape along with the eye socket and nose positions. A metal washer can be used as a guide to mark the circular portions.
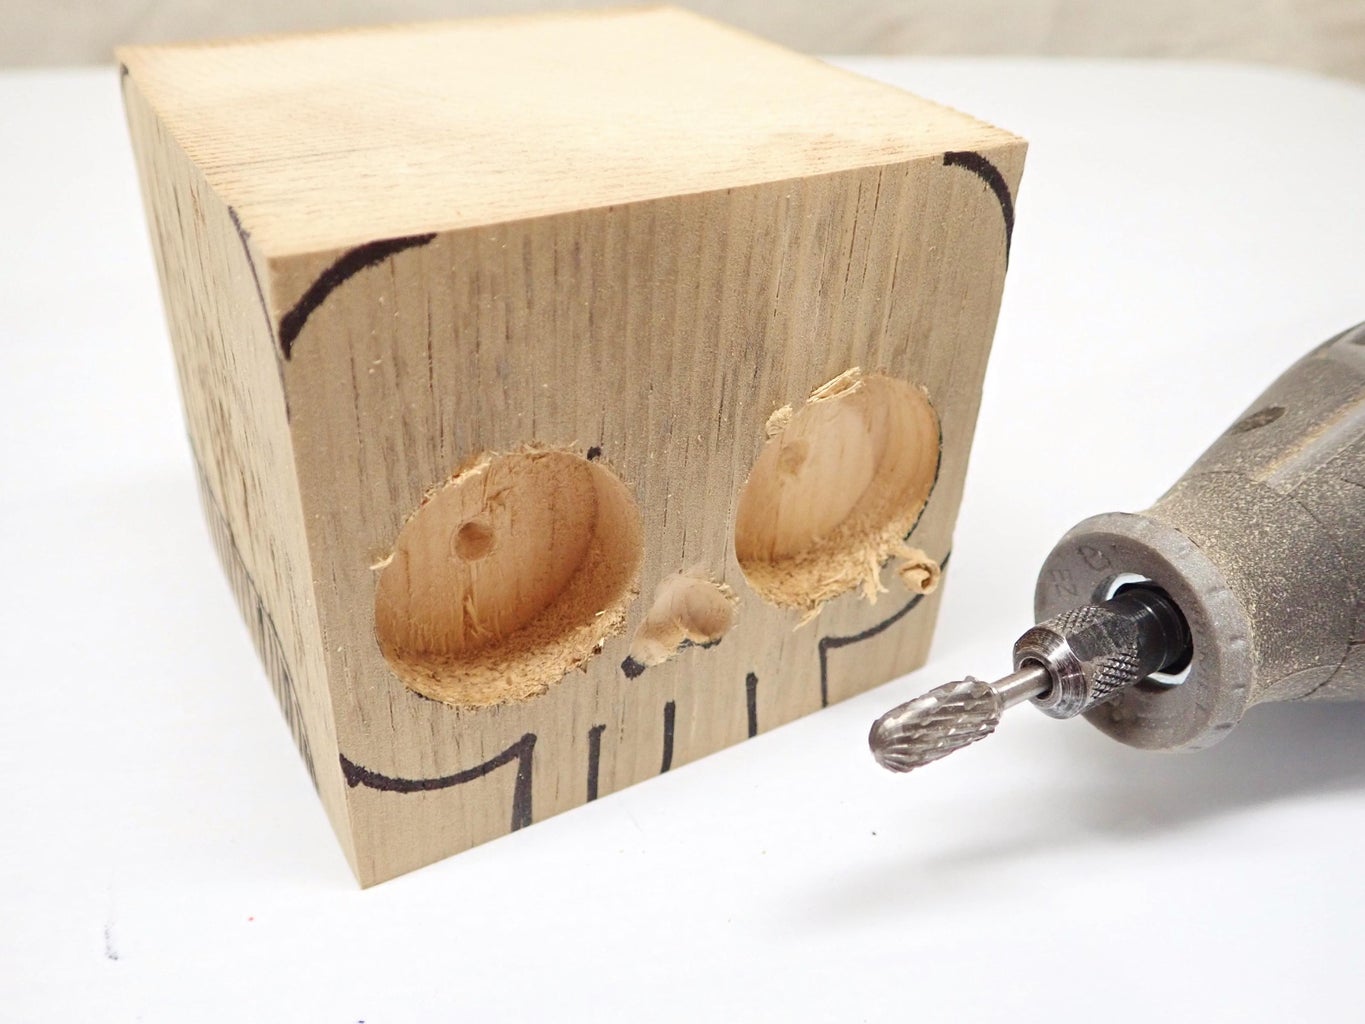
I like to drill out the eye sockets now using a Forstner bit and drill press. Most eyes were drilled with a 1 1/8" bit, but I did some with a 1 1/4" bit. I mix and match eye sizes which makes the skellies look unique and a little wonky, adding to their cuteness. These eye socket holes are drilled about 1/2" deep.
The nose hole is made using a Dremel tool and a small carving bit. The trick here is to make an inverted heart shape by gently pressing the bit into the wood for each half of the shape.
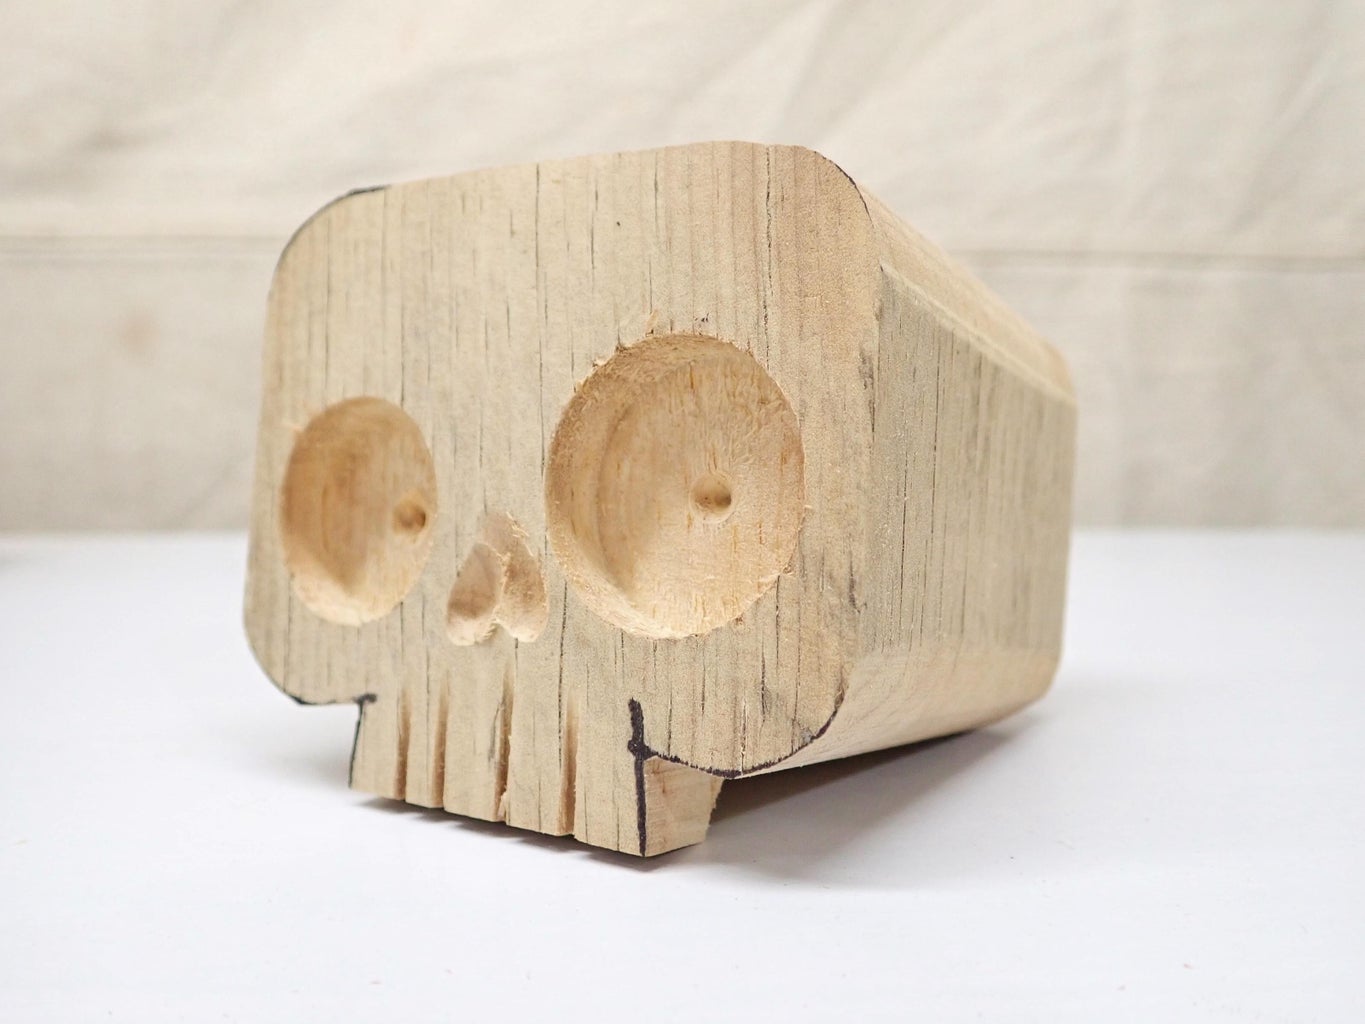
The skull shape is then cut out using the bandsaw.
I think it's easier to remove the lower skull portion first (2nd photo), followed by the little cheek areas, and then the curves at the top of the head. Depending on the size of bandsaw blade you use, you may need to nibble away these curved sections with multiple passes.
The teeth are cut now by carefully pressing the face area into the blade to make the tooth gaps. This is possible because of the way the skulls sit at a tilt due to the removal of the back lower skull section.
The skull faces are sprayed with some flat black spray paint to cover all the recessed areas. After the paint is dry an orbital sander with 150 grit sand paper is used to sand the faces until just the recessed areas have paint remaining.
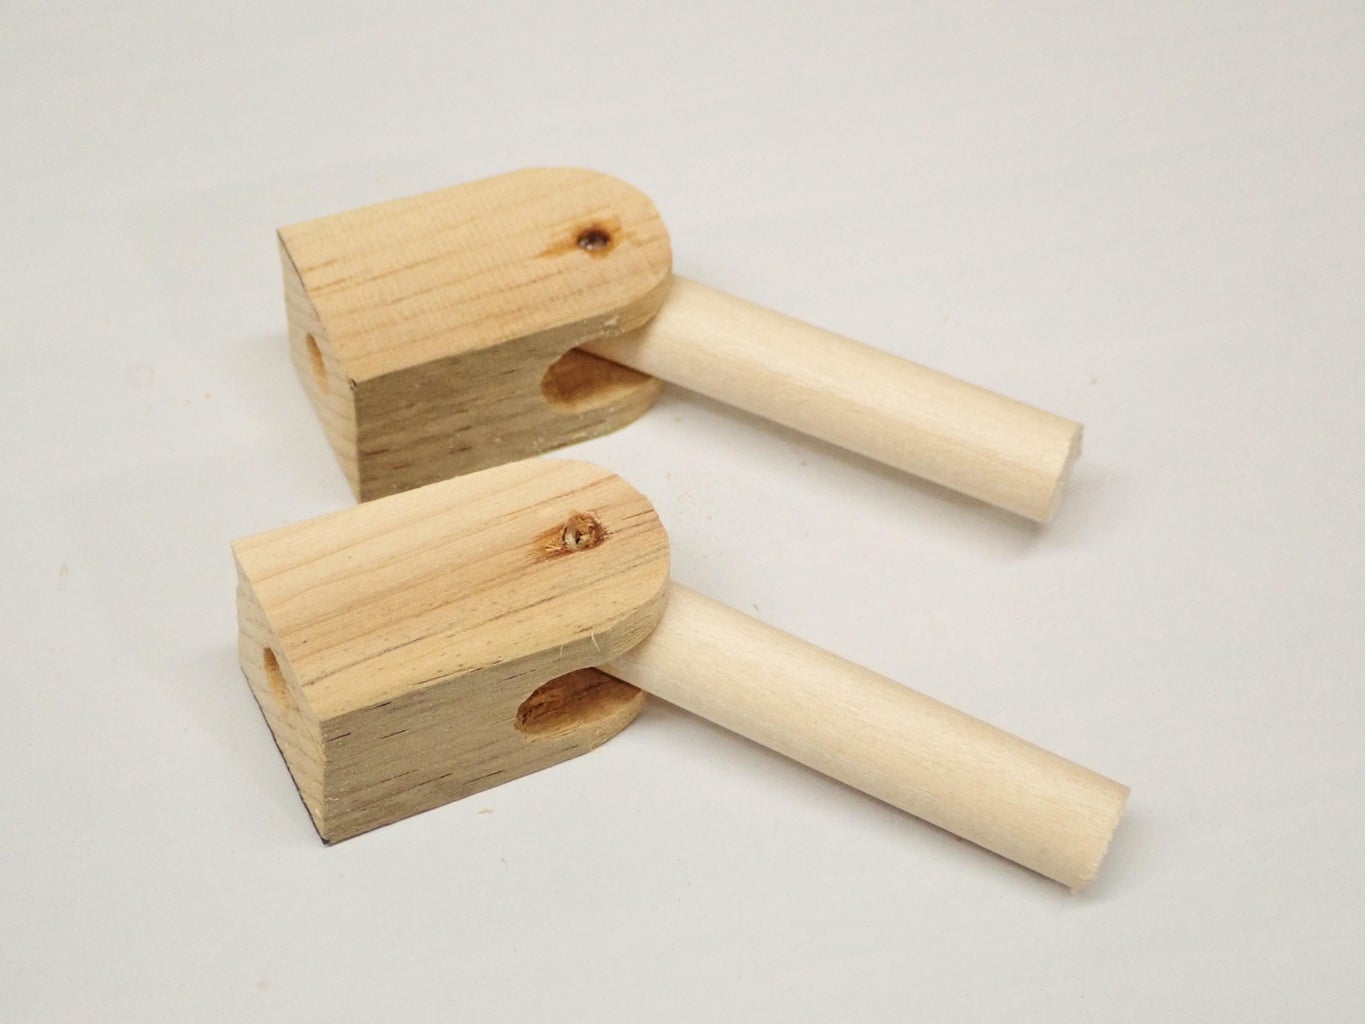
Step 4: Arms, Legs and Hips
The arms and legs are cut from one of the squarish chunks from the block breakdown shown in step 1.
Before cutting each block into quarters, drill 1/4" holes with a drill press all the way through along the grain as shown.
The hip pieces also get 1/4 holes drilled, but these are done with a handheld drill. Place a scrap piece of wood underneath as you drill from the top. These holes are drilled at an angle as shown in the photo - on the top side the holes start close together but on the bottom they exit further apart, which positions the legs later on.
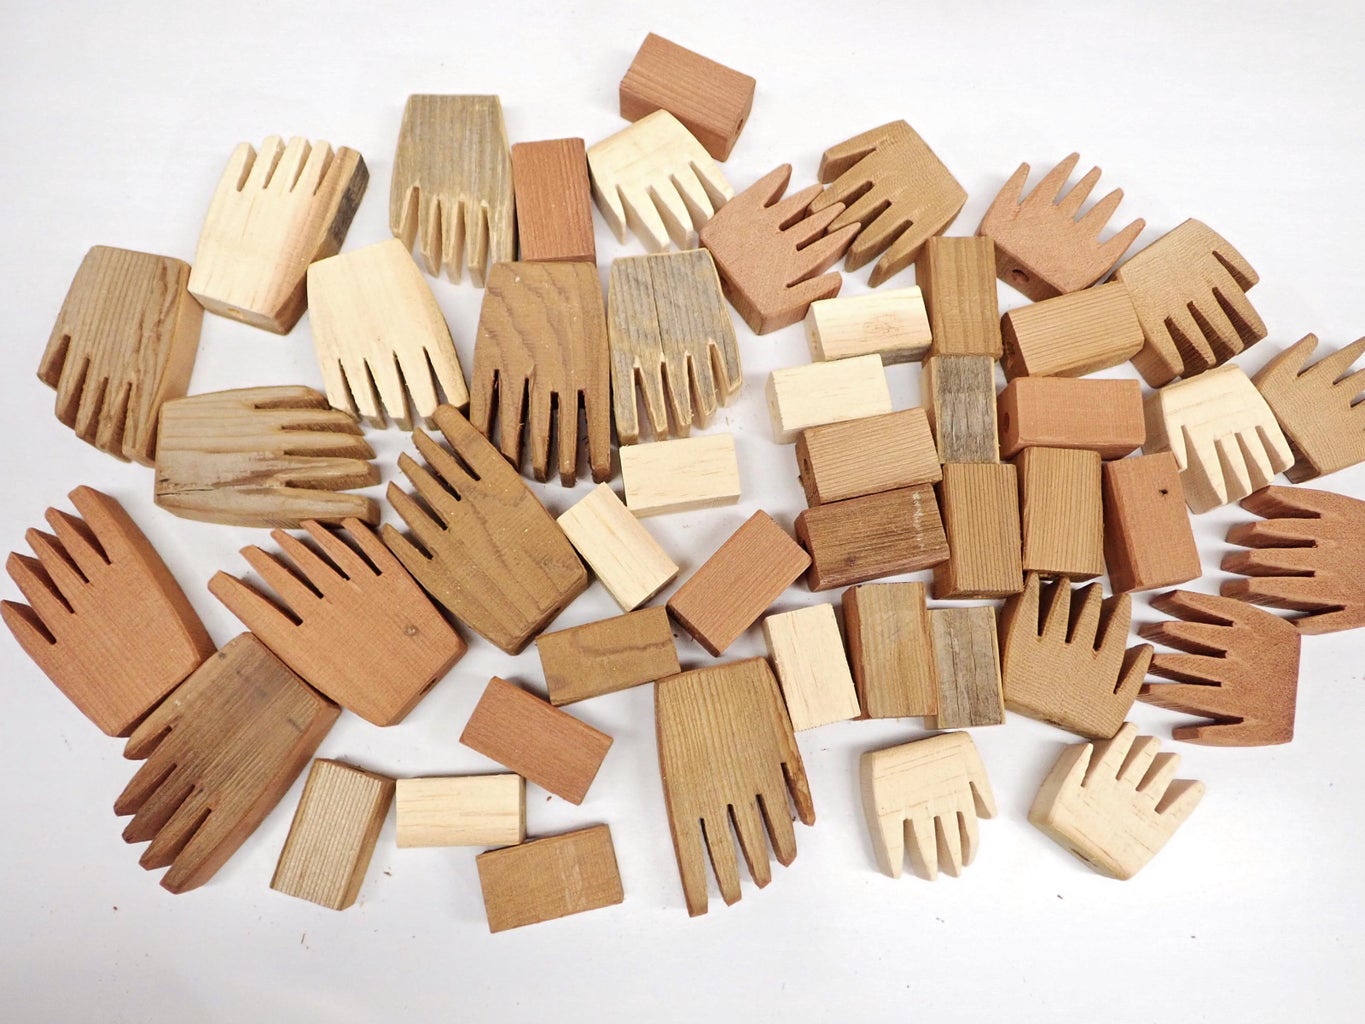
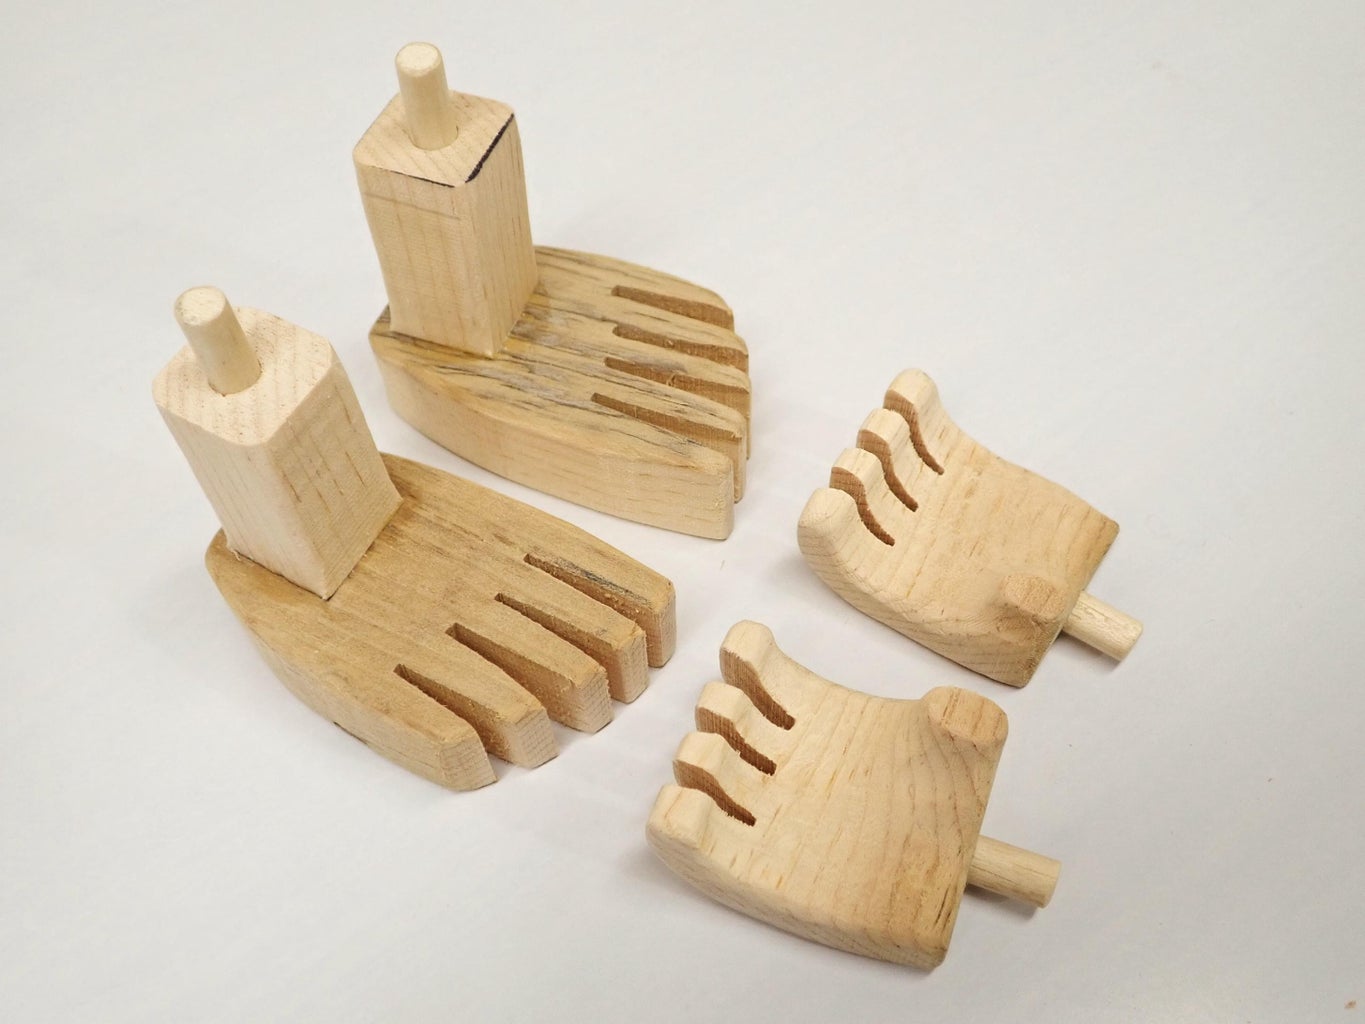
Step 5: Hands and Feet
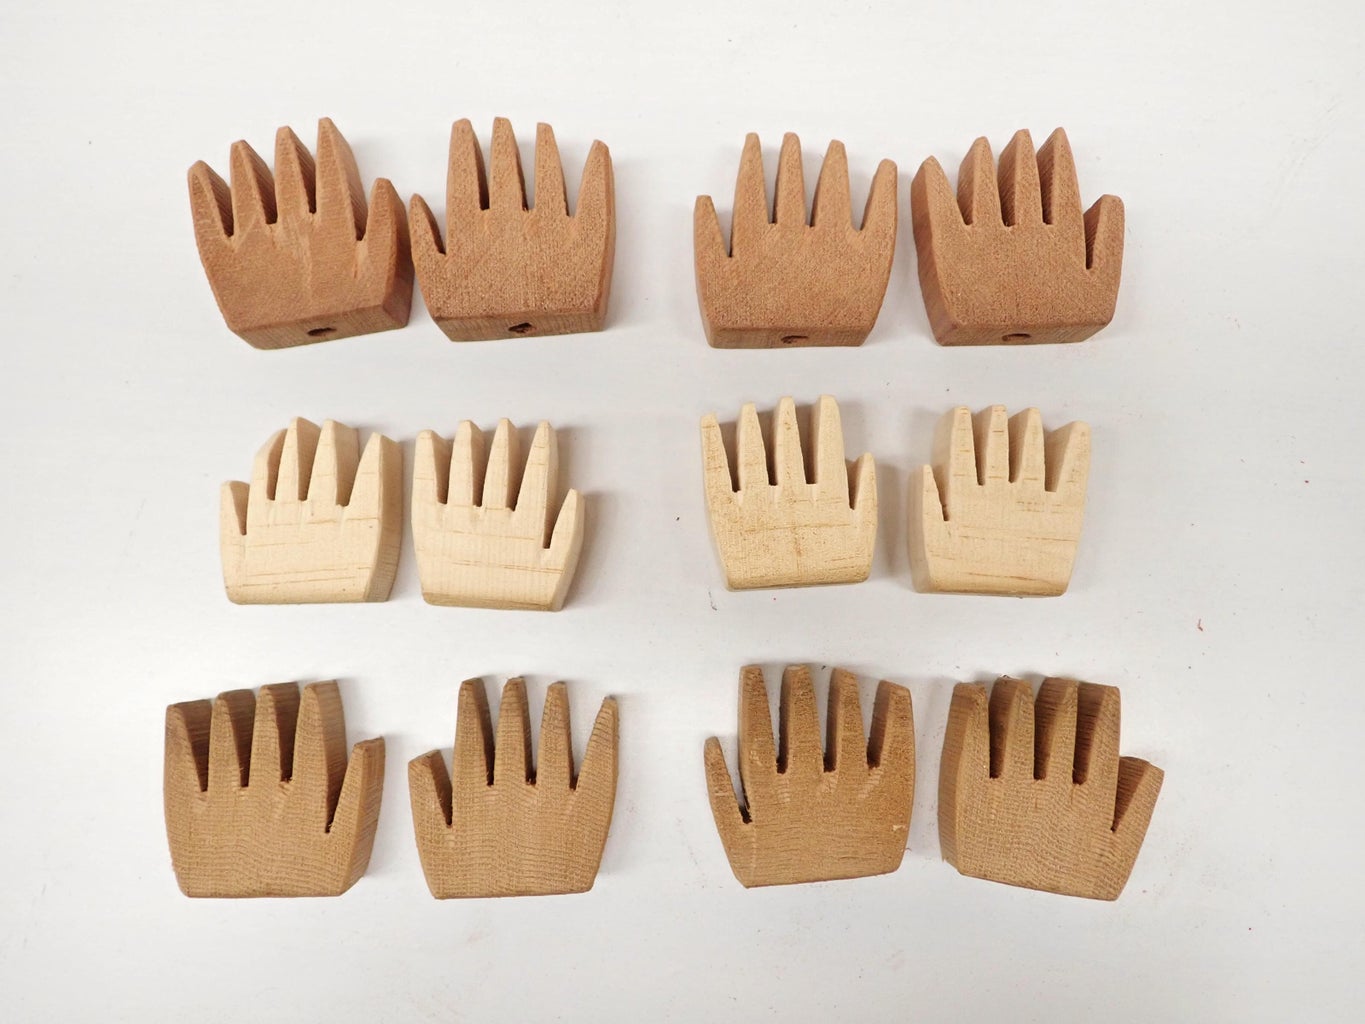
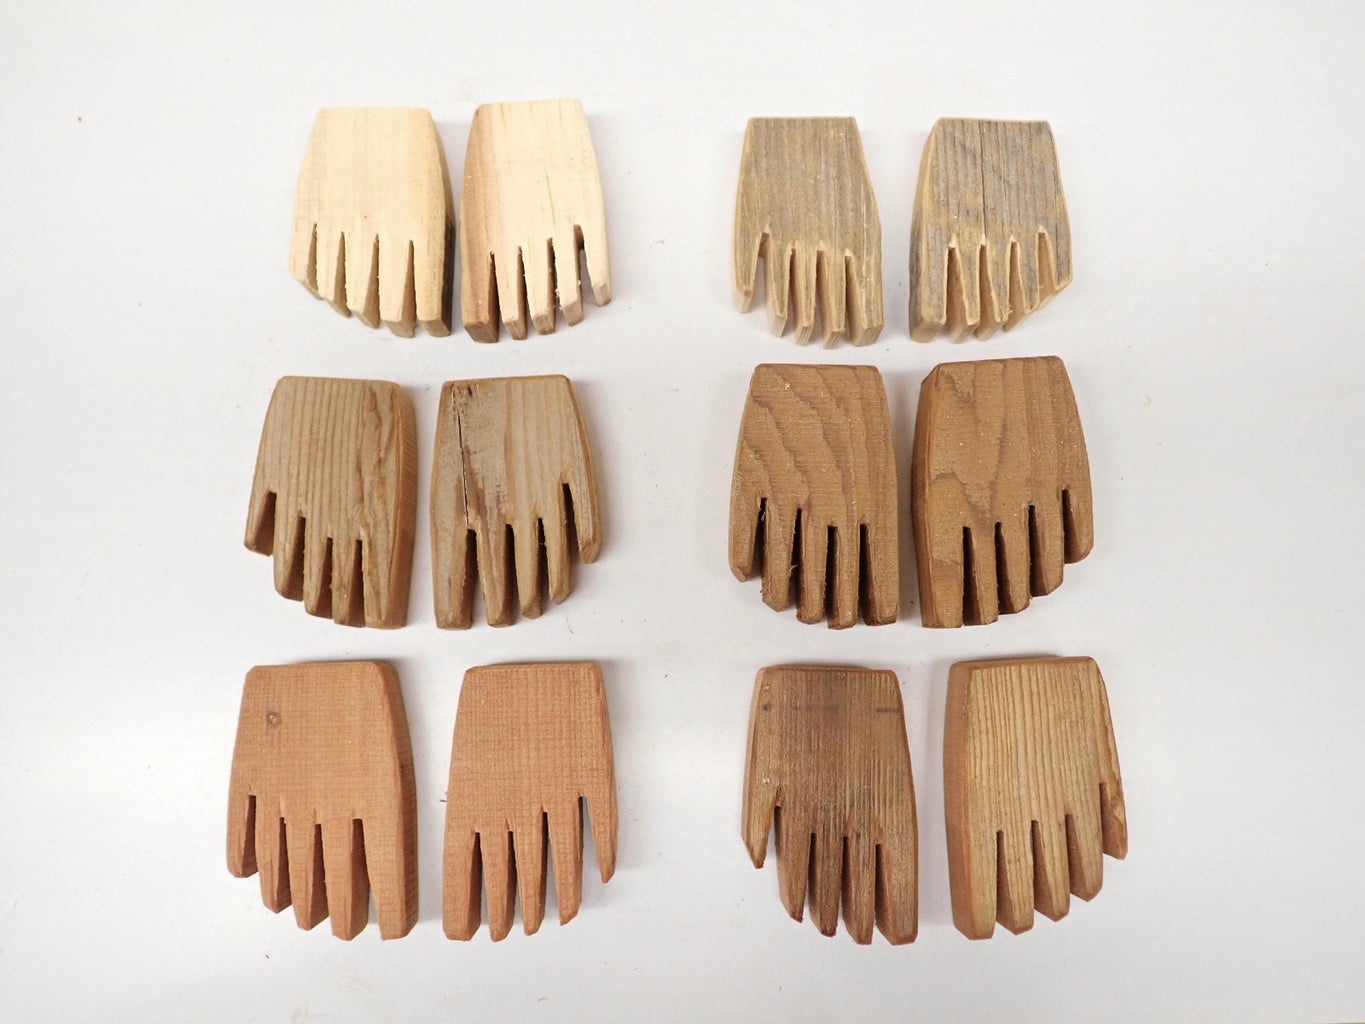
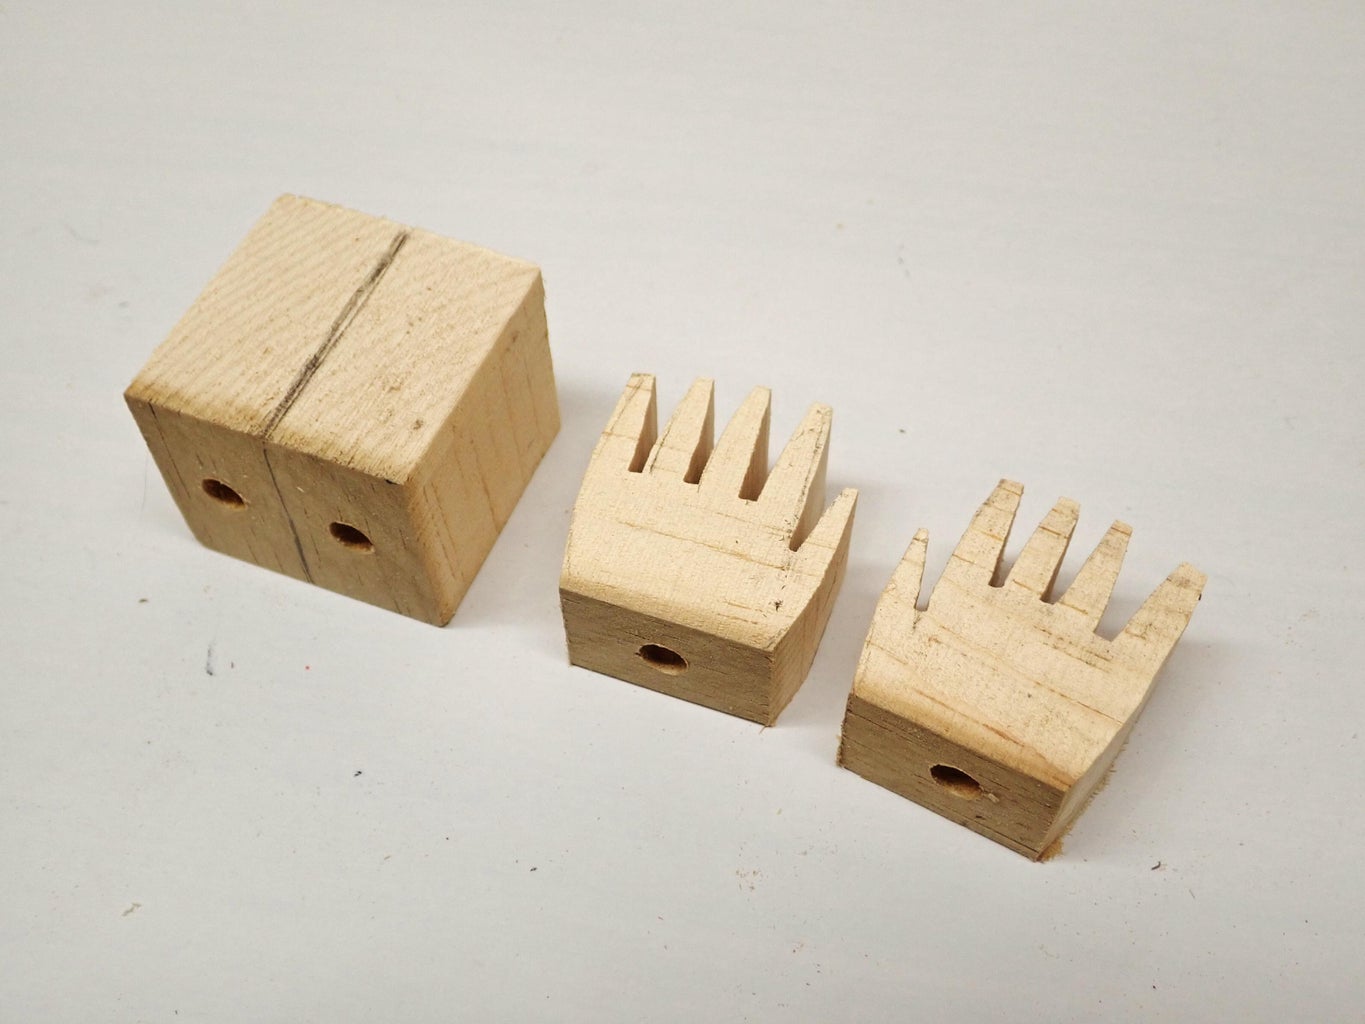
The hands are cut from the remaining small squarish block and the feet from the foot blocks.
Before cutting them out they are all drilled in the ends with a 1/4" bit about 1/2" deep.
The toes and fingers should be long and bony for the most skeleton-like visual effect.
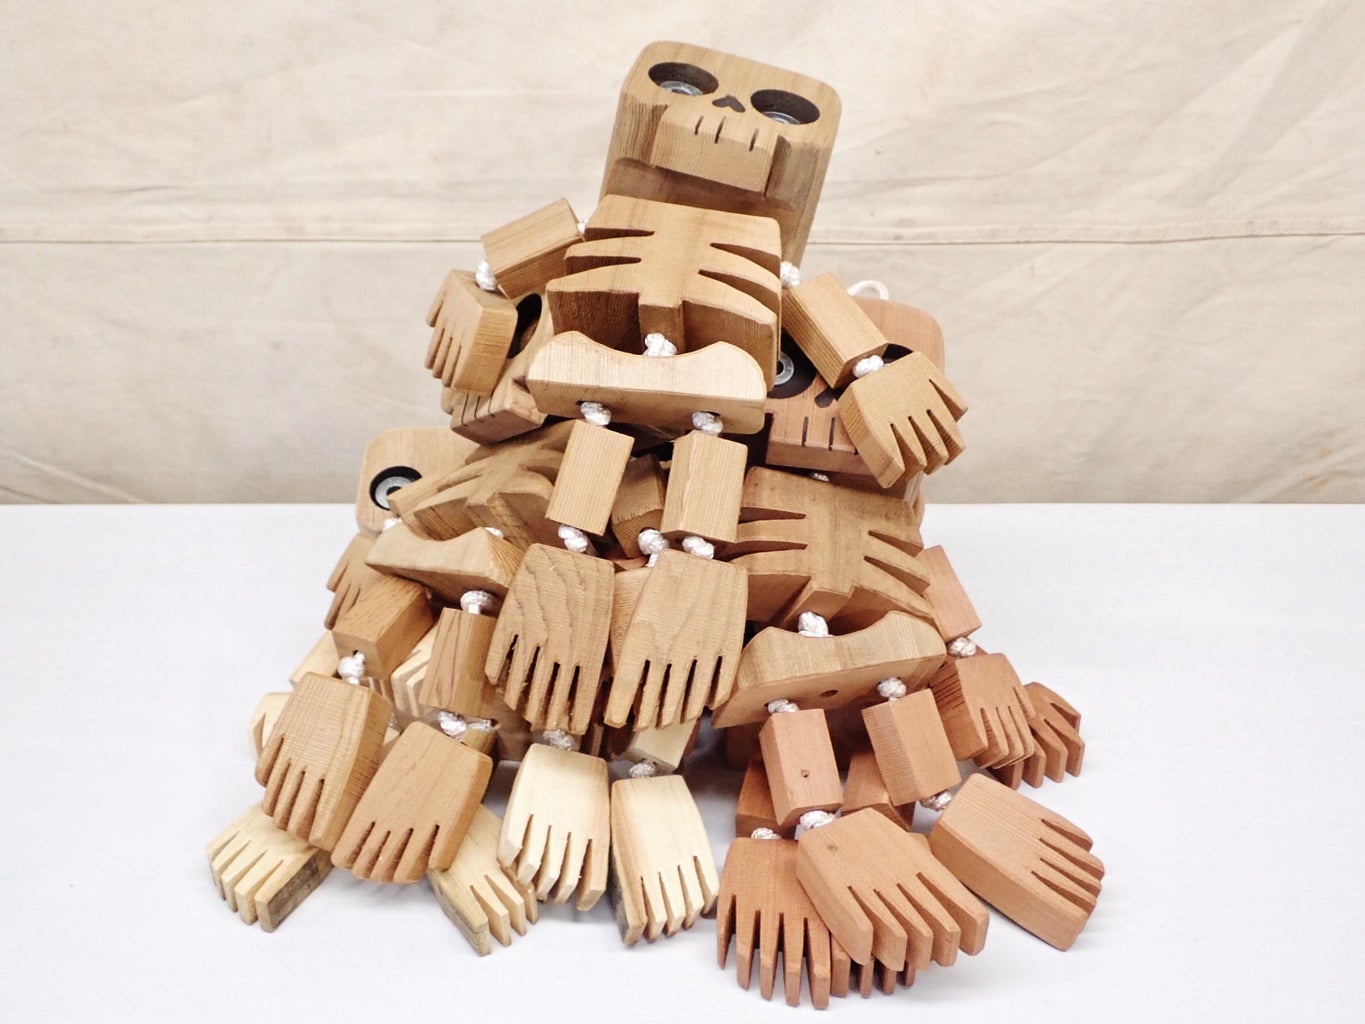
Step 6: Sanding
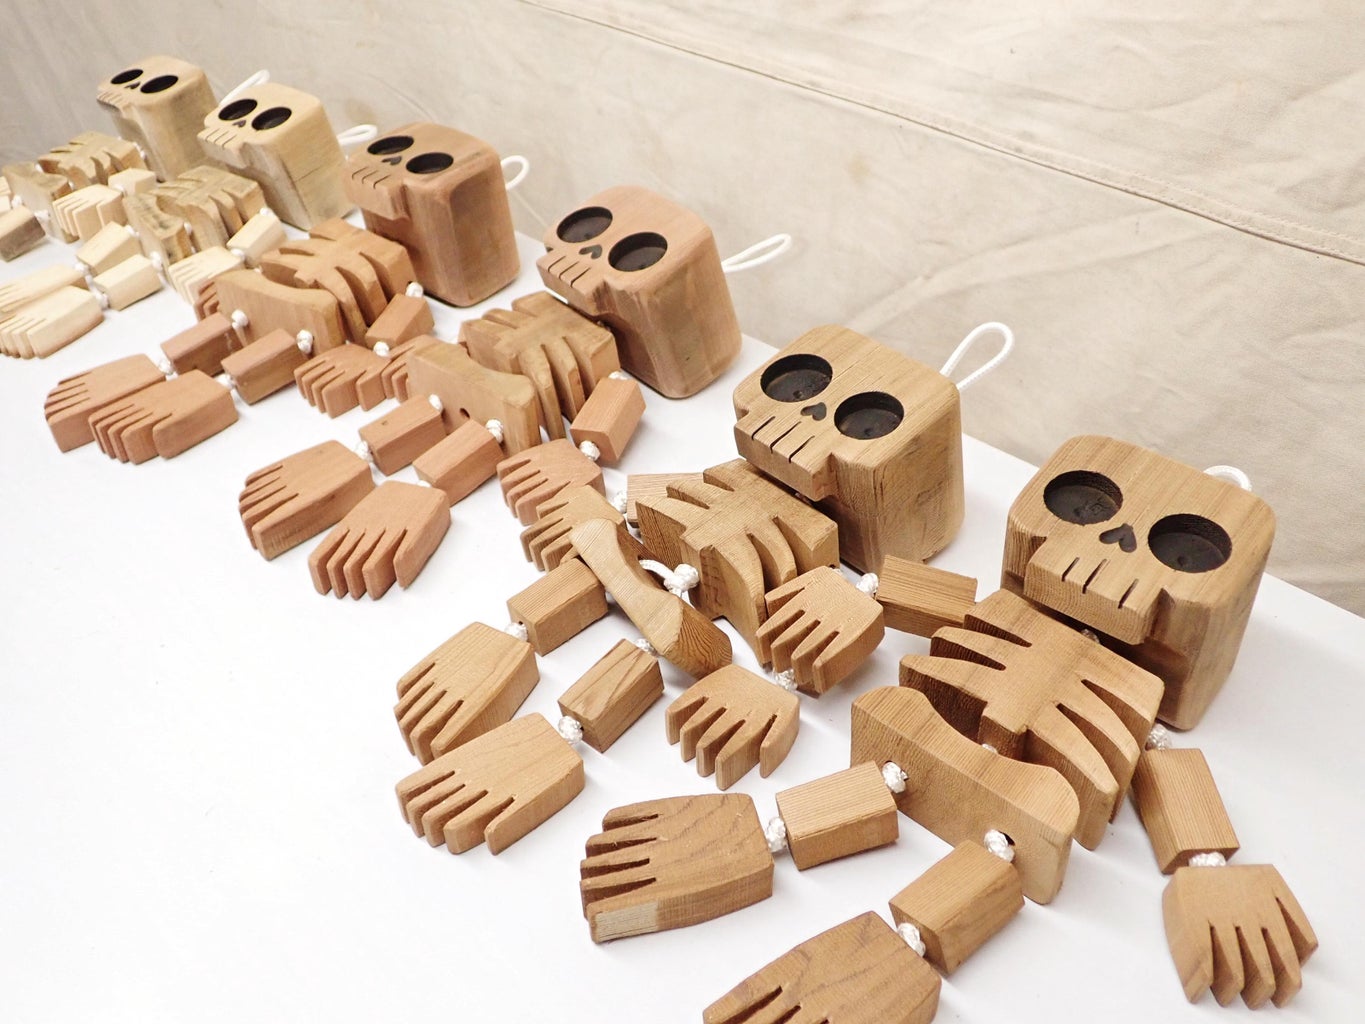
Before assembling all the skellies, I took some time to lightly sand off all of the sharp edges from all pieces using a drum sander on a Dremel tool. This was followed by a light hand-sanding with some 220 grit sandpaper.
This is a tedious job, especially for 6 different skeleton figures. All those bony fingers and toes were mocking me!
Step 7: Assembly 1


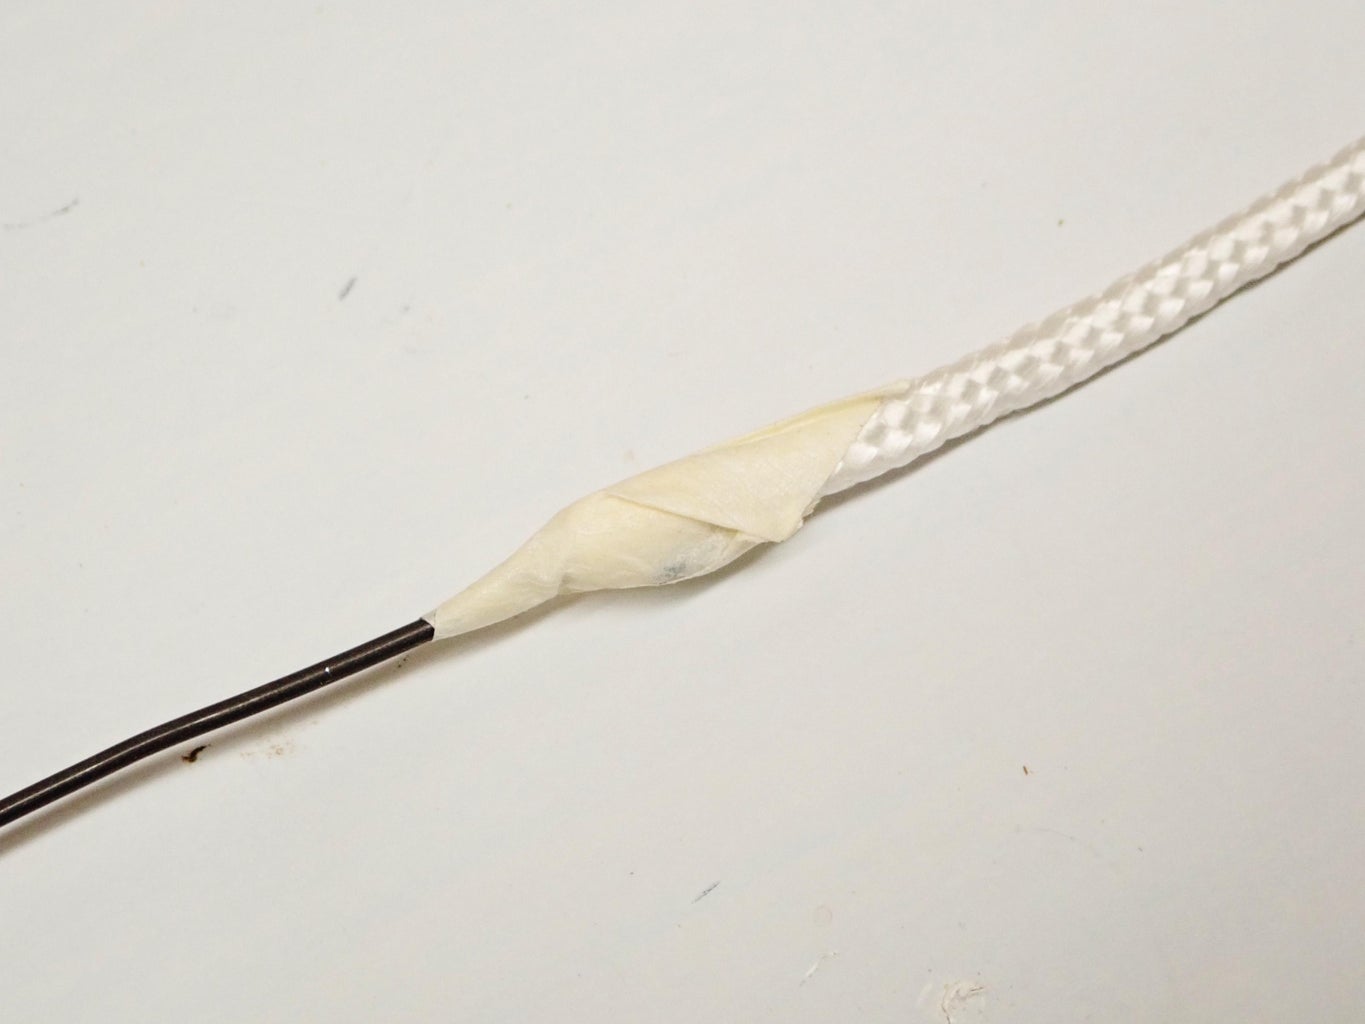
You need two pieces of 3/16" cording for each skeleton. Cut one piece 48" long and one 20" long.
I recommend wrapping the cut ends with a small piece of masking tape to keep them from fraying, which allows them to be threaded through the holes easier than if you fuse the ends with a lighter or torch. Trick: wrap the cord with tape first, then cut through the middle of the taped section.
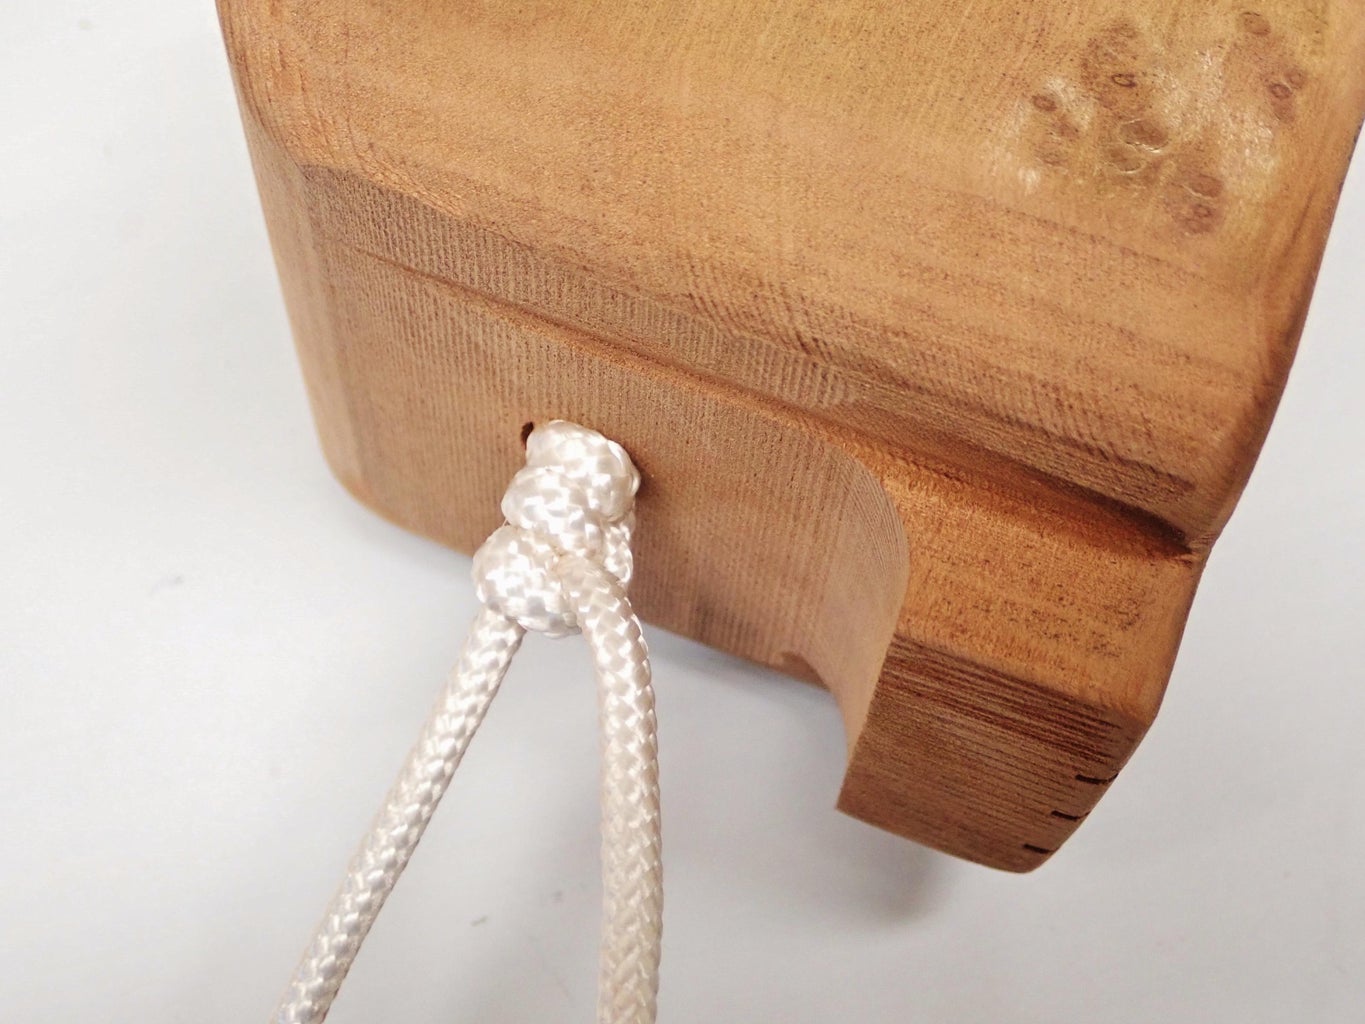
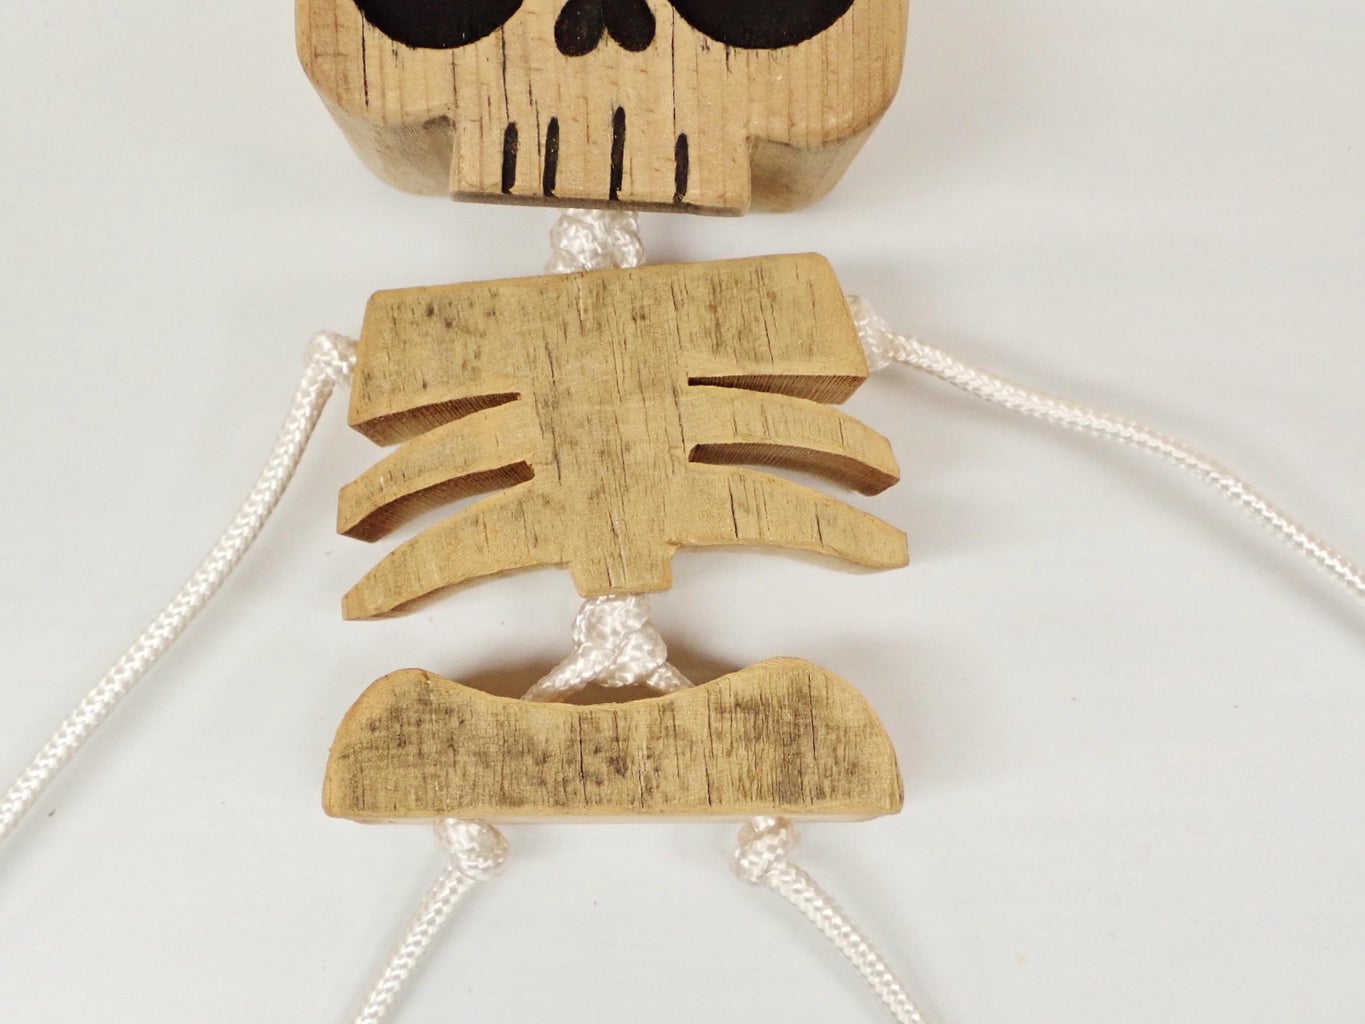
Take the 48" piece and fold it in half and tie a simple loop in the middle, so the loop is about 2" long. The two loose ends are threaded through the top of the skull piece as shown.
The rope can be made to look like a perfect "spine" - which is a detail I'm especially proud of!
To do this, tie three half-hitches as detailed in the photos. Each half-hitch should be made using the same rope end, tied around the other rope end that is held straight.
Step 8: Assembly 2
Thread the two loose head-ropes down through the rib section, but leave some slack remaining between the skull and ribs for now.
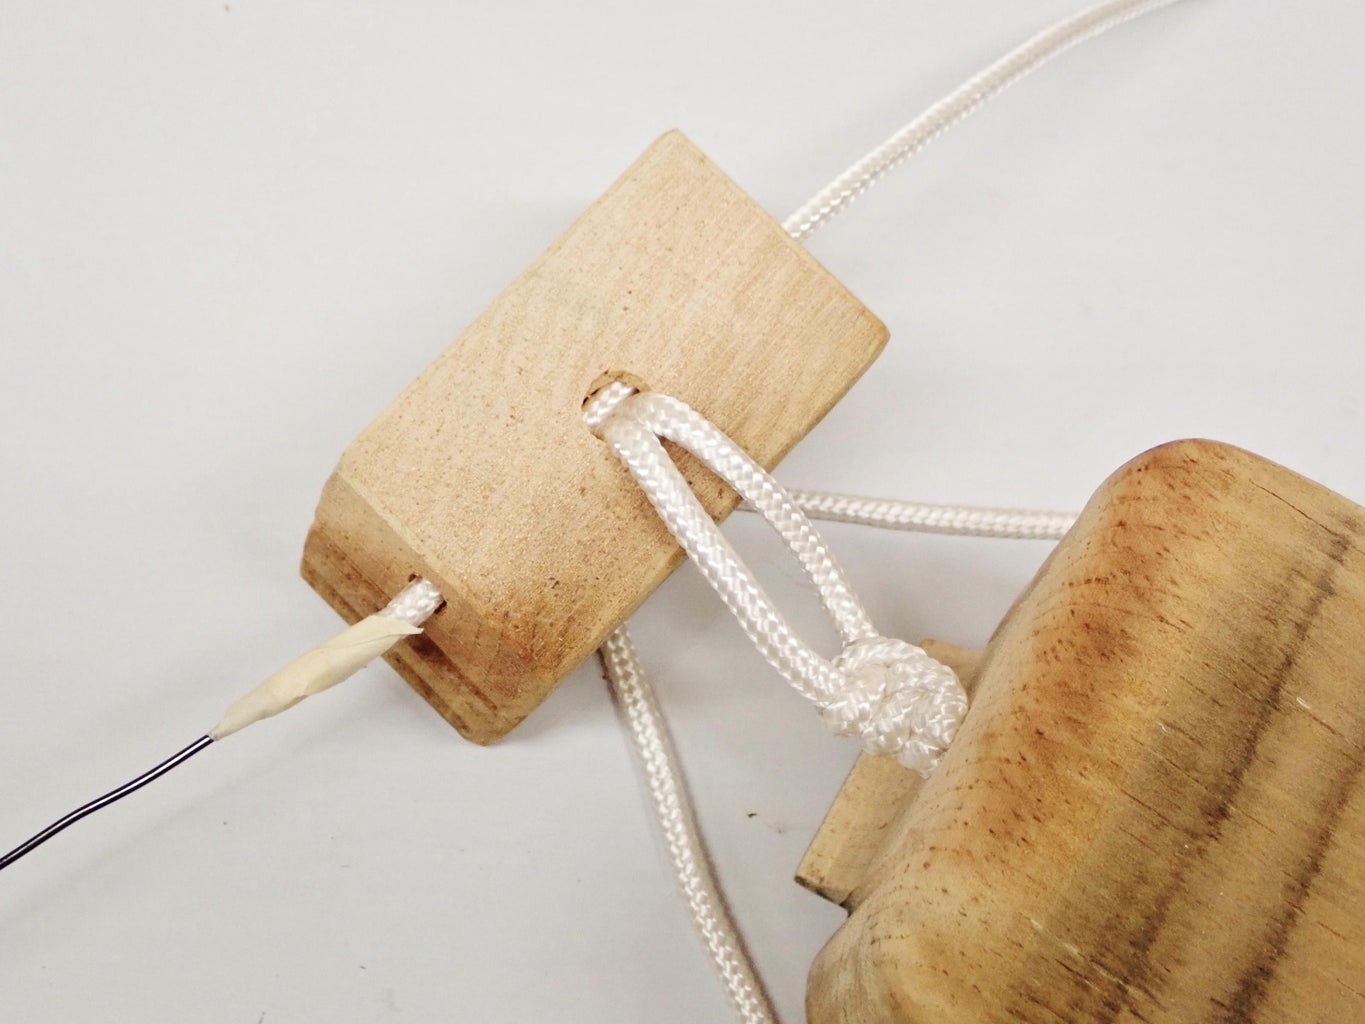
The 20" section of cording is now threaded through the top horizontal hole in the ribs for the arms.
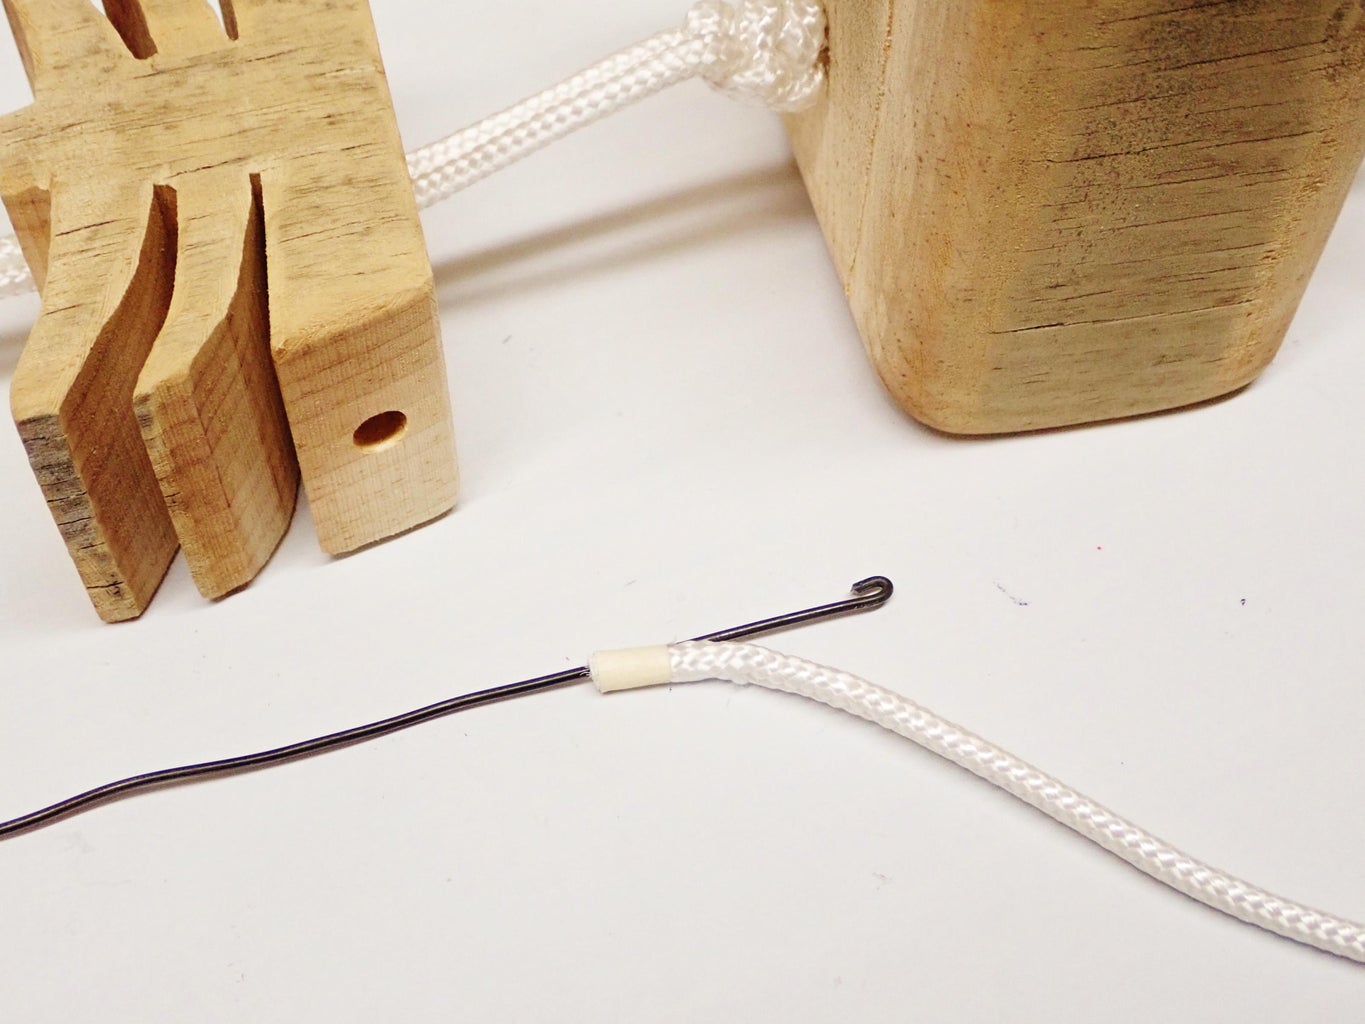
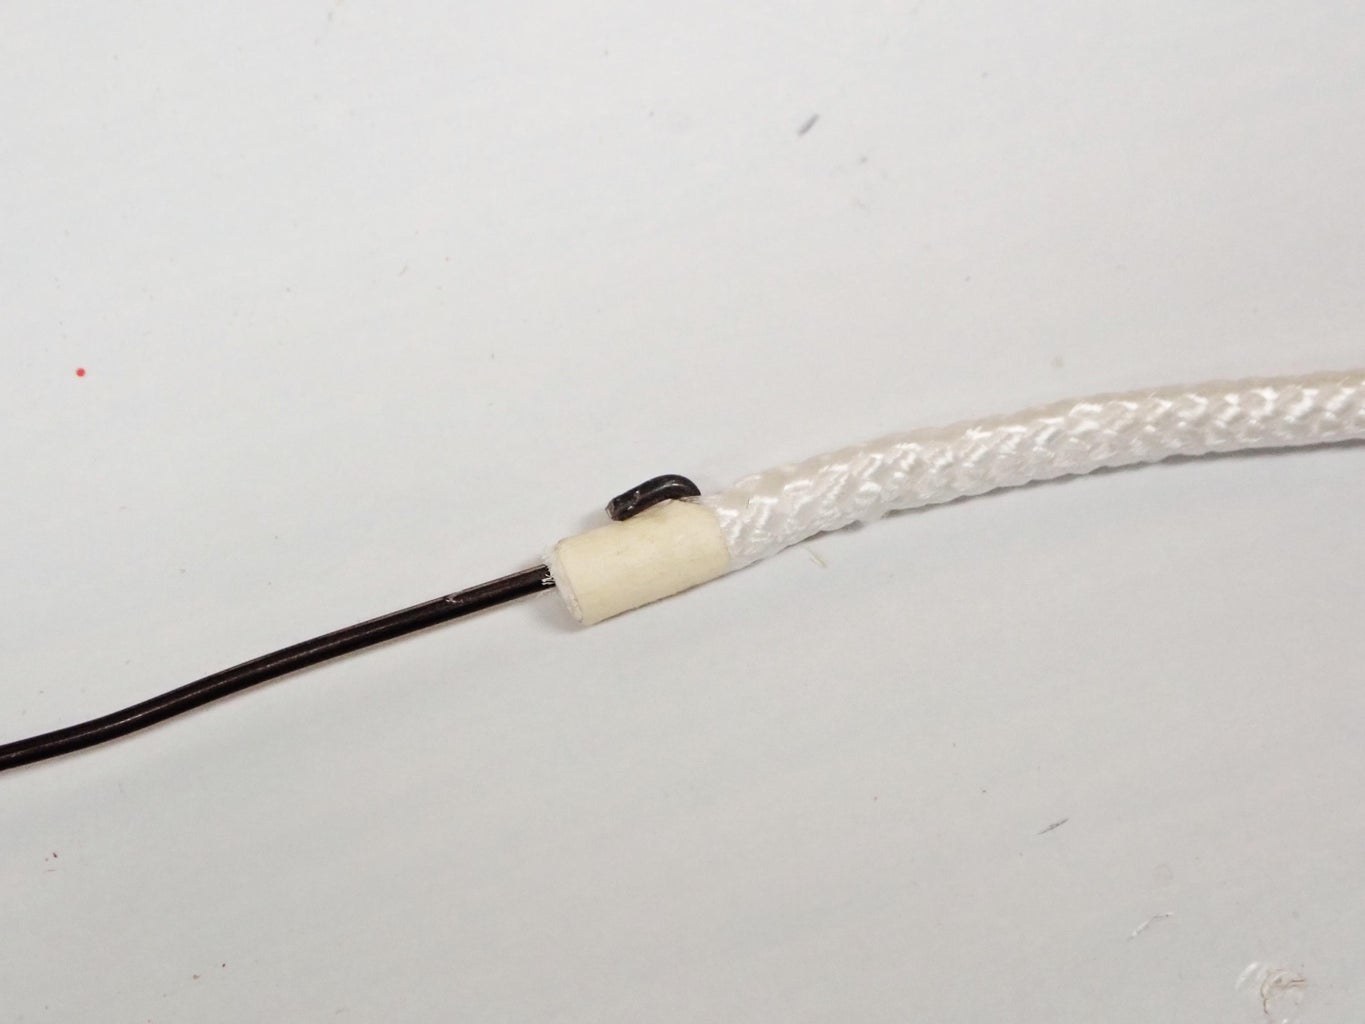
To make this as easy as possible, it helps to take a thin piece of wire and put a tight little bend on one end. This is then fed into the cord end and hooked onto the end as shown. Wrap this with a little bit of tape to keep it from snagging, and then it can be fed through the rib hole and pulled past the head-ropes.
Step 9: Assembly 3
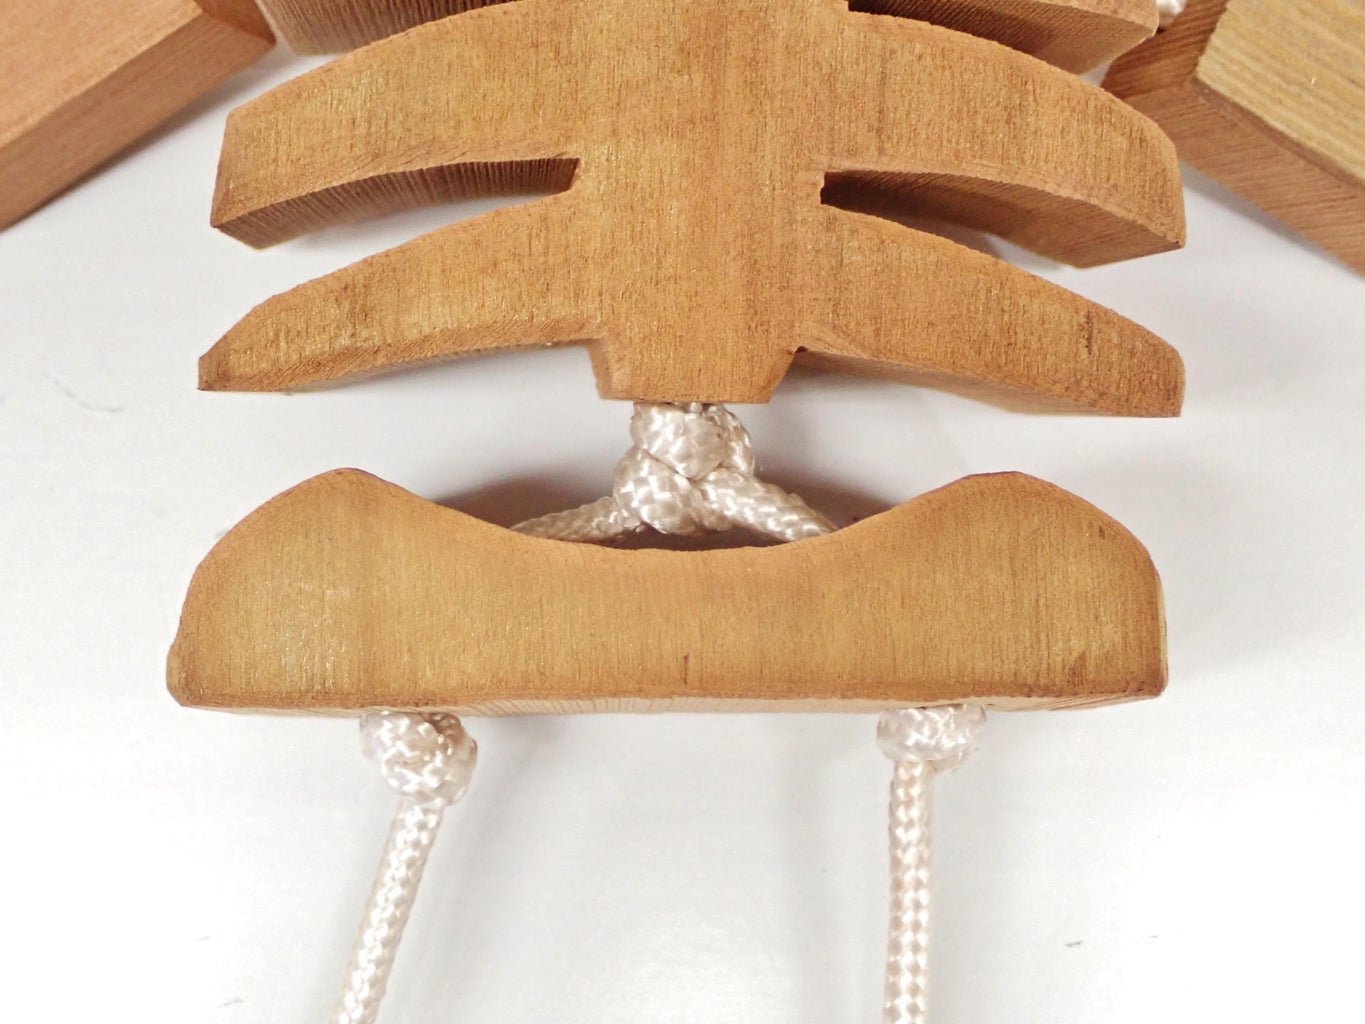
The cord that passes through the ribs for the arms is tied with a simple knot on either side.
The cords that pass through the skull and rib pieces will have one end that is longer than the other now, due to the half-hitches tied earlier. Tie two more half-hitches at the bottom of the rib section, using the longer cord to tie around the shorter one.
The two cord ends are now used to tie on the hip section as shown with a simple knot on each side.
Step 10: Assembly 4
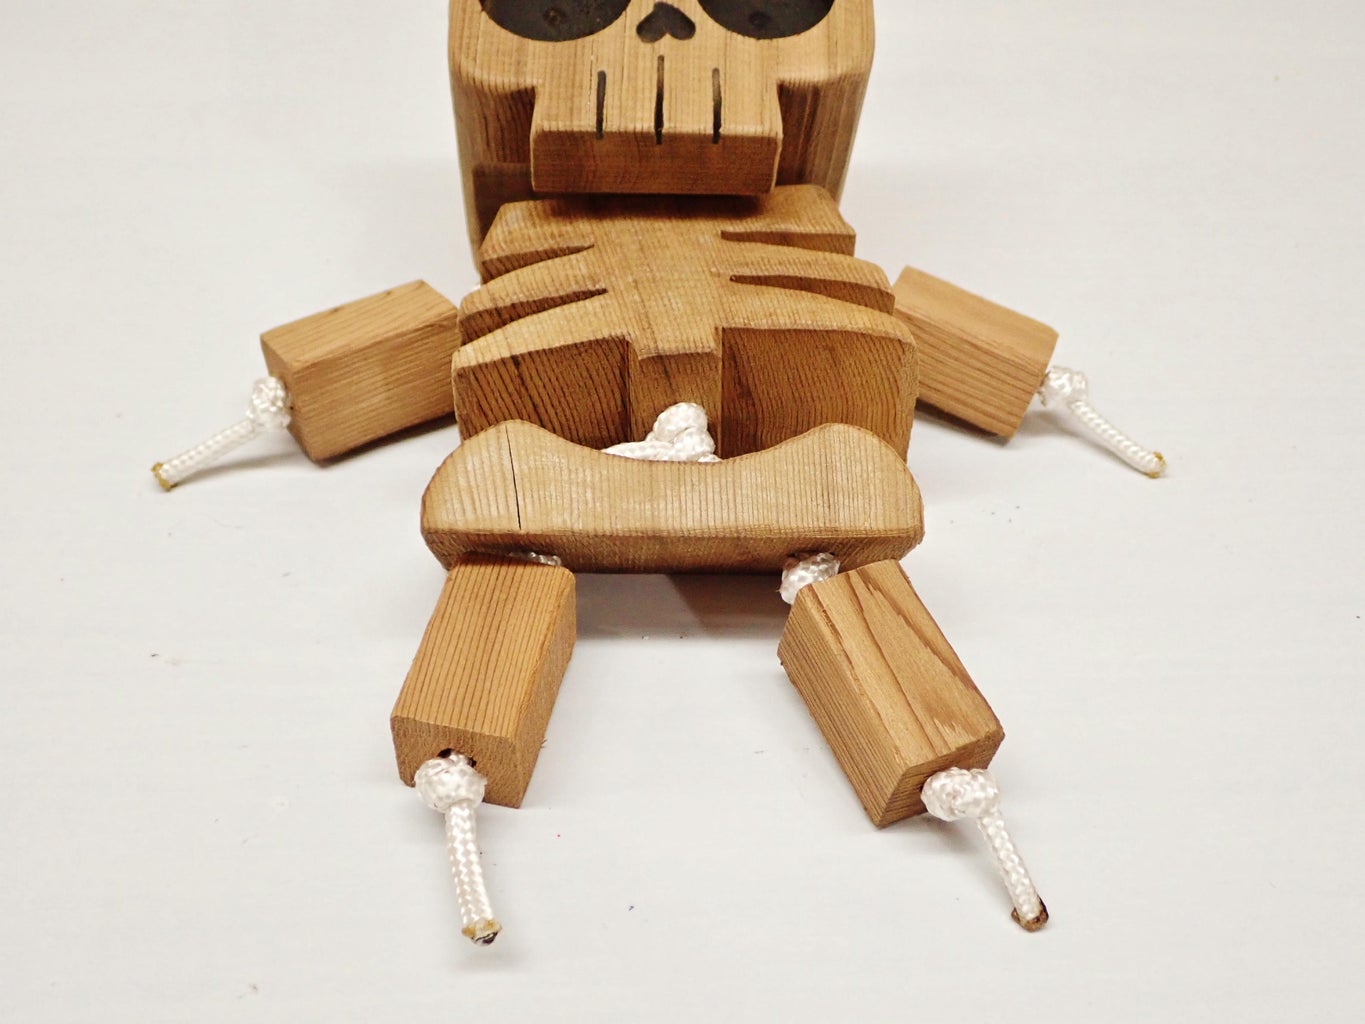
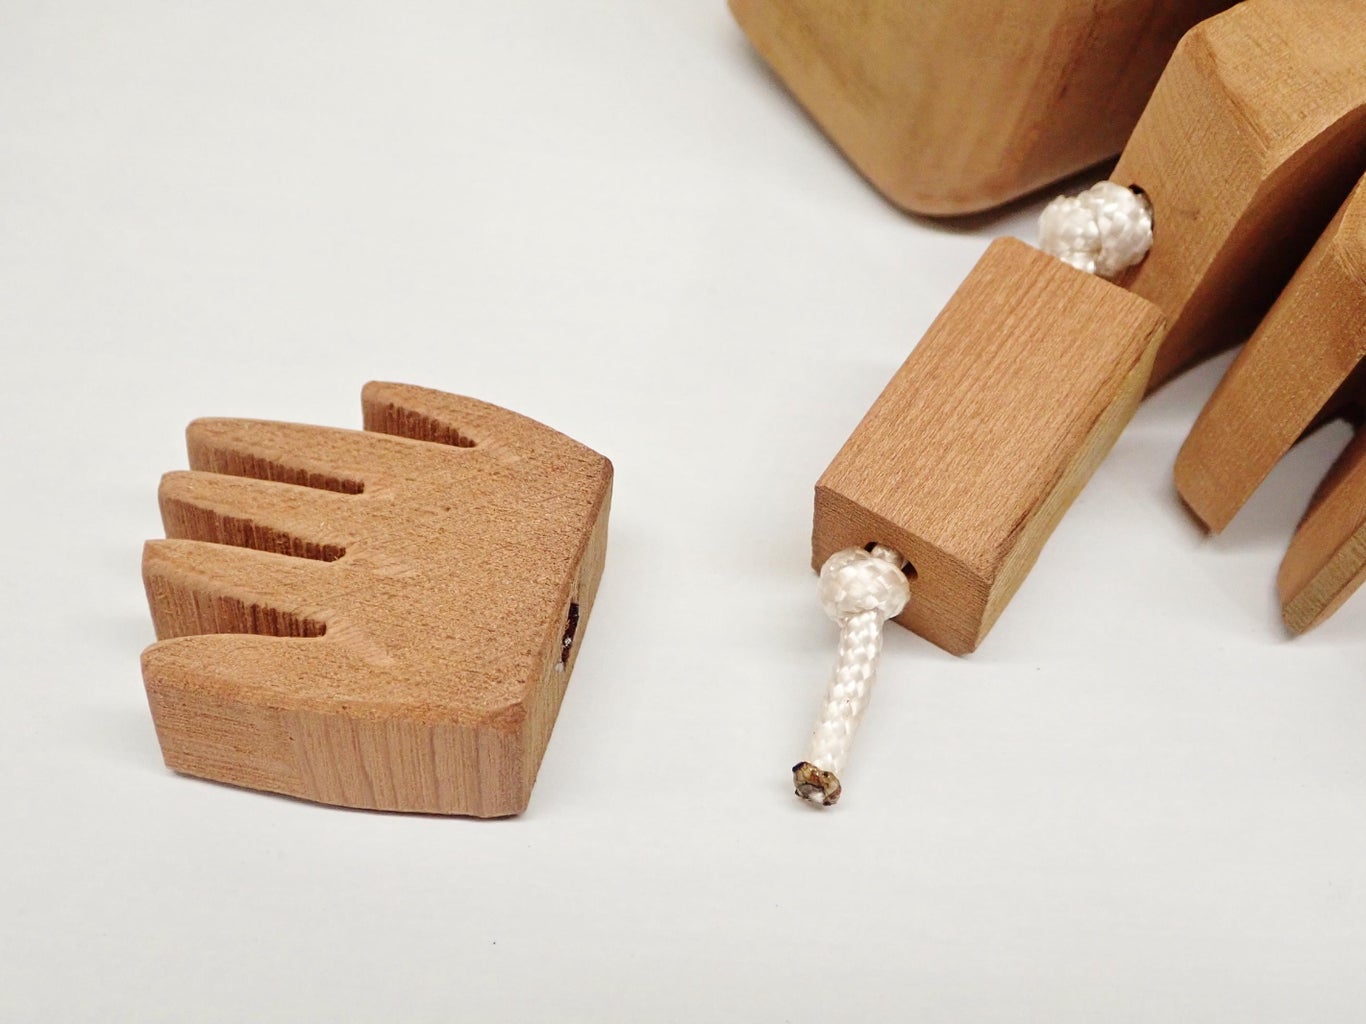
The wooden arm and leg pieces are now threaded on and tied in place as shown.
The loose rope ends are test fit and then trimmed as needed so they fit nicely in the hands and feet. At this point I recommend using a lighter or small butane torch to fuse the rope ends to keep them from fraying.
I used hot glue to fasten the rope ends into the hands and feet, but a slower-cure glue like E6000 could also be used. Hot glue is quick and easy though.
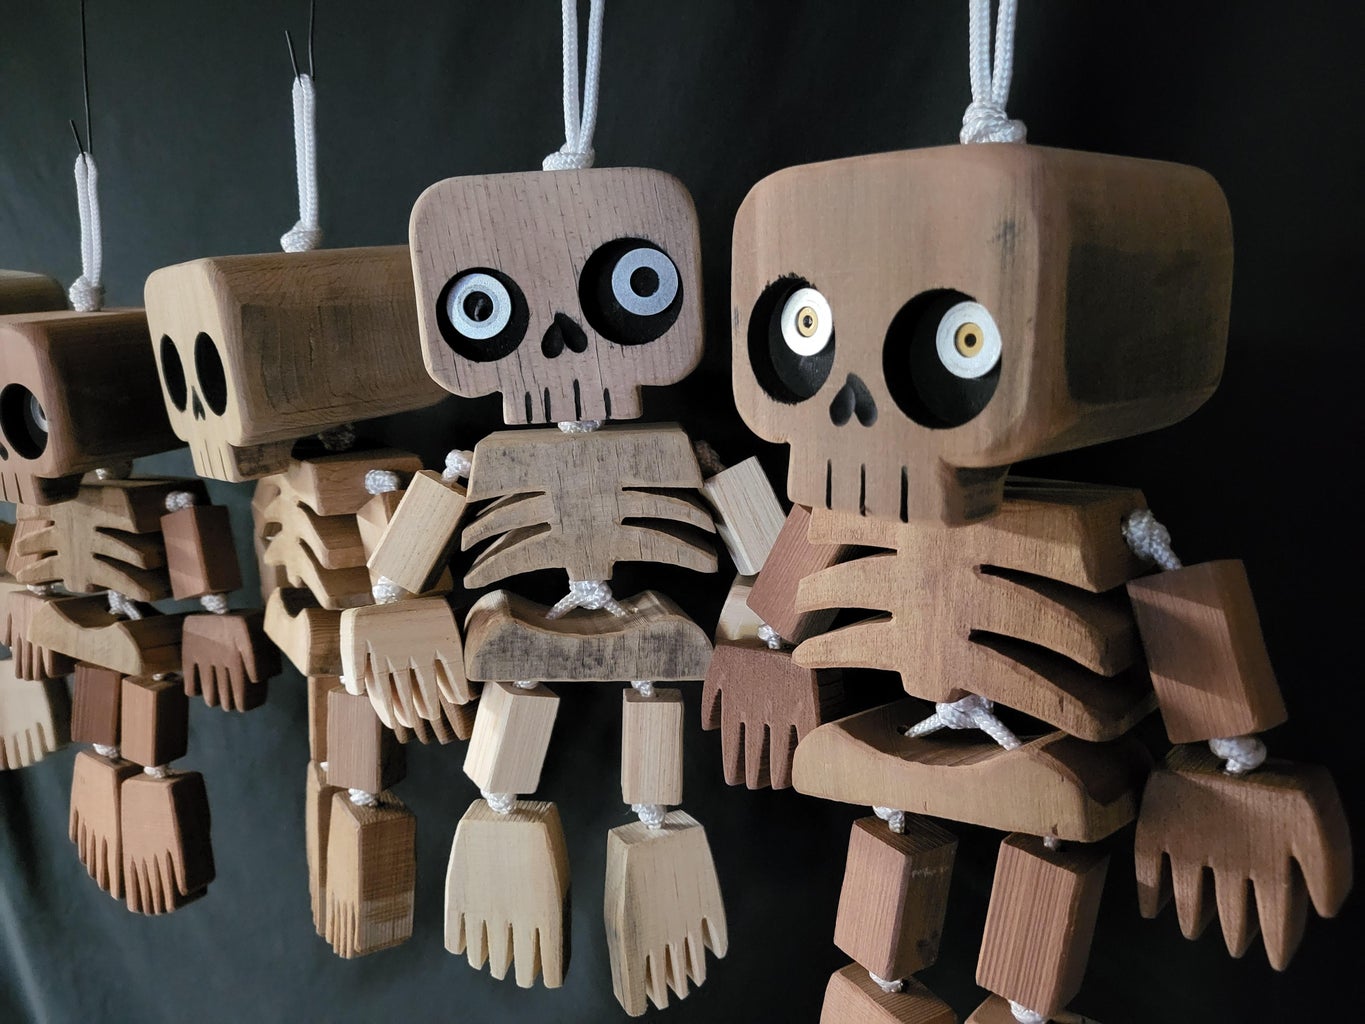
Step 11: Eyes
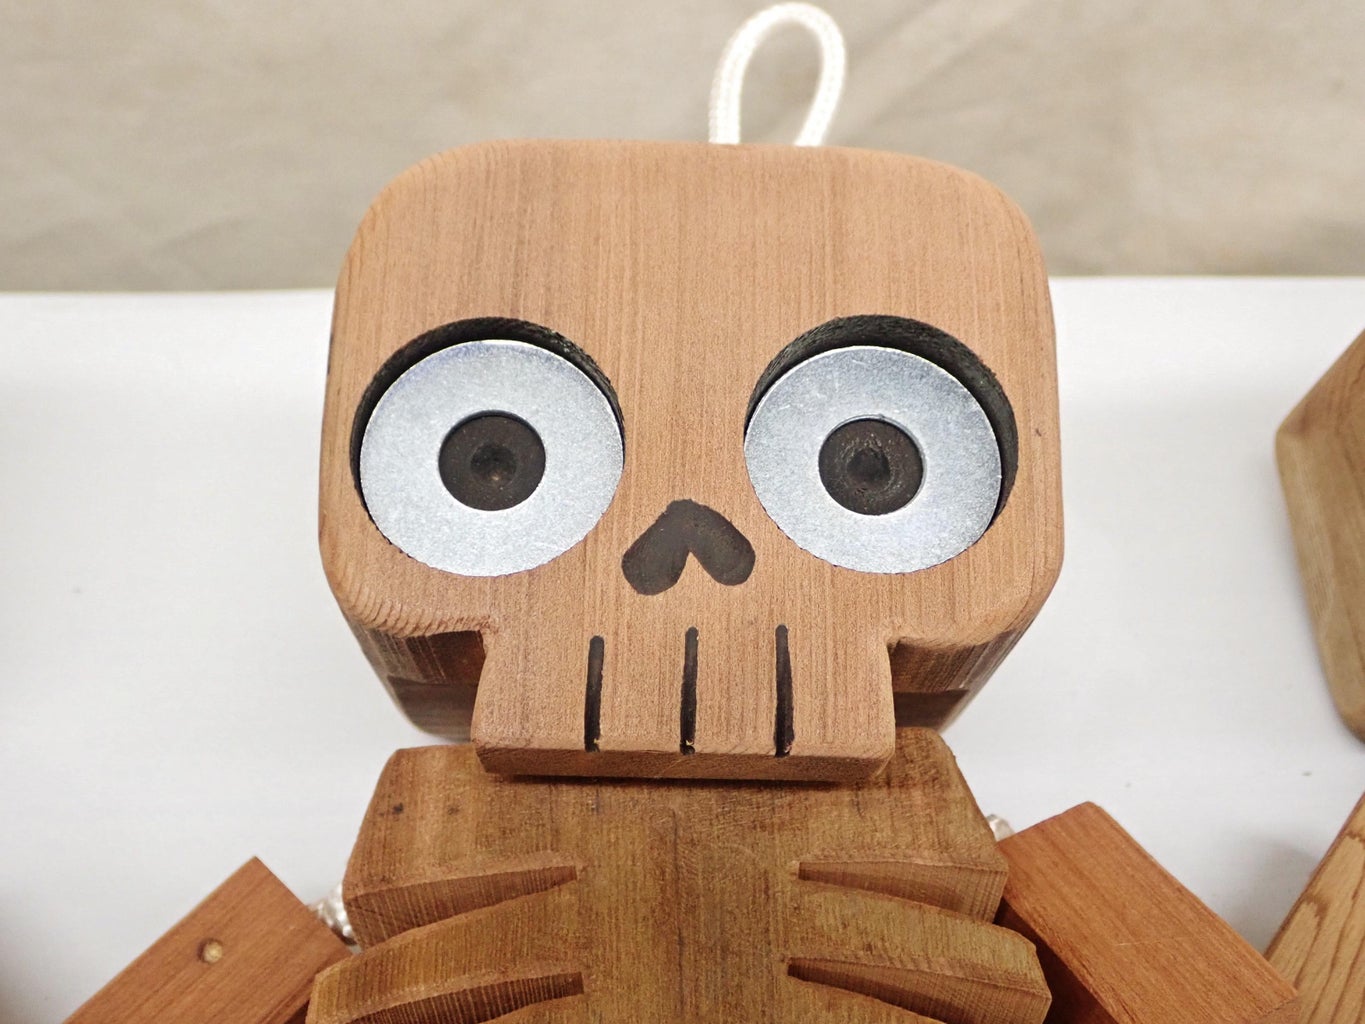
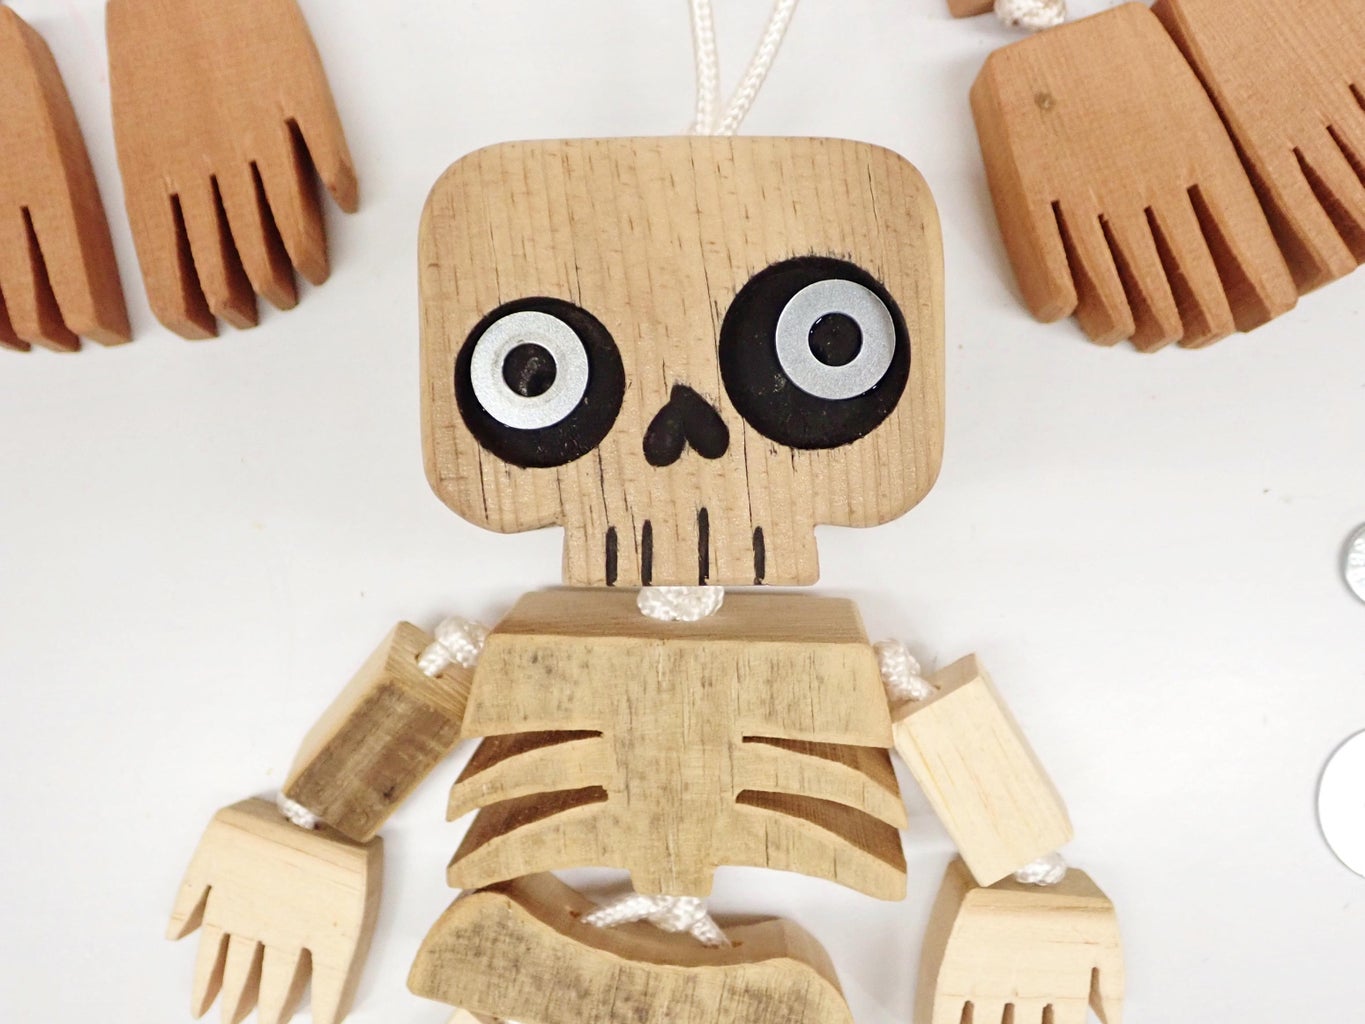
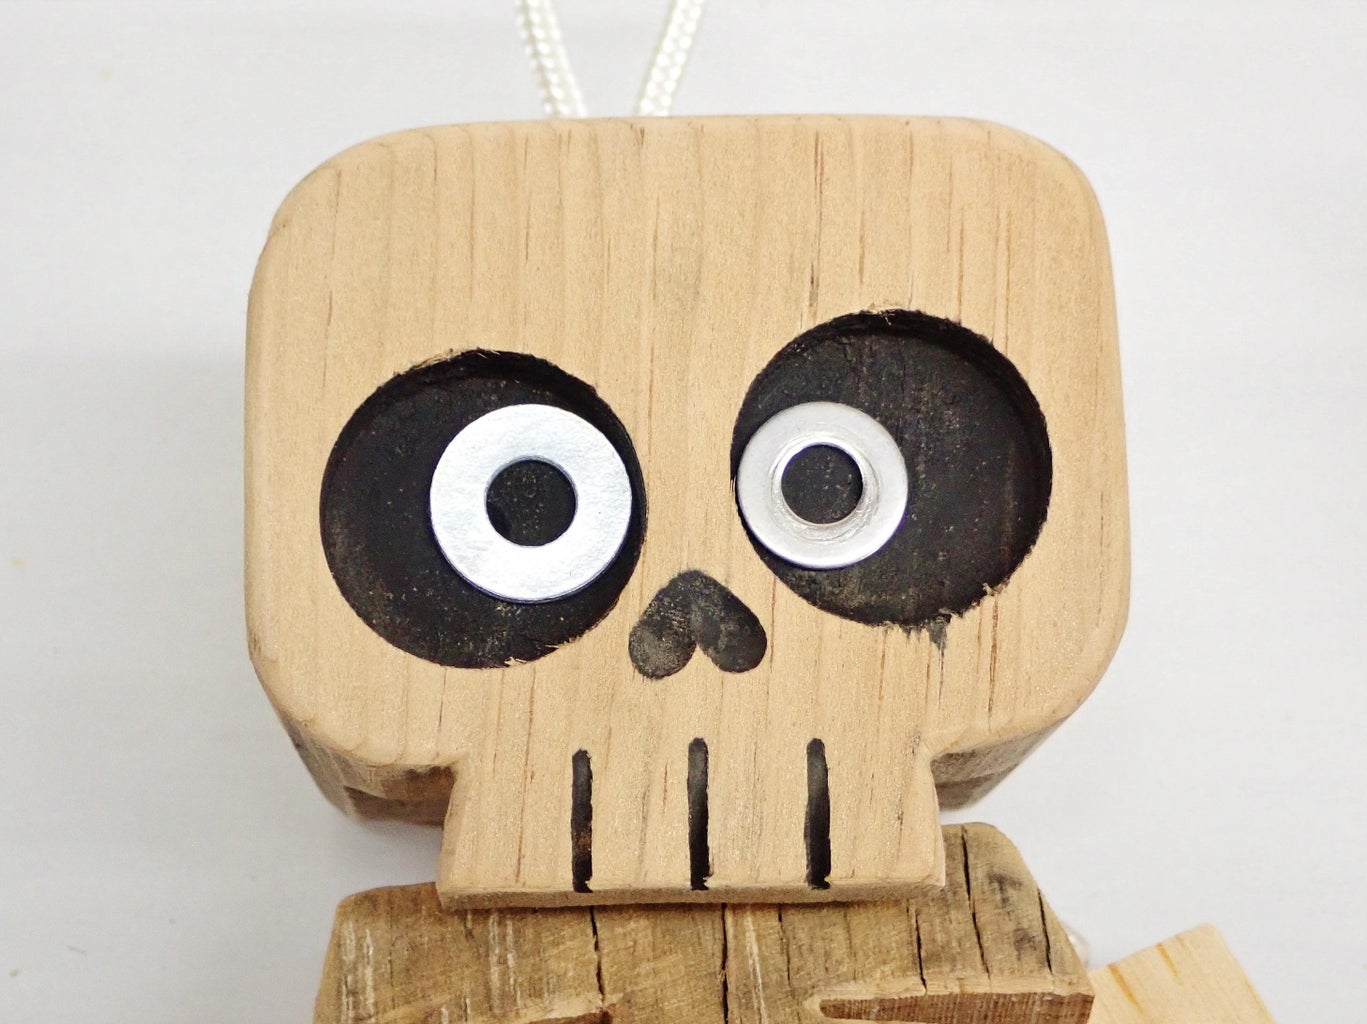
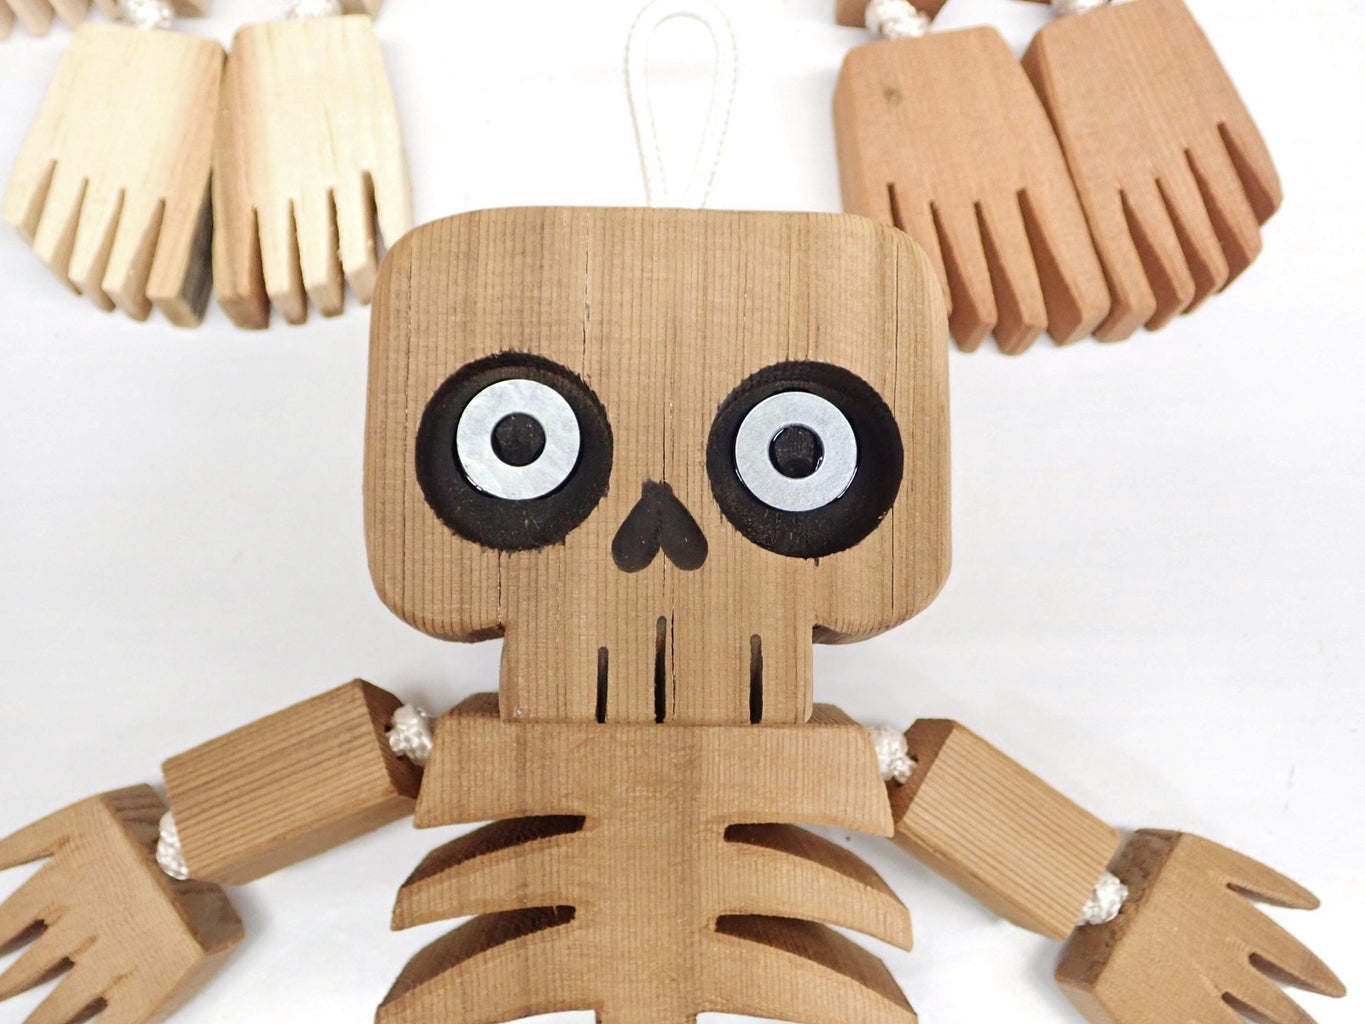
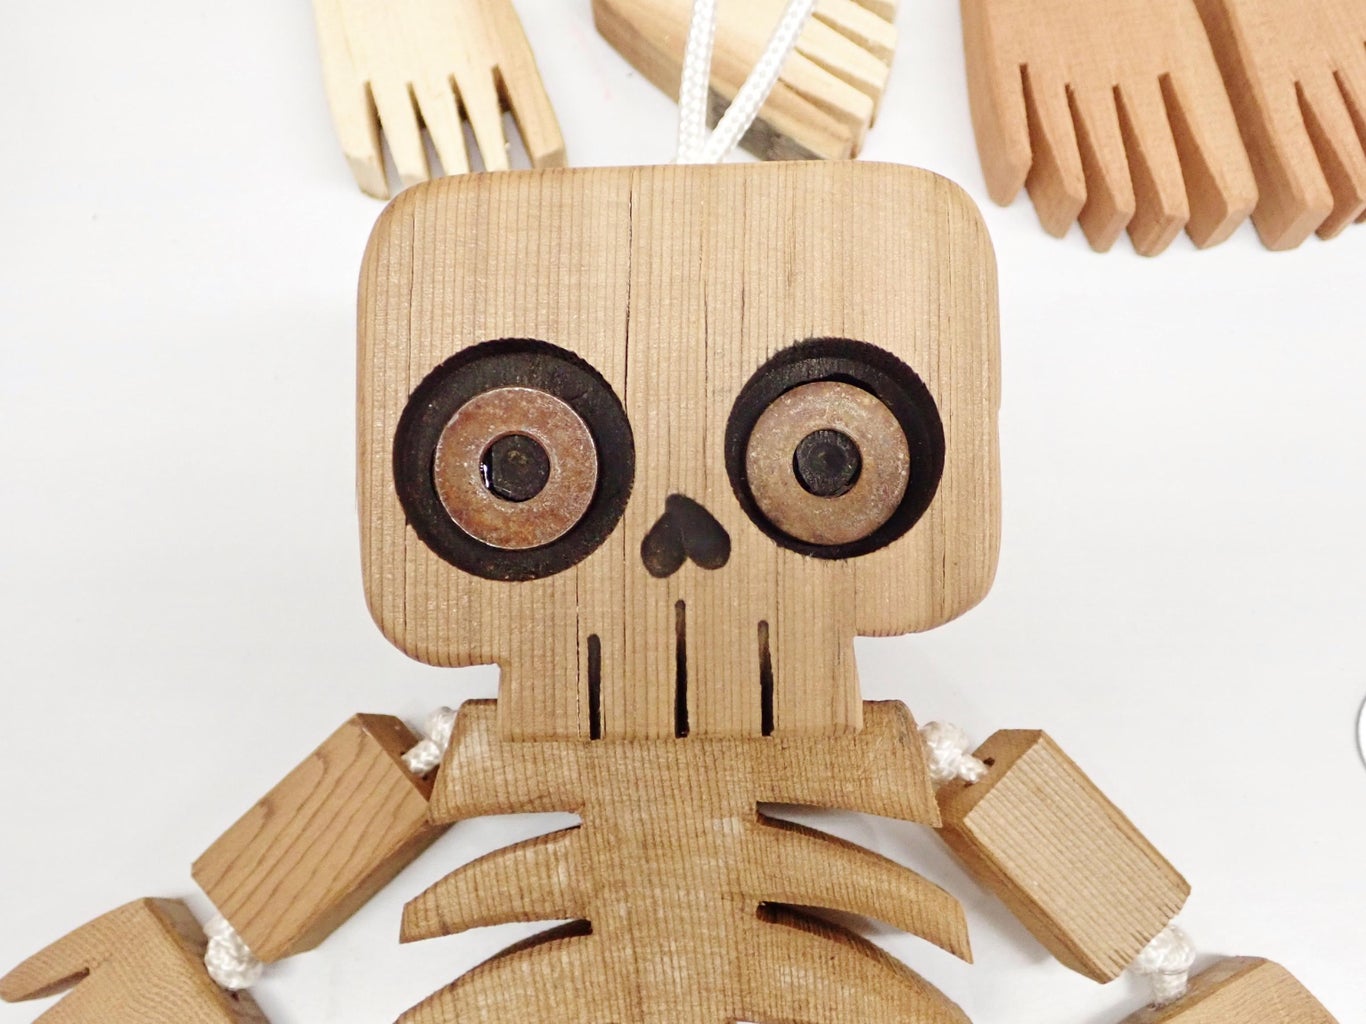
To give each skeleton some personality, various metal washers were test fit and moved around in the sunken eye sockets to see what looked good.
Get some washers of different colors and shapes and just see what kinds of faces you like.
In the end, my favorite look is with medium sized washers placed toward the upper middle section of the eye sockets, and spaced outward from the centerlines just a little. This makes them look aware, and just a little dopey. A little asymmetry is always good.
The washers were glued in place with tiny dabs of E6000 glue.
Step 12: Whew!
That was a lot of work for a tiny pile of wooden bones.
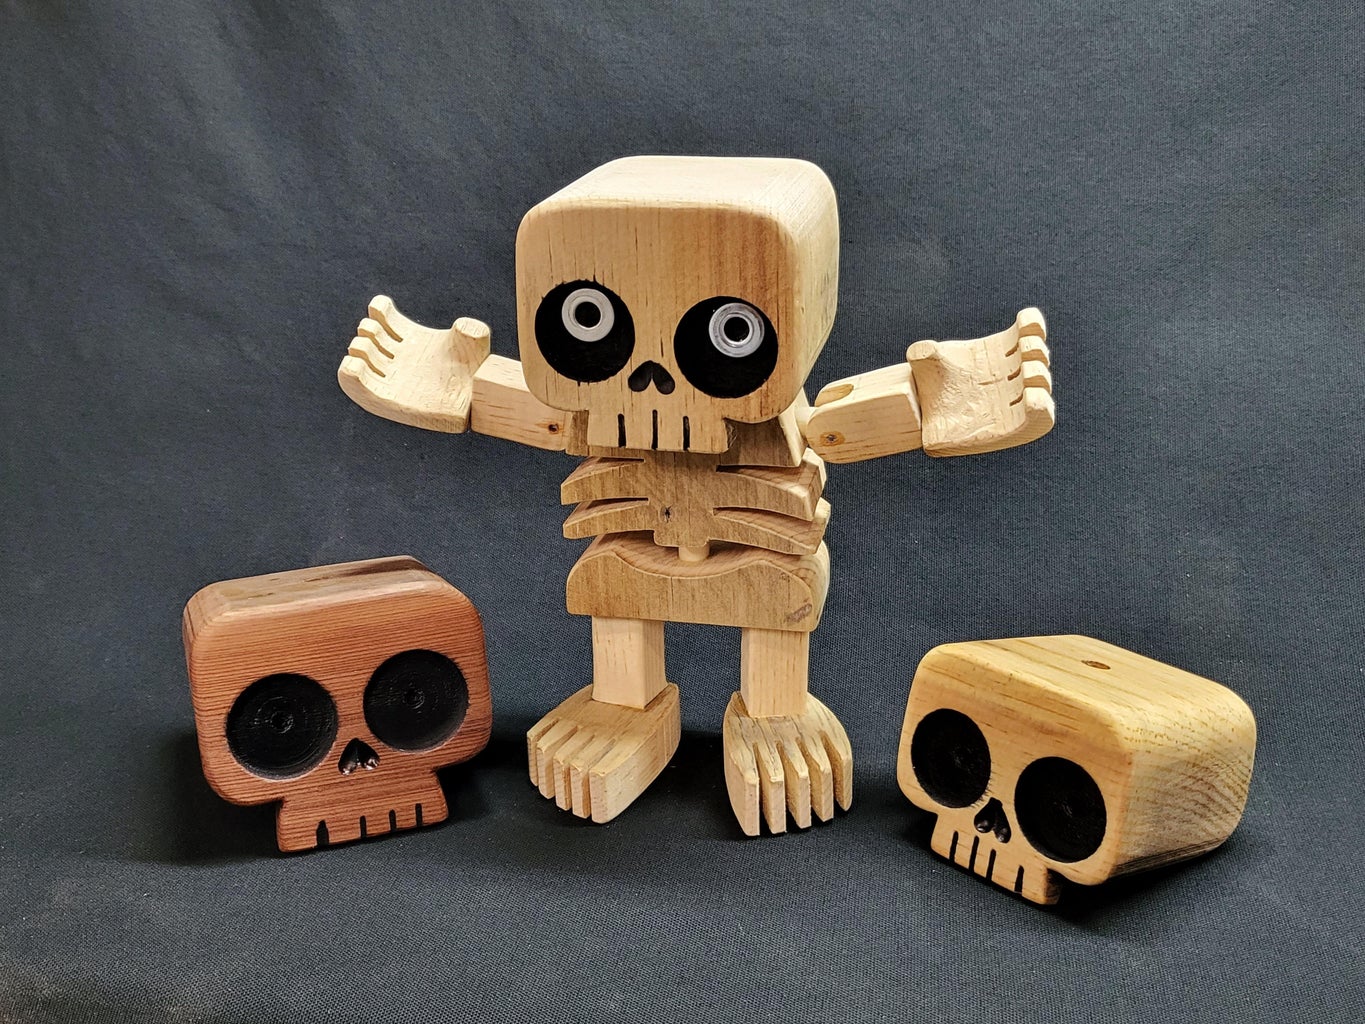
Step 13: Stand-up Posable Version
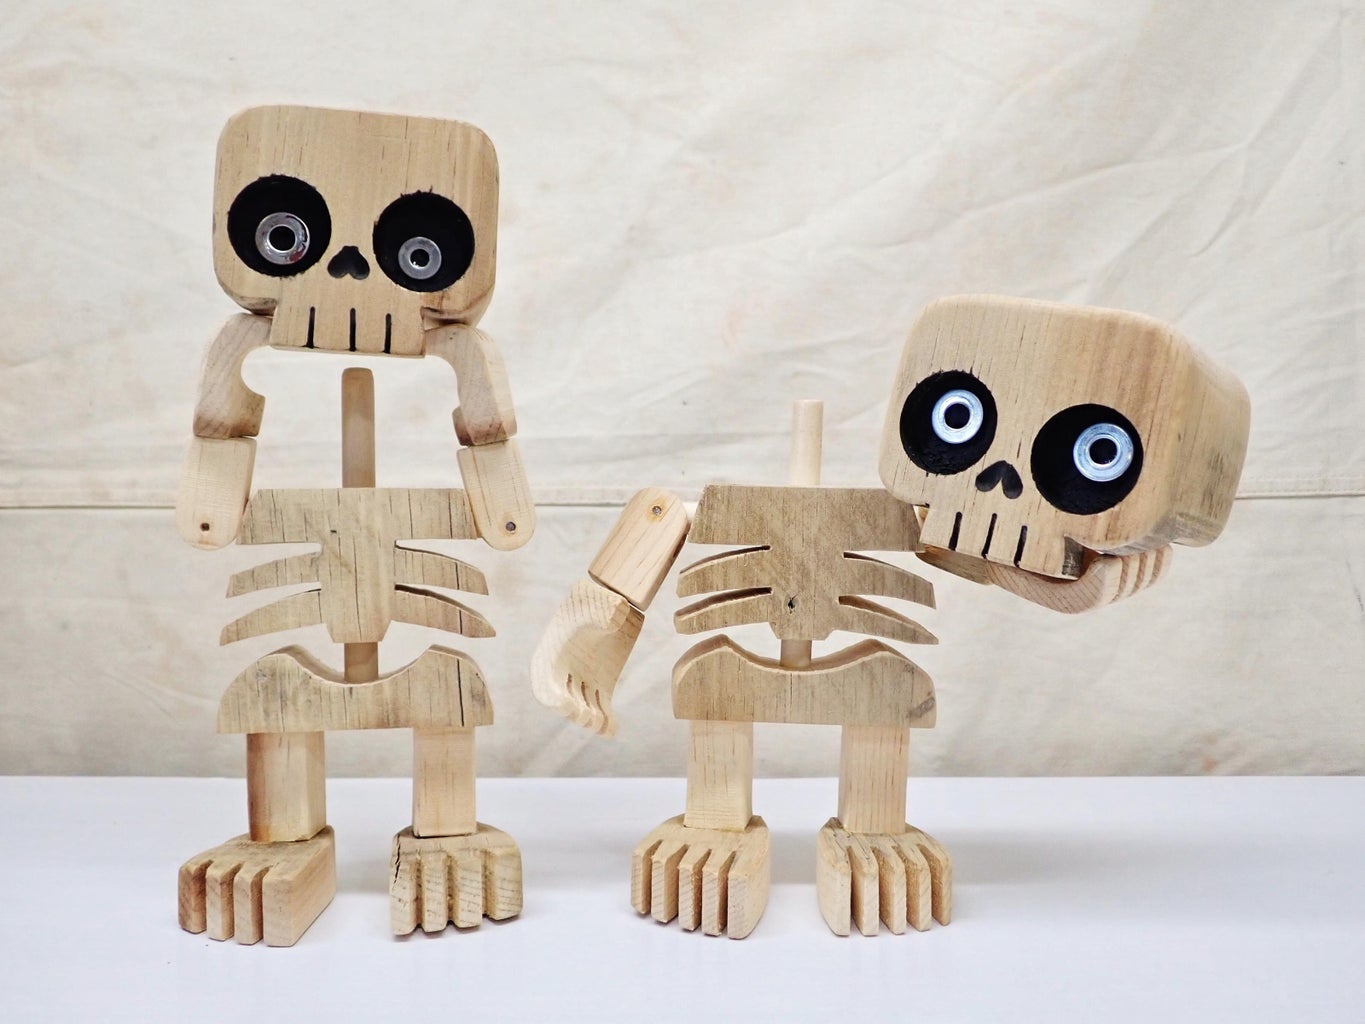
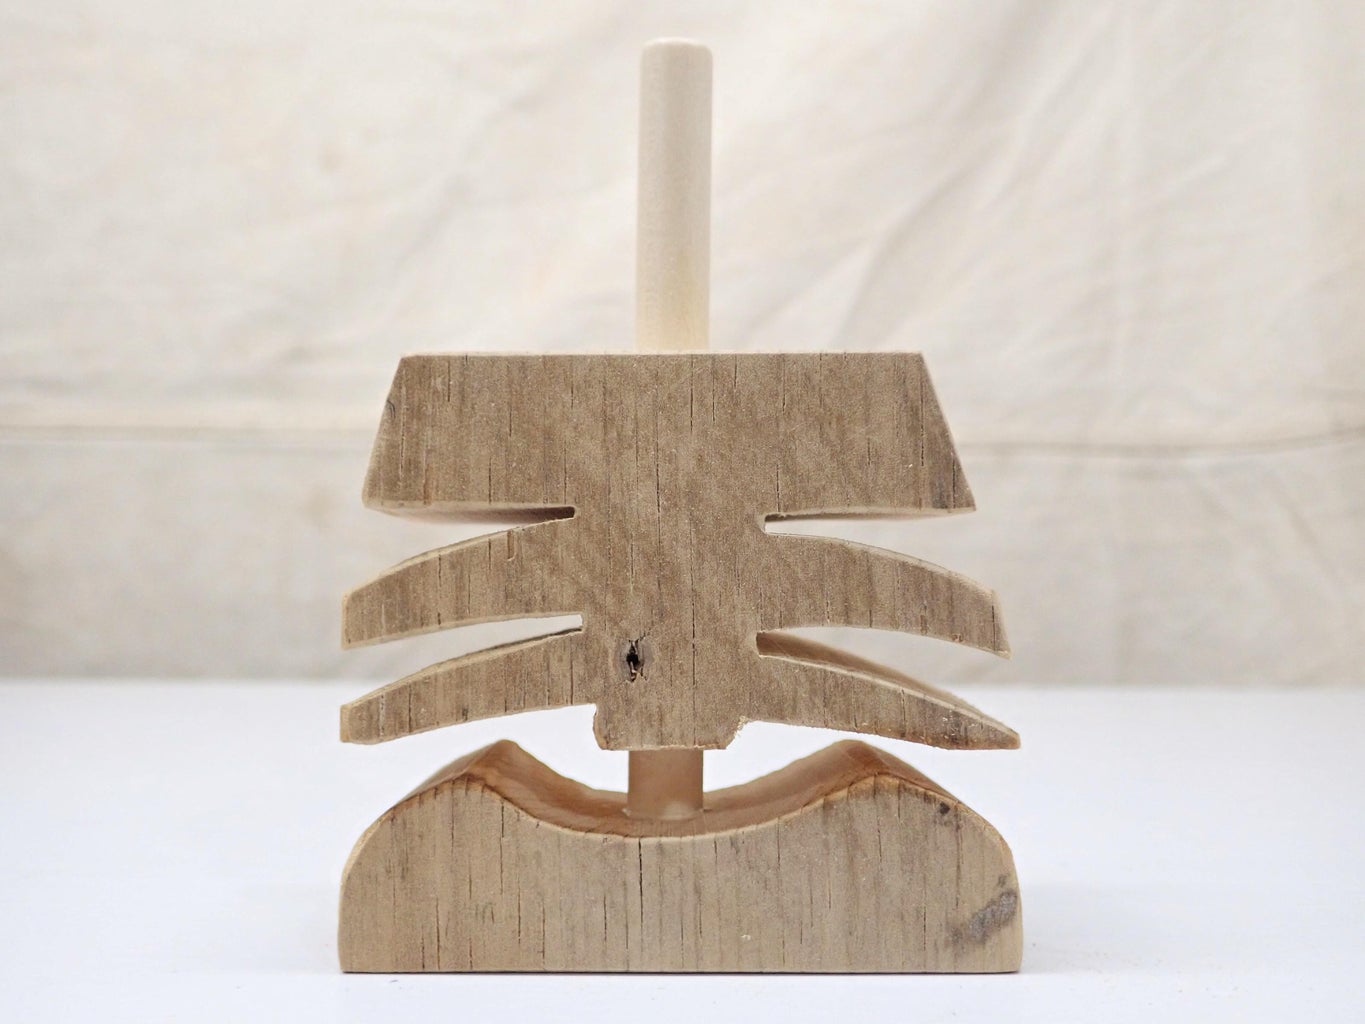
I also made made a pair of stand-up posable skeletons, which I really like! The arms and legs are made as outlined in my previous instructable, with ribs and hips made as shown in this one.
Instead of being tied together with cording these have a 3/8" dowel glued in place through the ribs and hip sections.
I like these because they can do silly things like hold their own heads and can be posed in all sorts of ways.
Step 14: Make Some!
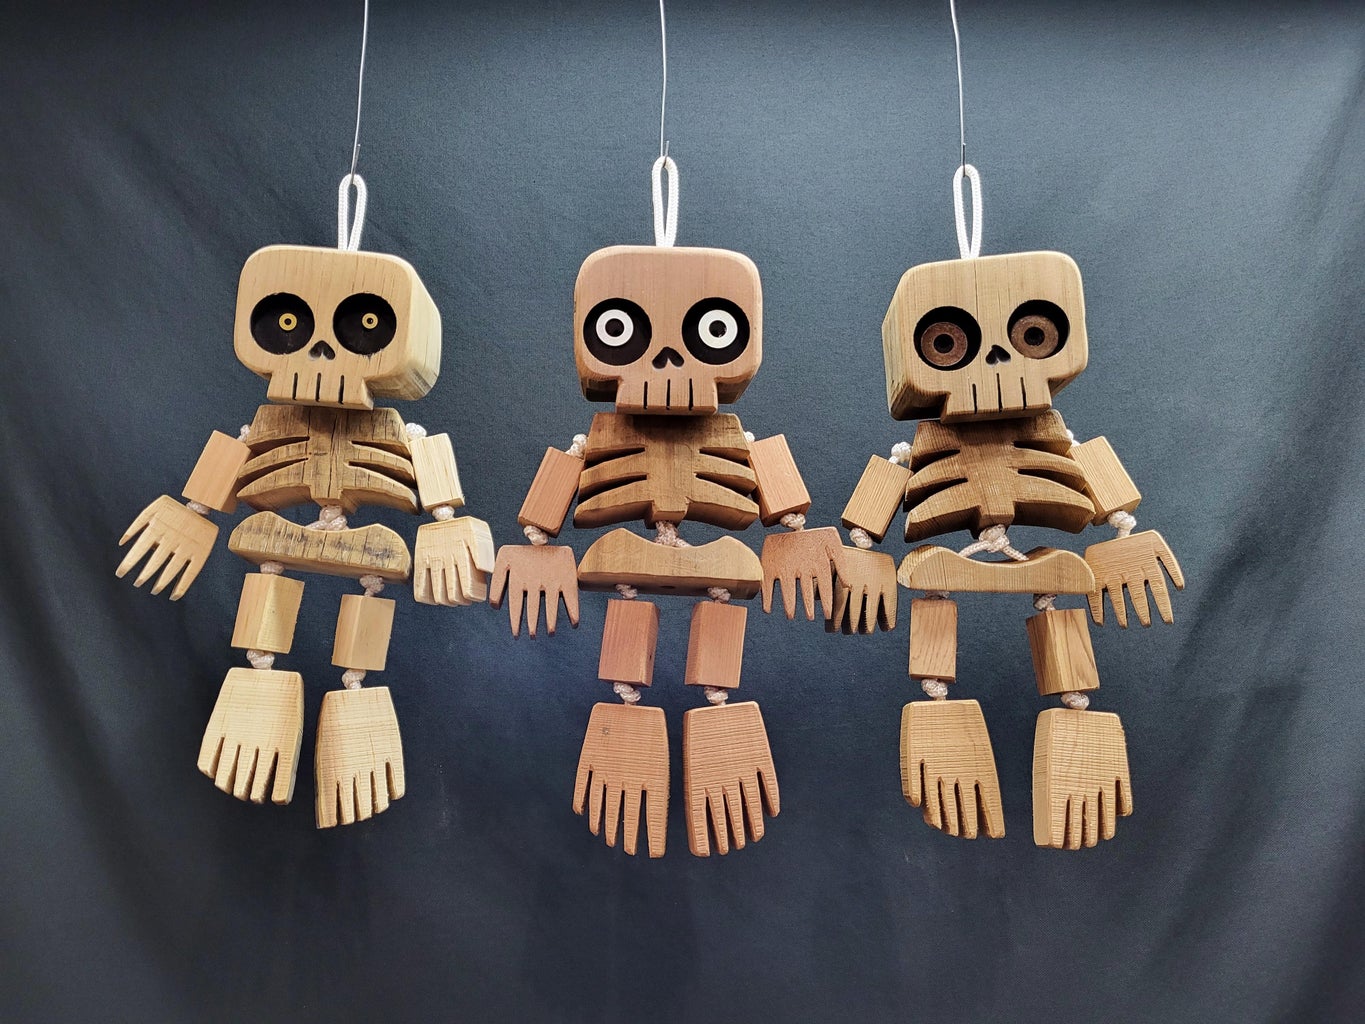
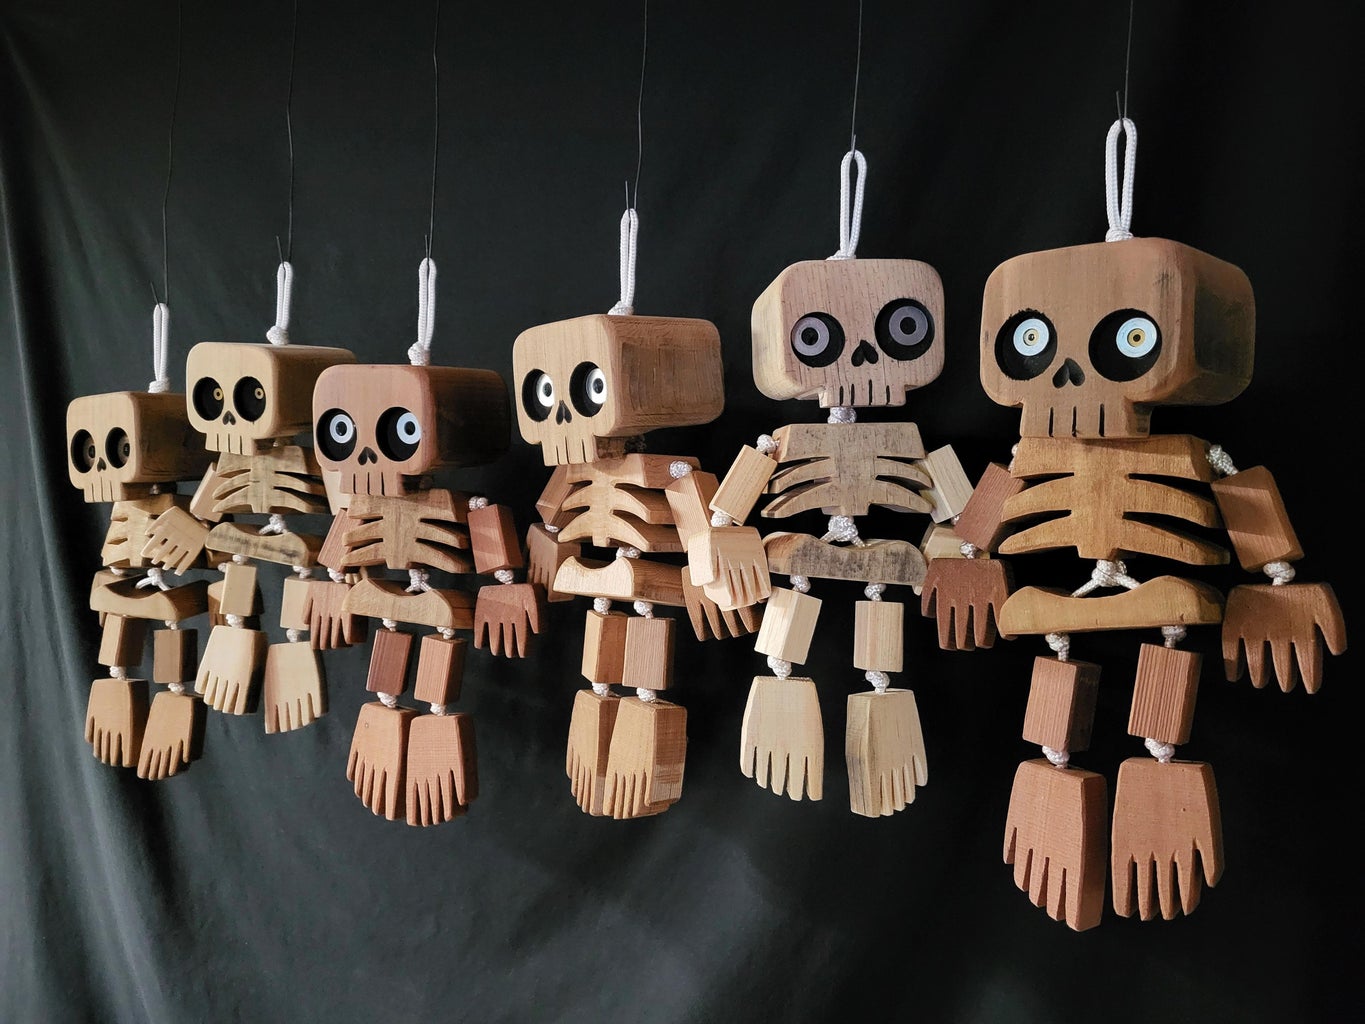
I love these little guys and have them hanging around my home. I prefer creepy-cute for Halloween decor as opposed to dark-and-gory, so these fit the bill nicely. Let me know what you think.
And if you make some, please share photos in the comments!

First Prize in the
Halloween Contest


24 Comments
6 weeks ago
Thank you so much for posting these 'Bad Boys', just what I needed to get me out of my post Covid brain fog. A good instruction lay out and open to development ! I rounded off the arms and legs to reduce the blocky look and stuck some beads in for eyes. I'm going to move onto the free standing ones now.
Thank You once again
Reply 4 weeks ago
These look excellent - I'm thrilled that you made some and shared your results. Thanks for sharing your photo!
7 weeks ago
These are just AMAZING! Great design. Great instructions. Wish you had a little shop nearby where I could just BUY one of these cute little skeletons. Perhaps I shall learn to carve wood..... KUDOS!!!!
7 weeks ago
These little dudes are awesome! With some sharpies, you could put some Dia de Los Muertos designs on them, or better yet, make a larger loop on the skull and use as a Nightmare Before Christmas ornament. I will be making one!
7 weeks ago
These are really nice and creative.
2 months ago
Very nice design.
2 months ago
So cute. I really need a band saw...
2 months ago
Fantastic tutorial. I had seen your block figurine tutorial recently and saved it for later but when I saw your skeleton variation I had to give it a go (for Halloween decor of course). Worked great in the scrap of wood I found, tempted to buy something bigger to make a few more.
Reply 2 months ago
Nice work, this was great to see! I'm so happy you were able to make one, and if you make more, please be sure to share. Thank you!
2 months ago
LOVE THESE!! Can't wait to make some. And out of scraps of 4"x4"!!! Awesome Instructable.
Reply 2 months ago
Thank you so much for the compliment!
2 months ago on Introduction
Very nicely done! Thanks for the inspiration. I will be using this technique to make other animal and character figures.
Reply 2 months ago
Excellent! Glad you enjoyed this and found it useful!
2 months ago
I’ve got to say this is the best Instructable I’ve seen in a long time. Thank you for taking the time to share with everyone ….
THIS IS AMAZING
~:}
Reply 2 months ago
What a huge compliment, thank you so much!
2 months ago on Step 14
Lindos! Parabéns pela criatividade!
2 months ago on Step 14
Wow! These are really cool. Although it's too late for me to start this year, I hope to make some of these for next year! Thanks for posting such a fun project.
2 months ago
Love the style of these little buddies! Adorable :)
Reply 2 months ago
Thank you!
2 months ago
These are great!